Epson PowerLite Pro G5750WU User's Guide - Page 63
Displaying and Adjusting the Image, be output.
 |
View all Epson PowerLite Pro G5750WU manuals
Add to My Manuals
Save this manual to your list of manuals |
Page 63 highlights
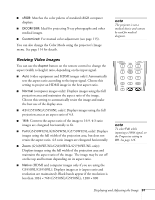
Depending on the video signals that are input, the images on the left and right may not appear at the same size even if you choose Equal as the sizing option. 6. To end the split screen, do one of the following: ■ Press the Esc button on the remote control or the projector's control panel. ■ Press the Split button on the remote control. ■ Select Exit Split Screen from the Split Screen Setup window and press Enter. You cannot do the following while the split screen is active: ■ Use the projector's on-screen menus ■ Use the E-Zoom feature ■ Change the aspect ratio of either image ■ Use the User button on the remote control ■ Use the Help button (unless an error or warning is occurring) Additionally, while you are using the split screen: ■ The audio from the source on the left side of the screen will be output. ■ The Color Mode, Abs. Color Temp, and Color Adjustment settings for the image on the left are applied to the image on the right (all of the remaining settings in the projector's Image menu are set to default for the image on the right side). ■ You cannot use the Thin Line Enhancement or Thick Line Enhancement settings or the Progressive, Noise Reduction, or 2-2 Pull-down features. ■ The Overscan setting is set to its default value, if applicable. ■ The screen will be blue for any side which is not receiving a signal, and the screen will turn black when the A/V Mute button is pressed. Displaying and Adjusting the Image 63
-
 1
1 -
2
-
3
-
4
-
5
-
6
-
7
-
8
-
9
-
10
-
11
-
12
-
13
-
14
-
15
-
16
-
17
-
18
-
19
-
20
-
21
-
22
-
23
-
24
-
25
-
26
-
27
-
28
-
29
-
30
-
31
-
32
-
33
-
34
-
35
-
36
-
37
-
38
-
39
-
40
-
41
-
42
-
43
-
44
-
45
-
46
-
47
-
48
-
49
-
50
-
51
-
52
-
53
-
54
-
55
-
56
-
57
-
 58
58 -
 59
59 -
 60
60 -
 61
61 -
 62
62 -
 63
63 -
 64
64 -
 65
65 -
 66
66 -
 67
67 -
 68
68 -
69
-
70
-
71
-
72
-
73
-
74
-
75
-
76
-
77
-
78
-
79
-
80
-
81
-
82
-
83
-
84
-
85
-
86
-
87
-
88
-
89
-
90
-
91
-
92
-
93
-
94
-
95
-
96
-
97
-
98
-
99
-
100
-
101
-
102
-
103
-
104
-
105
-
106
-
107
-
108
-
109
-
110
-
111
-
112
-
113
-
114
-
115
-
116
-
117
-
118
-
119
-
120
-
121
-
122
-
123
-
124
-
125
-
126
-
127
-
128
-
129
-
130
-
131
-
132
-
133
-
134
-
135
-
136
-
137
-
138
-
139
-
140
-
141
-
142
-
143
-
144
-
145
-
146
-
147
-
148
-
149
-
150
-
151
-
152
-
153
-
154
-
155
-
156
-
157
-
158
-
159
-
160
-
161
-
162
-
163
-
164
-
165
-
166
-
167
-
168
-
169
-
170
-
171
-
172
-
173
-
174
-
175
-
176
-
177
-
178
-
179
-
180
-
181
-
182
-
183
-
184
-
185
-
186
-
187
-
188
-
189
-
190
-
191
-
192
-
193
-
194
-
195
-
196
-
197
-
198
-
199
-
200
-
201
-
202
-
203
-
204
-
205
-
206
-
207
-
208
-
209
-
210
-
211
-
212
-
213
-
214
-
215
-
216
-
217
 |
 |
