HP J5780 User Guide - Microsoft Windows - Page 111
Check the estimated ink levels, HP Solution Center - printer ink
 |
UPC - 882780940253
View all HP J5780 manuals
Add to My Manuals
Save this manual to your list of manuals |
Page 111 highlights
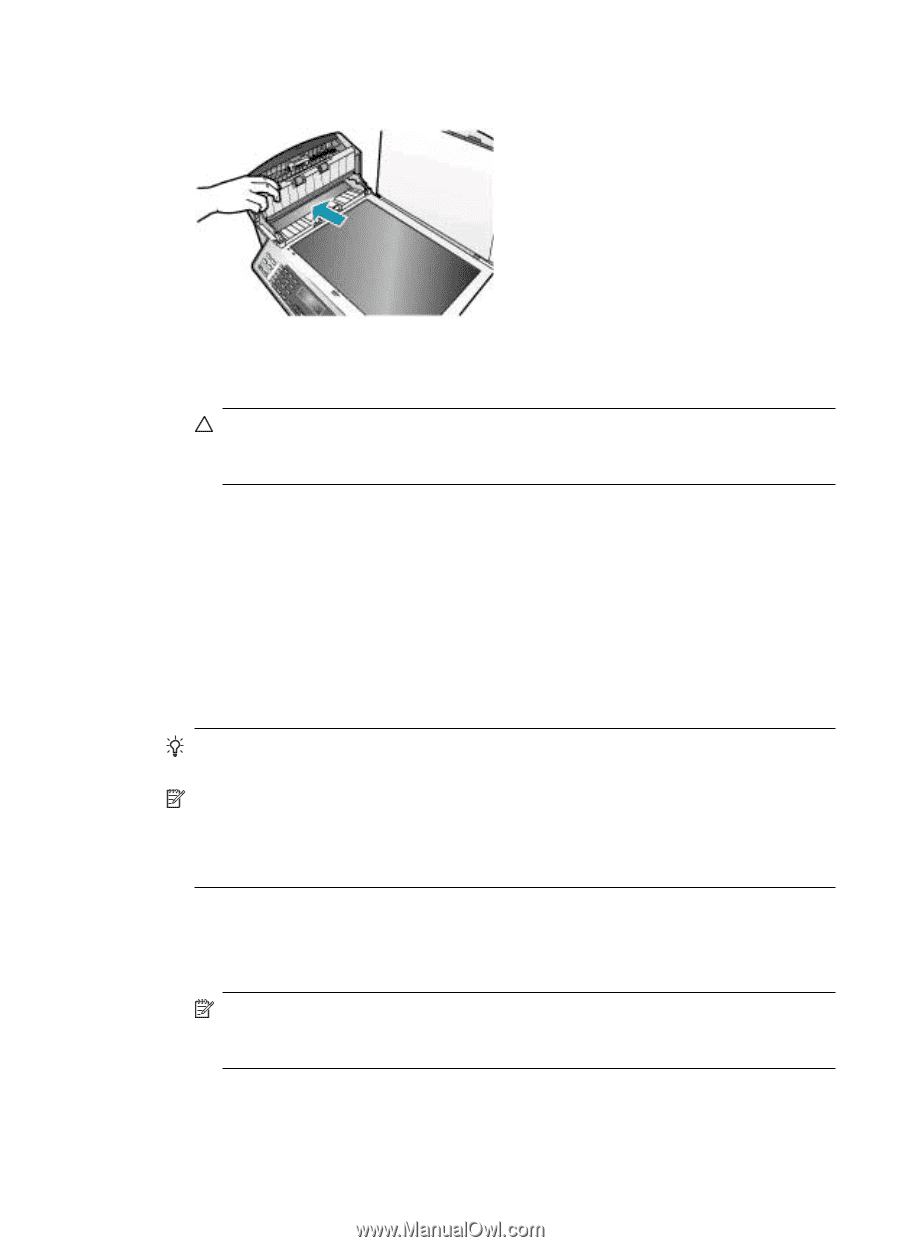
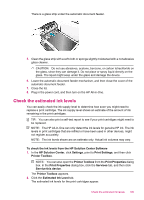
There is a glass strip under the automatic document feeder. 5. Clean the glass strip with a soft cloth or sponge slightly moistened with a nonabrasive glass cleaner. CAUTION: Do not use abrasives, acetone, benzene, or carbon tetrachloride on the glass, since they can damage it. Do not place or spray liquid directly on the glass. The liquid might seep under the glass and damage the device. 6. Lower the automatic document feeder mechanism, and then close the cover of the automatic document feeder. 7. Close the lid. 8. Plug in the power cord, and then turn on the HP All-in-One. Check the estimated ink levels You can easily check the ink supply level to determine how soon you might need to replace a print cartridge. The ink supply level shows an estimate of the amount of ink remaining in the print cartridges. TIP: You can also print a self-test report to see if your print cartridges might need to be replaced. NOTE: The HP All-in-One can only detect the ink levels for genuine HP ink. The ink levels in print cartridges that are refilled or have been used in other devices, might not register accurately. NOTE: The ink levels shown are an estimate only. Actual ink volumes may vary. To check the ink levels from the HP Solution Center Software 1. In the HP Solution Center, click Settings, point to Print Settings, and then click Printer Toolbox. NOTE: You can also open the Printer Toolbox from the Print Properties dialog box. In the Print Properties dialog box, click the Services tab, and then click Service this device. The Printer Toolbox appears. 2. Click the Estimated Ink Level tab. The estimated ink levels for the print cartridges appear. Check the estimated ink levels 109
-
 1
1 -
2
-
3
-
4
-
5
-
6
-
7
-
8
-
9
-
10
-
11
-
12
-
13
-
14
-
15
-
16
-
17
-
18
-
19
-
20
-
21
-
22
-
23
-
24
-
25
-
26
-
27
-
28
-
29
-
30
-
31
-
32
-
33
-
34
-
35
-
36
-
37
-
38
-
39
-
40
-
41
-
42
-
43
-
44
-
45
-
46
-
47
-
48
-
49
-
50
-
51
-
52
-
53
-
54
-
55
-
56
-
57
-
58
-
59
-
60
-
61
-
62
-
63
-
64
-
65
-
66
-
67
-
68
-
69
-
70
-
71
-
72
-
73
-
74
-
75
-
76
-
77
-
78
-
79
-
80
-
81
-
82
-
83
-
84
-
85
-
86
-
87
-
88
-
89
-
90
-
91
-
92
-
93
-
94
-
95
-
96
-
97
-
98
-
99
-
100
-
101
-
102
-
103
-
104
-
105
-
 106
106 -
 107
107 -
 108
108 -
 109
109 -
 110
110 -
 111
111 -
 112
112 -
 113
113 -
 114
114 -
 115
115 -
 116
116 -
117
-
118
-
119
-
120
-
121
-
122
-
123
-
124
-
125
-
126
-
127
-
128
-
129
-
130
-
131
-
132
-
133
-
134
-
135
-
136
-
137
-
138
-
139
-
140
-
141
-
142
-
143
-
144
-
145
-
146
-
147
-
148
-
149
-
150
-
151
-
152
-
153
-
154
-
155
-
156
-
157
-
158
-
159
-
160
-
161
-
162
-
163
-
164
-
165
-
166
-
167
-
168
-
169
-
170
-
171
-
172
-
173
-
174
-
175
-
176
-
177
-
178
-
179
-
180
-
181
-
182
-
183
-
184
-
185
-
186
-
187
-
188
-
189
-
190
-
191
-
192
-
193
-
194
-
195
-
196
-
197
-
198
-
199
-
200
-
201
-
202
-
203
-
204
-
205
-
206
-
207
-
208
-
209
-
210
-
211
-
212
-
213
-
214
-
215
-
216
-
217
-
218
-
219
-
220
-
221
-
222
-
223
-
224
-
225
-
226
-
227
-
228
-
229
-
230
-
231
-
232
-
233
-
234
-
235
-
236
-
237
-
238
-
239
-
240
-
241
-
242
-
243
-
244
-
245
-
246
-
247
-
248
-
249
-
250
-
251
-
252
-
253
-
254
-
255
-
256
-
257
-
258
-
259
-
260
-
261
-
262
-
263
-
264
-
265
-
266
-
267
-
268
-
269
-
270
-
271
-
272
-
273
-
274
-
275
-
276
-
277
-
278
-
279
-
280
-
281
-
282
-
283
-
284
-
285
-
286
 |
 |