HP J5780 User Guide - Microsoft Windows - Page 73
Print from your computer, Print from a software application, Print, Properties, Options, Printer Setup - printer out of paper
 |
UPC - 882780940253
View all HP J5780 manuals
Add to My Manuals
Save this manual to your list of manuals |
Page 73 highlights
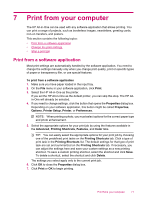
7 Print from your computer The HP All-in-One can be used with any software application that allows printing. You can print a range of projects, such as borderless images, newsletters, greeting cards, iron-on transfers, and posters. This section contains the following topics: • Print from a software application • Change the print settings • Stop a print job Print from a software application Most print settings are automatically handled by the software application. You need to change the settings manually only when you change print quality, print on specific types of paper or transparency film, or use special features. To print from a software application 1. Make sure you have paper loaded in the input tray. 2. On the File menu in your software application, click Print. 3. Select the HP All-in-One as the printer. If you set the HP All-in-One as the default printer, you can skip this step. The HP Allin-One will already be selected. 4. If you need to change settings, click the button that opens the Properties dialog box. Depending on your software application, this button might be called Properties, Options, Printer Setup, Printer, or Preferences. NOTE: When printing a photo, you must select options for the correct paper type and photo enhancement. 5. Select the appropriate options for your print job by using the features available in the Advanced, Printing Shortcuts, Features, and Color tabs. TIP: You can easily select the appropriate options for your print job by choosing one of the predefined print tasks on the Printing Shortcuts tab. Click a type of print task in the Printing Shortcuts list. The default settings for that type of print task are set and summarized on the Printing Shortcuts tab. If necessary, you can adjust the settings here and save your custom settings as a new printing shortcut. To save a custom printing shortcut, select the shortcut and click Save. To delete a shortcut, select the shortcut and click Delete. The settings you select apply only to the current print job. 6. Click OK to close the Properties dialog box. 7. Click Print or OK to begin printing. Print from your computer 71
-
 1
1 -
2
-
3
-
4
-
5
-
6
-
7
-
8
-
9
-
10
-
11
-
12
-
13
-
14
-
15
-
16
-
17
-
18
-
19
-
20
-
21
-
22
-
23
-
24
-
25
-
26
-
27
-
28
-
29
-
30
-
31
-
32
-
33
-
34
-
35
-
36
-
37
-
38
-
39
-
40
-
41
-
42
-
43
-
44
-
45
-
46
-
47
-
48
-
49
-
50
-
51
-
52
-
53
-
54
-
55
-
56
-
57
-
58
-
59
-
60
-
61
-
62
-
63
-
64
-
65
-
66
-
67
-
 68
68 -
 69
69 -
 70
70 -
 71
71 -
 72
72 -
 73
73 -
 74
74 -
 75
75 -
 76
76 -
 77
77 -
 78
78 -
79
-
80
-
81
-
82
-
83
-
84
-
85
-
86
-
87
-
88
-
89
-
90
-
91
-
92
-
93
-
94
-
95
-
96
-
97
-
98
-
99
-
100
-
101
-
102
-
103
-
104
-
105
-
106
-
107
-
108
-
109
-
110
-
111
-
112
-
113
-
114
-
115
-
116
-
117
-
118
-
119
-
120
-
121
-
122
-
123
-
124
-
125
-
126
-
127
-
128
-
129
-
130
-
131
-
132
-
133
-
134
-
135
-
136
-
137
-
138
-
139
-
140
-
141
-
142
-
143
-
144
-
145
-
146
-
147
-
148
-
149
-
150
-
151
-
152
-
153
-
154
-
155
-
156
-
157
-
158
-
159
-
160
-
161
-
162
-
163
-
164
-
165
-
166
-
167
-
168
-
169
-
170
-
171
-
172
-
173
-
174
-
175
-
176
-
177
-
178
-
179
-
180
-
181
-
182
-
183
-
184
-
185
-
186
-
187
-
188
-
189
-
190
-
191
-
192
-
193
-
194
-
195
-
196
-
197
-
198
-
199
-
200
-
201
-
202
-
203
-
204
-
205
-
206
-
207
-
208
-
209
-
210
-
211
-
212
-
213
-
214
-
215
-
216
-
217
-
218
-
219
-
220
-
221
-
222
-
223
-
224
-
225
-
226
-
227
-
228
-
229
-
230
-
231
-
232
-
233
-
234
-
235
-
236
-
237
-
238
-
239
-
240
-
241
-
242
-
243
-
244
-
245
-
246
-
247
-
248
-
249
-
250
-
251
-
252
-
253
-
254
-
255
-
256
-
257
-
258
-
259
-
260
-
261
-
262
-
263
-
264
-
265
-
266
-
267
-
268
-
269
-
270
-
271
-
272
-
273
-
274
-
275
-
276
-
277
-
278
-
279
-
280
-
281
-
282
-
283
-
284
-
285
-
286
 |
 |