Lexmark X560n User's Guide - Page 28
Setting the country code, Fax Settings, Your Fax Number, Company Name, Select Function, Admin Menu
 |
View all Lexmark X560n manuals
Add to My Manuals
Save this manual to your list of manuals |
Page 28 highlights
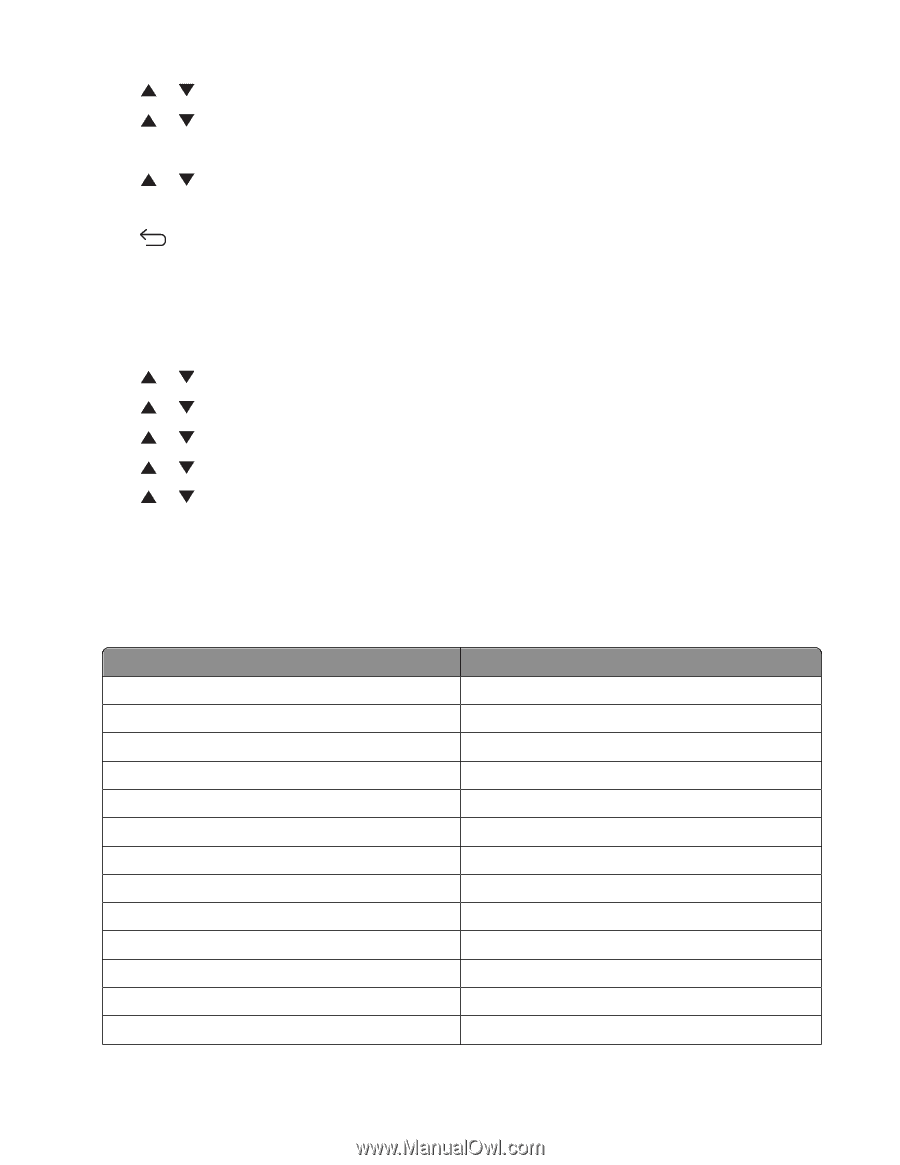
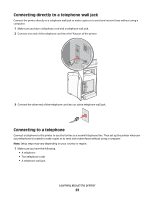
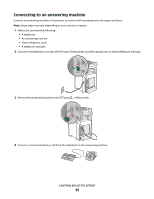
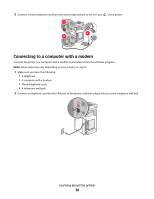
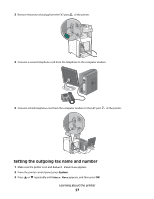
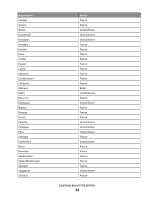
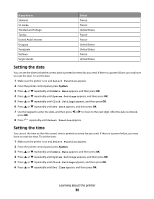
4 Press or repeatedly until Fax Settings appears, and then press OK. 5 Press or repeatedly until Your Fax Number appears, and then press OK. 6 Use the keypad to enter the fax number, and then press OK. 7 Press or repeatedly until Company Name appears, and then press OK. 8 Use the keypad to type the user name, and then press OK. 9 Press repeatedly until Select Function appears. Setting the country code 1 Make sure the printer is on and Select Function appears. 2 From the printer control panel, press System. 3 Press or repeatedly until Admin Menu appears, and then press OK. 4 Press or repeatedly until Fax Settings appears, and then press OK. 5 Press or repeatedly until Country appears, and then press OK. 6 Press or repeatedly to select the country or region, and then press OK. 7 Press or repeatedly until Yes appears, and then press OK. The printer automatically restarts, and then Select Function appears. Notes: • After the country code is changed, the Fax and Address Book settings are cleared. • If your country or region is not listed in the Country menu, use the following table to determine which country or region to select: If you live in Algeria Austria Barbados Belarus Bulgaria Columbia Costa Rica Croatia Cyprus Ecuador Egypt El Salvador Estonia Select France France United States United States France United States United States France France United States France United States France Learning about the printer 28
-
 1
1 -
2
-
3
-
4
-
5
-
6
-
7
-
8
-
9
-
10
-
11
-
12
-
13
-
14
-
15
-
16
-
17
-
18
-
19
-
20
-
21
-
22
-
 23
23 -
 24
24 -
 25
25 -
 26
26 -
 27
27 -
 28
28 -
 29
29 -
 30
30 -
 31
31 -
 32
32 -
 33
33 -
34
-
35
-
36
-
37
-
38
-
39
-
40
-
41
-
42
-
43
-
44
-
45
-
46
-
47
-
48
-
49
-
50
-
51
-
52
-
53
-
54
-
55
-
56
-
57
-
58
-
59
-
60
-
61
-
62
-
63
-
64
-
65
-
66
-
67
-
68
-
69
-
70
-
71
-
72
-
73
-
74
-
75
-
76
-
77
-
78
-
79
-
80
-
81
-
82
-
83
-
84
-
85
-
86
-
87
-
88
-
89
-
90
-
91
-
92
-
93
-
94
-
95
-
96
-
97
-
98
-
99
-
100
-
101
-
102
-
103
-
104
-
105
-
106
-
107
-
108
-
109
-
110
-
111
-
112
-
113
-
114
-
115
-
116
-
117
-
118
-
119
-
120
-
121
-
122
-
123
-
124
-
125
-
126
-
127
-
128
-
129
-
130
-
131
-
132
-
133
-
134
-
135
-
136
-
137
-
138
-
139
-
140
-
141
-
142
-
143
-
144
-
145
-
146
-
147
-
148
-
149
-
150
-
151
-
152
-
153
-
154
-
155
-
156
-
157
-
158
-
159
-
160
-
161
-
162
-
163
-
164
-
165
-
166
-
167
-
168
-
169
-
170
-
171
-
172
-
173
-
174
-
175
-
176
-
177
-
178
-
179
-
180
-
181
-
182
-
183
-
184
-
185
-
186
-
187
-
188
-
189
-
190
-
191
-
192
-
193
-
194
-
195
-
196
-
197
-
198
-
199
-
200
-
201
-
202
-
203
-
204
-
205
-
206
-
207
-
208
-
209
-
210
 |
 |