Lexmark X560n User's Guide - Page 71
Scanning documents directly to other applications, Scanning text for editing
 |
View all Lexmark X560n manuals
Add to My Manuals
Save this manual to your list of manuals |
Page 71 highlights
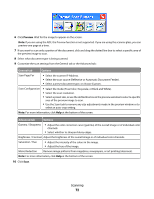
Scanning documents directly to other applications You can scan documents directly to applications that are TWAIN and WIA compliant. For more information, see the application help. Scanning text for editing Use the Optical Character Recognition (OCR) software feature to turn scanned images into text you can edit with a word-processing application. 1 Make sure: • The printer is connected to a computer, and both the printer and the computer are on. • ABBYY Fine Reader is installed. 2 Load an original document faceup into the ADF or facedown on the scanner glass. Note: Do not load postcards, photos, small items, transparencies, photo paper, or thin media (such as magazine clippings) into the ADF. Place these items on the scanner glass. 3 If you are loading a document into the ADF, adjust the paper guides. 4 Click Start Œ Programs or All Programs Œ ABBYY FineReader 6.0 Sprint Œ ABBYY FineReader 6.0 Sprint. 5 From the toolbar, click Scan&Read. 6 When the scan settings dialog appears, click Preview. Note: If you are using the ADF, the Preview function is not supported. If you are using the scanner glass, you can preview one page at a time. 7 For best results, select Editing Text (OCR), and then click Scan. 8 Once the image loads, click Save. 9 Select a destination you want to save to, and then click OK. 10 Edit and save the document. Customizing scan settings using the computer 1 Make sure the printer is connected to a computer, and both the printer and the computer are on. 2 Load an original document faceup into the ADF or facedown on the scanner glass. Note: Do not load postcards, photos, small items, transparencies, photo paper, or thin media (such as magazine clippings) into the ADF. Place these items on the scanner glass. 3 If you are loading a document into the ADF, adjust the paper guides. 4 Click Start Œ Programs or All Programs Œ Lexmark Applications Œ Presto! PageManager. 5 From the Presto! Scan Buttons toolbar, click the application to scan to. Note: If the Scan Buttons dialog does not appear, press F9. Scanning 71
-
 1
1 -
2
-
3
-
4
-
5
-
6
-
7
-
8
-
9
-
10
-
11
-
12
-
13
-
14
-
15
-
16
-
17
-
18
-
19
-
20
-
21
-
22
-
23
-
24
-
25
-
26
-
27
-
28
-
29
-
30
-
31
-
32
-
33
-
34
-
35
-
36
-
37
-
38
-
39
-
40
-
41
-
42
-
43
-
44
-
45
-
46
-
47
-
48
-
49
-
50
-
51
-
52
-
53
-
54
-
55
-
56
-
57
-
58
-
59
-
60
-
61
-
62
-
63
-
64
-
65
-
 66
66 -
 67
67 -
 68
68 -
 69
69 -
 70
70 -
 71
71 -
 72
72 -
 73
73 -
 74
74 -
 75
75 -
 76
76 -
77
-
78
-
79
-
80
-
81
-
82
-
83
-
84
-
85
-
86
-
87
-
88
-
89
-
90
-
91
-
92
-
93
-
94
-
95
-
96
-
97
-
98
-
99
-
100
-
101
-
102
-
103
-
104
-
105
-
106
-
107
-
108
-
109
-
110
-
111
-
112
-
113
-
114
-
115
-
116
-
117
-
118
-
119
-
120
-
121
-
122
-
123
-
124
-
125
-
126
-
127
-
128
-
129
-
130
-
131
-
132
-
133
-
134
-
135
-
136
-
137
-
138
-
139
-
140
-
141
-
142
-
143
-
144
-
145
-
146
-
147
-
148
-
149
-
150
-
151
-
152
-
153
-
154
-
155
-
156
-
157
-
158
-
159
-
160
-
161
-
162
-
163
-
164
-
165
-
166
-
167
-
168
-
169
-
170
-
171
-
172
-
173
-
174
-
175
-
176
-
177
-
178
-
179
-
180
-
181
-
182
-
183
-
184
-
185
-
186
-
187
-
188
-
189
-
190
-
191
-
192
-
193
-
194
-
195
-
196
-
197
-
198
-
199
-
200
-
201
-
202
-
203
-
204
-
205
-
206
-
207
-
208
-
209
-
210
 |
 |