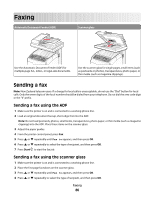
Lexmark X560n User's Guide - Page 82
Adjusting the color saturation of a scanned image, Adjusting the scan resolution
 |
View all Lexmark X560n manuals
Add to My Manuals
Save this manual to your list of manuals |
Page 82 highlights
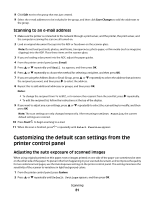
3 Press 4 Press 5 Press 6 Press or repeatedly until Scan Defaults appears, and then press OK. or repeatedly until Auto Expo. Level appears, and then press OK. or repeatedly until Normal, Higher(1), or Higher(2) appears, and then press OK. repeatedly until Select Function appears. Adjusting the color saturation of a scanned image 1 From the printer control panel, press System. 2 Press or repeatedly until Default Settings appears, and then press OK. 3 Press or repeatedly until Scan Defaults appears, and then press OK. 4 Press or repeatedly until Contrast appears, and then press OK. 5 Press or repeatedly to select the contrast level you want, and then press OK. 6 Press repeatedly until Select Function appears. Adjusting the image compression of a scanned image Sets the image compression for scanning. A low compression will result in a higher quality image, but the file size will be larger. To adjust the image compression: 1 From the printer control panel, press System. 2 Press or repeatedly until Default Settings appears, and then press OK. 3 Press or repeatedly until Scan Defaults appears, and then press OK. 4 Press or repeatedly until Image Compression appears, and then press OK. 5 Press or repeatedly to select the image compression you want, and then press OK. 6 Press repeatedly until Select Function appears. Adjusting the scan resolution 1 From the printer control panel, press System. 2 Press or repeatedly until Default Settings appears, and then press OK. 3 Press or repeatedly until Scan Defaults appears, and then press OK. 4 Press or repeatedly until Resolution appears, and then press OK. 5 Press or repeatedly to select the resolution you want, and then press OK. 6 Press repeatedly until Select Function appears. Adjusting the sharpness of a scanned image To adjust the sharpness of a scanned image: 1 From the printer control panel, press System. 2 Press or repeatedly until Default Settings appears, and then press OK. Scanning 82
-
 1
1 -
2
-
3
-
4
-
5
-
6
-
7
-
8
-
9
-
10
-
11
-
12
-
13
-
14
-
15
-
16
-
17
-
18
-
19
-
20
-
21
-
22
-
23
-
24
-
25
-
26
-
27
-
28
-
29
-
30
-
31
-
32
-
33
-
34
-
35
-
36
-
37
-
38
-
39
-
40
-
41
-
42
-
43
-
44
-
45
-
46
-
47
-
48
-
49
-
50
-
51
-
52
-
53
-
54
-
55
-
56
-
57
-
58
-
59
-
60
-
61
-
62
-
63
-
64
-
65
-
66
-
67
-
68
-
69
-
70
-
71
-
72
-
73
-
74
-
75
-
76
-
 77
77 -
 78
78 -
 79
79 -
 80
80 -
 81
81 -
 82
82 -
 83
83 -
 84
84 -
 85
85 -
 86
86 -
 87
87 -
88
-
89
-
90
-
91
-
92
-
93
-
94
-
95
-
96
-
97
-
98
-
99
-
100
-
101
-
102
-
103
-
104
-
105
-
106
-
107
-
108
-
109
-
110
-
111
-
112
-
113
-
114
-
115
-
116
-
117
-
118
-
119
-
120
-
121
-
122
-
123
-
124
-
125
-
126
-
127
-
128
-
129
-
130
-
131
-
132
-
133
-
134
-
135
-
136
-
137
-
138
-
139
-
140
-
141
-
142
-
143
-
144
-
145
-
146
-
147
-
148
-
149
-
150
-
151
-
152
-
153
-
154
-
155
-
156
-
157
-
158
-
159
-
160
-
161
-
162
-
163
-
164
-
165
-
166
-
167
-
168
-
169
-
170
-
171
-
172
-
173
-
174
-
175
-
176
-
177
-
178
-
179
-
180
-
181
-
182
-
183
-
184
-
185
-
186
-
187
-
188
-
189
-
190
-
191
-
192
-
193
-
194
-
195
-
196
-
197
-
198
-
199
-
200
-
201
-
202
-
203
-
204
-
205
-
206
-
207
-
208
-
209
-
210
 |
 |
