Panasonic WJSX650 WJSX650 User Guide - Page 61
Recorder Control End, Recorder Selection, Wv-cu360c/cj, Wv-cu950/650
 |
View all Panasonic WJSX650 manuals
Add to My Manuals
Save this manual to your list of manuals |
Page 61 highlights
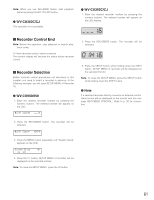
Note: When you use WJ-HD300 Series, start playback before pressing the GO TO LAST button. G WV-CU360C/CJ This operation is not available. G WV-CU360C/CJ 1. Enter the desired recorder number by pressing the numeric buttons. The entered number will appear on the LED display. I Recorder Control End Note: Before this operation, stop playback or search playback surely. To finish recorder control, select a camera. The monitor display will become the status before recorder control. I Recorder Selection Before recorder control procedures not described in this chapter, you need to select a recorder in advance. In the following example, you will open SETUP MENU of Recorder 16. G WV-CU950/650 1. Enter the desired recorder number by pressing the numeric buttons. The entered number will appear on the LCD. 2. Press the RECORDER button. The recorder will be selected. 3. Press the SETUP button while holding down the SHIFT button. SETUP MENU of recorder will be displayed on the selected monitor. Note: To close the SETUP MENU, press the SETUP button while holding down the SHIFT button. G Note If a selected recorder directly connects an external monitor, black screen will be displayed on the monitor with the message "RECORDER CONTROL". Refer to p. 30 for connection. 2. Press the RECORDER button. The recorder will be selected. 3. Press the MENU button repeatedly until "System Setup" appears on the LCD. 4. Press the F1 button. SETUP MENU of recorder will be displayed on the selected monitor. Note: To close the SETUP MENU, press the F2 button. 61
-
 1
1 -
2
-
3
-
4
-
5
-
6
-
7
-
8
-
9
-
10
-
11
-
12
-
13
-
14
-
15
-
16
-
17
-
18
-
19
-
20
-
21
-
22
-
23
-
24
-
25
-
26
-
27
-
28
-
29
-
30
-
31
-
32
-
33
-
34
-
35
-
36
-
37
-
38
-
39
-
40
-
41
-
42
-
43
-
44
-
45
-
46
-
47
-
48
-
49
-
50
-
51
-
52
-
53
-
54
-
55
-
 56
56 -
 57
57 -
 58
58 -
 59
59 -
 60
60 -
 61
61 -
 62
62 -
 63
63 -
 64
64 -
 65
65 -
 66
66 -
67
-
68
-
69
-
70
-
71
-
72
-
73
-
74
-
75
-
76
-
77
-
78
-
79
-
80
-
81
-
82
-
83
-
84
-
85
-
86
-
87
-
88
-
89
-
90
-
91
-
92
-
93
-
94
-
95
-
96
-
97
-
98
 |
 |
