Samsung SCH-R860 User Manual (user Manual) (ver.f9) (English) - Page 50
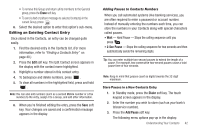
Deleting a Contacts Entry
 |
View all Samsung SCH-R860 manuals
Add to My Manuals
Save this manual to your list of manuals |
Page 50 highlights
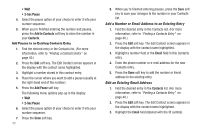
1. In Standby mode, press the Menu soft key and select Contacts. The Contacts screen appears in the display with an alphabetical list of Contacts showing. 2. Press the Down arrow button at the top right corner of the screen. The Groups screen appears in the display. • General • Family • Friends • Colleague • Business 3. Press the Rename soft key. 4. Select the Group (other than No Group) that you want to rename, then press the Rename soft key. 5. The Rename Group text entry screen appears in the display. The current name of the selected Group populates the text field. 6. Enter a new Group name using the keypad. (For more information, refer to "Entering Text" on page 49.) 7. Press the Save soft key to save the changed group name. Deleting a Contacts Entry 1. Find the desired entry in the Contacts list. (For more information, refer to "Finding a Contacts Entry" on page 40.) 47 2. Press the Erase soft key, the Select to erase screen appears in the display. 3. Select the Contact to delete by pressing . 4. Press the Erase soft key. You are prompted to confirm the erasure. 5. To erase this contact, press the Yes button. Sending a Contacts Entry Use the Send Name Card With Bluetooth option to send one or more selected Contacts entries to another, compatible phone or other device over a Bluetooth connection. 1. Find the desired entry in the Contacts list. (For more information, refer to "Finding a Contacts Entry" on page 40.) 2. Press the Send Name Card soft key. The Select to send screen appears in the display. 3. Select Contacts entry you wish to send. A check mark appears in the entry's check box. Repeat this step for all other Contacts entries you wish to send. 4. When you have marked all the entries you wish to send, press the Send soft key. The Choose device screen appears in the display.
-
 1
1 -
2
-
3
-
4
-
5
-
6
-
7
-
8
-
9
-
10
-
11
-
12
-
13
-
14
-
15
-
16
-
17
-
18
-
19
-
20
-
21
-
22
-
23
-
24
-
25
-
26
-
27
-
28
-
29
-
30
-
31
-
32
-
33
-
34
-
35
-
36
-
37
-
38
-
39
-
40
-
41
-
42
-
43
-
44
-
 45
45 -
 46
46 -
 47
47 -
 48
48 -
 49
49 -
 50
50 -
 51
51 -
 52
52 -
 53
53 -
 54
54 -
 55
55 -
56
-
57
-
58
-
59
-
60
-
61
-
62
-
63
-
64
-
65
-
66
-
67
-
68
-
69
-
70
-
71
-
72
-
73
-
74
-
75
-
76
-
77
-
78
-
79
-
80
-
81
-
82
-
83
-
84
-
85
-
86
-
87
-
88
-
89
-
90
-
91
-
92
-
93
-
94
-
95
-
96
-
97
-
98
-
99
-
100
-
101
-
102
-
103
-
104
-
105
-
106
-
107
-
108
-
109
-
110
-
111
-
112
-
113
-
114
-
115
-
116
-
117
-
118
-
119
-
120
-
121
-
122
-
123
-
124
-
125
-
126
-
127
-
128
-
129
-
130
-
131
-
132
-
133
-
134
-
135
-
136
-
137
-
138
-
139
-
140
-
141
-
142
-
143
-
144
-
145
-
146
-
147
-
148
-
149
-
150
-
151
-
152
-
153
-
154
-
155
-
156
-
157
-
158
-
159
-
160
-
161
-
162
-
163
-
164
-
165
-
166
-
167
-
168
-
169
-
170
-
171
-
172
-
173
-
174
-
175
-
176
-
177
-
178
-
179
-
180
 |
 |
