Samsung SCH U340 User Manual (ENGLISH) - Page 69
Send Picture Messages in Standby Mode
 |
UPC - 635753463200
View all Samsung SCH U340 manuals
Add to My Manuals
Save this manual to your list of manuals |
Page 69 highlights
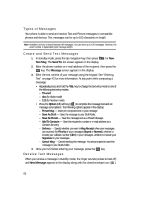
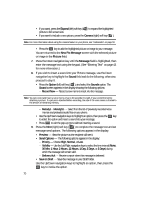
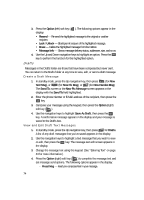
Send Picture Messages in Standby Mode 9. Press the SEND (left) soft key ( ) to send the message. "Pic Msg Sending" appears in the display and a progress bar indicates the send status. Send Picture Messages in Standby Mode Send Picture messages to recipients with a compatible phone or other device, and accompany the Picture message with a voice memo, ring tone, or downloaded melody. Tip: You can send a Picture message to up to ten recipients. Enter each recipient's address or phone number in a separate Send to field of the Picture message composer. 1. In standby mode, press the Up navigation key, then press abc for New Pic Msg. The New Pic Message screen then appears in the display with the Send To field highlighted. 2. Enter the phone number or e-mail address of the recipient using the keypad, then press the Down navigation key. Note: Use the Left and Right navigation keys to add CC and BCC recipients. Tip: Press the Option (left) soft key ( ) to display a pop-up menu containing: Contacts, text input mode, Internet address type, Save Address, and Recent Calls. These options allow you to find and add recipients to the message. 3. The Subject field appears in the display. Enter a subject for the Picture message using the keypad. (See "Entering Text" on page 43 for more information.) 4. Press the Down navigation key until the Picture field is highlighted, then press the Option (left) soft key ( ). The following options appear in the display: • Photo Gallery - Select or take a picture to include in your message. • Image Gallery - Select a downloaded image to include in your message. • Erase - Remove an included picture or image from your message. 5. Use the Up and Down navigation keys to highlight Photo Gallery or Image Gallery, then press the OK key. A gallery of thumbnail pictures or images appears in the display. 6. Use the Navigation key to highlight a picture or image to be added to your message, then do the following: Messaging 69
-
 1
1 -
2
-
3
-
4
-
5
-
6
-
7
-
8
-
9
-
10
-
11
-
12
-
13
-
14
-
15
-
16
-
17
-
18
-
19
-
20
-
21
-
22
-
23
-
24
-
25
-
26
-
27
-
28
-
29
-
30
-
31
-
32
-
33
-
34
-
35
-
36
-
37
-
38
-
39
-
40
-
41
-
42
-
43
-
44
-
45
-
46
-
47
-
48
-
49
-
50
-
51
-
52
-
53
-
54
-
55
-
56
-
57
-
58
-
59
-
60
-
61
-
62
-
63
-
 64
64 -
 65
65 -
 66
66 -
 67
67 -
 68
68 -
 69
69 -
 70
70 -
 71
71 -
 72
72 -
 73
73 -
 74
74 -
75
-
76
-
77
-
78
-
79
-
80
-
81
-
82
-
83
-
84
-
85
-
86
-
87
-
88
-
89
-
90
-
91
-
92
-
93
-
94
-
95
-
96
-
97
-
98
-
99
-
100
-
101
-
102
-
103
-
104
-
105
-
106
-
107
-
108
-
109
-
110
-
111
-
112
-
113
-
114
-
115
-
116
-
117
-
118
-
119
-
120
-
121
-
122
-
123
-
124
-
125
-
126
-
127
-
128
-
129
-
130
-
131
-
132
-
133
-
134
-
135
-
136
-
137
-
138
-
139
-
140
-
141
-
142
-
143
-
144
-
145
-
146
-
147
-
148
-
149
-
150
-
151
-
152
-
153
-
154
-
155
-
156
-
157
-
158
-
159
-
160
-
161
-
162
-
163
-
164
 |
 |