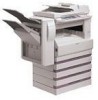
Sharp AR-M237 AR-M237 AR-M277 Operation Manual Suite
Sharp AR-M237 - B/W Laser - Copier Manual
 |
View all Sharp AR-M237 manuals
Add to My Manuals
Save this manual to your list of manuals |
Sharp AR-M237 manual content summary:
- Sharp AR-M237 | AR-M237 | AR-M277 Operation Manual Suite - Page 1
MODEL AR-M237 AR-M277 DIGITAL MULTIFUNCTIONAL SYSTEM OPERATION MANUAL (for copier) Page • BEFORE USING THE MACHINE 8 • COPY FUNCTIONS 21 • CONVENIENT COPY FUNCTIONS 35 • USER SETTINGS 51 • TROUBLESHOOTING AND MAINTENANCE 57 • PERIPHERAL DEVICES AND SUPPLIES 76 • APPENDIX 80 - Sharp AR-M237 | AR-M237 | AR-M277 Operation Manual Suite - Page 2
for reference the copier's serial number located on the back of the unit. Model Number Serial Number Date of Purchase Place of Purchase Authorized Sharp Copier Service Department Number Do not . G Money G Stamps G Bonds G Stocks G Bank drafts G Checks G Passports G Driver's licenses - Sharp AR-M237 | AR-M237 | AR-M277 Operation Manual Suite - Page 3
MANUAL RATIO SELECTION 31 G SELECTING THE VERTICAL AND HORIZONTAL COPY RATIOS SEPARATELY (XY ZOOM copying 32 INTERRUPTING A COPY RUN 34 3 CONVENIENT COPY FUNCTIONS COPY FINISHING FUNCTIONS 35 G SORT COPY 35 G GROUP COPY 35 G OFFSET FUNCTION 35 G STAPLE SORT (when the finisher (AR MEMORY - Sharp AR-M237 | AR-M237 | AR-M277 Operation Manual Suite - Page 4
MESSAGES 58 TROUBLESHOOTING 60 MISFEED REMOVAL kit or finisher (AR-FN5N) is installed 70 G MISFEED IN AN OUTPUT TRAY (when a finisher (AR-FN5N) is installed).........70 REPLACING THE TONER CARTRIDGE ........ 72 STAPLE CARTRIDGE REPLACEMENT......... 73 G STAPLE JAM REMOVAL 74 CHECKING THE TONER - Sharp AR-M237 | AR-M237 | AR-M277 Operation Manual Suite - Page 5
CAUTIONS Follow the cautions below when using this machine. CAUTIONS ON USING THE MACHINE Warning: • The fusing area is hot. Exercise care in this area when removing misfed paper. • Do not look directly at the light source. Doing so may damage your eyes. Caution: • Do not switch the machine - Sharp AR-M237 | AR-M237 | AR-M277 Operation Manual Suite - Page 6
the machine for servicing and proper ventilation. Store spare toner cartridges in a drum (green portion). • Scratches or smudges on the drum will cause dirty copies. Safety precautions: This Digital Copier Windows® 95, Windows® 98, Windows® Me, Windows NT® 4.0, Windows® 2000, and Windows® XP Mac - Sharp AR-M237 | AR-M237 | AR-M277 Operation Manual Suite - Page 7
WHICH MUST BE DISPOSED OF PROPERLY. CONTACT YOUR SHARP DEALER OR SERVICER FOR INSTRUCTIONS. This product utilizes tin-lead solder, and as a printer, network printer, and network scanner. Software setup guide (for printer) This manual contains instructions for installing the software that allows the - Sharp AR-M237 | AR-M237 | AR-M277 Operation Manual Suite - Page 8
of the machine. Explanation of words and illustration • This operation manual refers to the Reversing Single Pass Feeder as the "RSPF". • The illustrations in this manual show the AR-M237/AR-M277 with the optional job separator tray kit (AR-TR3) installed. The appearance of your machine may be - Sharp AR-M237 | AR-M237 | AR-M277 Operation Manual Suite - Page 9
touch panel even provides instructions for removing paper misfeeds and other problems that occur. Optional features • An optional finisher allows automatic stapling of up to 30 sheets. • This machine can be used as a network printer if the optional printer expansion kit is installed. • This machine - Sharp AR-M237 | AR-M237 | AR-M277 Operation Manual Suite - Page 10
PART NAMES AND FUNCTIONS Exterior 1 2 36 7 16 8 4 5 12 11 17 9 19 13 10 14 18 20 21 1 Document feeder tray Place the original(s) that you wish to scan face up here. (p.23) 2 Original guides jobs and received faxes are delivered to this tray. 13 Center tray Finished copies are - Sharp AR-M237 | AR-M237 | AR-M277 Operation Manual Suite - Page 11
separator tray kit or a optional finisher is Toner cartridge lock release lever Use to unlock the toner cartridge. (p.72) 23 Toner cartridge Contains toner. (p.72) 24 Roller rotating knob Turn to remove misfed paper. (p.66) 25 Photoconductive drum Copy images are formed on the photoconductive drum - Sharp AR-M237 | AR-M237 | AR-M277 Operation Manual Suite - Page 12
network scanner option is installed.) Press to select network scan mode when the network scanner option is installed. • DATA indicator Lights steadily or blinks while a scanned image is being sent. (See "Operation manual (for network scanner)".) [FAX press this key after finishing a job to return - Sharp AR-M237 | AR-M237 | AR-M277 Operation Manual Suite - Page 13
. DUAL PAGE 1/ COPY MULTI SHOT The confirmation beeps can be disabled in the key operator programs. (See "Key operator's guide".) The touch panel screens shown in this manual are printed images and may differ from the actual screens. DUAL PAGE COPY The key is no longer highlighted and the - Sharp AR-M237 | AR-M237 | AR-M277 Operation Manual Suite - Page 14
, print, network scan and fax) This screen of the job as follows: Copy mode Printer mode Network scanner mode Fax mode Fax mode (Send jobs) (Receive jobs) manual".) 2 Mode switching keys Use to select the job list mode: "JOB QUEUE" (Stored/currently executing jobs) or "COMPLETE" (Finished - Sharp AR-M237 | AR-M237 | AR-M277 Operation Manual Suite - Page 15
main screen for several seconds. Then copying can be performed. (See "Key operator's guide".) OFF If the power switch is turned off while the machine is in operation, canceled. Note If the fax option is installed, be sure to keep the power turned on. Faxes cannot be received when the power is turned - Sharp AR-M237 | AR-M237 | AR-M277 Operation Manual Suite - Page 16
"Key operator's guide".) For the initial settings (initial screen) of printer, fax, and scanner modes, see the operation manuals of those modes. unit automatically turns off to reduce power consumption (This is based on the guidelines of the International Energy Star Program.). The factory default - Sharp AR-M237 | AR-M237 | AR-M277 Operation Manual Suite - Page 17
trays are shown below. For best results, use only SHARP recommended paper. Tray No. Paper tray type Paper type to 105 g/m2) (A5 to A3) 4 Lower paper tray of 2 x 500-sheet paper feed unit Bypass tray Plain paper Letterhead paper Recycled paper Color paper 5-1/2" x 8-1/2" to 15 lbs. to 34.5 - Sharp AR-M237 | AR-M237 | AR-M277 Operation Manual Suite - Page 18
with metal tabs, clasps, strings, holes, or windows. • Envelopes with rough fibers, carbon paper, protruding from the seal area. • Envelopes with part of the seal area peeled off. Letterhead paper paper, contact a SHARP service center. • Before using other than SHARP recommended paper, make a - Sharp AR-M237 | AR-M237 | AR-M277 Operation Manual Suite - Page 19
copying, printing, or printing a received fax, and then follow these steps to with the print side facing up. • Insert the paper along the guides. • The tray holds up to 500 sheets of 21 lb. size card in the front of the paper tray to indicate the new paper size. Paper size card Paper size card 81/ - Sharp AR-M237 | AR-M237 | AR-M277 Operation Manual Suite - Page 20
sure to pull out the bypass tray extension. 2 Set the paper guides to the copy paper width. Important points when inserting paper in the the original image. This may cause smudges or unclean images. • Do not use paper that has already been printed on by a laser printer or plain paper fax machine. - Sharp AR-M237 | AR-M237 | AR-M277 Operation Manual Suite - Page 21
in copy mode, the settings cannot be changed while a print job or received fax is being printed. Note • 5-1/2" x 8-1/2" (A5) size paper can only be can be prohibited in the key operator programs. (See the "Key operator's guide".) 1 Load paper in the tray as explained in "Loading the paper in - Sharp AR-M237 | AR-M237 | AR-M277 Operation Manual Suite - Page 22
LABELS TRANSPARENCY OK JAPANESE P/C 100% 3 Touch the paper type selection key. READY TO COPY. 8½x11 8½x14 PLAIN RECYCLED 11x17 PLAIN EXTRA IMAGE ADJUST 0 AUTO EXPOSURE PAPER SELECT 100% COPY RATIO 4 Select the paper type. READY TO COPY. PLAIN RECYCLED HEAVY PAPER LETTER HEAD COLOR - Sharp AR-M237 | AR-M237 | AR-M277 Operation Manual Suite - Page 23
when the custom settings screen appears.). COPY PRINT ON LINE DATA SCAN DATA FAX JOB STATUS LINE DATA CUSTOM SETTINGS ACC.#-C 1 2 READY TO mode setting screen. 4 [OUTPUT] key (p.35) Touch to select sort, group, staple sort, and other output settings. 5 [SPECIAL MODES] key (p.39) Touch to - Sharp AR-M237 | AR-M237 | AR-M277 Operation Manual Suite - Page 24
disabled, in the key operator programs. (See the "Key operator's guide".) Manually selecting the paper size (paper tray) If auto paper selection is READY TO COPY. 0 1.8½x11 2.8½x14 PLAIN RECYCLED 11x17 PLAIN EXTRA IMAGE ADJUST AUTO EXPOSURE PAPER SELECT 100% COPY RATIO 4 Select the number - Sharp AR-M237 | AR-M237 | AR-M277 Operation Manual Suite - Page 25
operator programs. (See the "Key operator's guide".) • If the original size is larger ). 3 Place the originals face up in the document feeder tray. Insert the originals all the way into the feed • If the original size is not automatically detected, manually set the original size. (p.47) 4 Make sure - Sharp AR-M237 | AR-M237 | AR-M277 Operation Manual Suite - Page 26
paper select or auto image function has been selected. In this case, the image of the original will in the key operator programs. (See the "Key operator's guide".) Originals that can be used in the RSPF A maximum of that there are no paper clips or staples on the original. • If an original has - Sharp AR-M237 | AR-M237 | AR-M277 Operation Manual Suite - Page 27
scanned before copying begins. 2 ORIGINAL C SIZE 3 Select the "MIX SIZE ORIGINAL FEEDING MODE" checkbox. ORIGINAL SIZE OK AUTO MANUAL MIX SIZE ORIGINAL FEEDING MODE Automatic copy image auto paper select and auto image modes. Rotation copying can be disabled in the key operator programs. ( - Sharp AR-M237 | AR-M237 | AR-M277 Operation Manual Suite - Page 28
( ). ACC.#-C 3 Touch the [PAPER SELECT] key or the tray in the image of the machine in the touch panel, and select the bypass tray. EXPOSURE AUTO 8½ the bypass tray. 1 Touch the [PAPER SELECT] key and then touch the [EXTRA IMAGE ADJUST] key on the bypass tray. 2 Use the key or key to adjust the - Sharp AR-M237 | AR-M237 | AR-M277 Operation Manual Suite - Page 29
two-sided copying is performed using super photo mode, the memory may become full ("MEMORY IS FULL, SELECT ANOTHER EXPOSURE MODE." will appear.). Touch can be disabled in the key operator programs. (See the "Key operator's guide".) • When dual page copy (p.43) is selected, two-sided original to two - Sharp AR-M237 | AR-M237 | AR-M277 Operation Manual Suite - Page 30
When making two-sided copies of an odd number of originals, touch the [READ-END] key after scanning the last original. ACC.#-C USING THE RSPF 1 Place the original(s) in the document feeder tray. (p.23) 2 Touch the [2-SIDED COPY] key. 2-SIDED COPY OUTPUT 3 Touch the desired copy mode. Y TO COPY - Sharp AR-M237 | AR-M237 | AR-M277 Operation Manual Suite - Page 31
EXPOSURE ADJUSTMENT SELECTING THE ORIGINAL IMAGE TYPE AND MANUALLY ADJUSTING THE EXPOSURE [AUTO] is selected by default for automatic adjustment of the image according to the original. If you wish to specify the original image type or manually adjust the exposure, place the original in the RSPF or - Sharp AR-M237 | AR-M237 | AR-M277 Operation Manual Suite - Page 32
not appear in the touch panel, specify the original size manually. (p.47) • Automatic ratio selection is not possible if image can be disabled in the key operator programs. (See the "Key operator's guide".) • If "IMAGE IS LARGER THAN THE COPY PAPER." appears in the touch panel, part of the image - Sharp AR-M237 | AR-M237 | AR-M277 Operation Manual Suite - Page 33
COPY FUNCTIONS MANUAL RATIO SELECTION There are four preset reduction ratios and four preset touch the [ ] key to decrease the ratio or the [ ] key to increase the ratio. • If "IMAGE IS LARGER THAN THE COPY PAPER." appears, the selected copy ratio is too large for the paper size. However, - Sharp AR-M237 | AR-M237 | AR-M277 Operation Manual Suite - Page 34
vertical copy ratios to be changed independently. Example: Vertical ratio set to 100% and horizontal ratio set to 50%. Original Copy Note • The AUTO IMAGE/MULTI SHOT/PAMPHLET COPY feature cannot be used in combination with the XY ZOOM function. • To use the XY ZOOM feature with the DUAL PAGE - Sharp AR-M237 | AR-M237 | AR-M277 Operation Manual Suite - Page 35
COPY FUNCTIONS 4 Touch the [X] key. X 100 Y 100 ZOOM The [X] key is selected 1 (highlighted) by default, so there is normally no 2 need to perform this step (Go to step 5.). 4 If the [X] key is not highlighted, perform this step. 5 Use the reduction, - Sharp AR-M237 | AR-M237 | AR-M277 Operation Manual Suite - Page 36
job is finished, the copy run will resume using the original copy settings. Note Automatic two-sided copying, sort/group copying, staple sort, • If an original is being scanned when the [INTERRUPT] key ( ) is pressed, the interrupt job will begin after the original is scanned. If a copy is being - Sharp AR-M237 | AR-M237 | AR-M277 Operation Manual Suite - Page 37
FUNCTIONS This section explains the sort, group, and offset functions, as well as the staple sort function which is used to staple output collated with the sort function when a finisher is installed. SORT COPY This function is used to collate sets of copies. The copies are delivered to the - Sharp AR-M237 | AR-M237 | AR-M277 Operation Manual Suite - Page 38
-END] key. PLACE NEXT ORIGINAL. PRESS [START]. WHEN FINISHED, PRESS [READ-END]. READ-END The copies are grouped as follows: Sort Copy Group Copy 5 sets of copies 5 copies per page If the memory becomes full while scanning the originals, "MEMORY IS FULL. PRESS [START] TO BEGIN COPYING OR [CA - Sharp AR-M237 | AR-M237 | AR-M277 Operation Manual Suite - Page 39
CONVENIENT COPY FUNCTIONS STAPLE SORT (when the finisher (AR-FN5N) is installed) This function collates the copies, staples each set, and delivers the sets to the offset tray. The staple sort function can only be used when a finisher is installed. Stapling position Top left corner Portrait - Sharp AR-M237 | AR-M237 | AR-M277 Operation Manual Suite - Page 40
COPY OUTPUT 3 Touch the [STAPLE SORT] key. OUTPUT SORT STAPLE SORT GROUP TOP TRAY OFFSET TRAY When the [STAPLE SORT] key is selected, scanned into memory can be increased by increasing the memory allocation in the key operator programs, or by installing more memory. (See the "Key operator's guide - Sharp AR-M237 | AR-M237 | AR-M277 Operation Manual Suite - Page 41
key (p.41) Use this to shift the image on the copy paper to create binding margins. copies in the proper order for center-stapling and folding into a booklet. Two the originals into sets and scan them sequentially in the RSPF. SIZE] key (p.47) Use to manually select the original size. When the - Sharp AR-M237 | AR-M237 | AR-M277 Operation Manual Suite - Page 42
CONVENIENT COPY FUNCTIONS GENERAL PROCEDURE FOR USING THE SPECIAL FUNCTIONS 1 Touch the [SPECIAL MODES] key. SPECIAL MODES 2-SIDED COPY 2 Touch the key of the desired special mode. MARGIN SHIFT Example: Selecting the margin shift function PAMPHLET COPY Procedures for modes that require further - Sharp AR-M237 | AR-M237 | AR-M277 Operation Manual Suite - Page 43
down can be selected for the shift direction as shown in the illustration. • The shift width (margin) can be set from 0" to 1" in increments of 1/8". Image shifted down Margin • If [DOWN] key is selected, set the original(s) so that the margin to be increased is set to the rear side of - Sharp AR-M237 | AR-M237 | AR-M277 Operation Manual Suite - Page 44
CONVENIENT COPY FUNCTIONS ERASE COPY The erase function is used to erase the shadow lines on copies that are produced when copying thick originals or books. The erase modes that can be selected are shown below. The erase width is initially set to 1/2". EDGE ERASE Eliminates shadow lines around the - Sharp AR-M237 | AR-M237 | AR-M277 Operation Manual Suite - Page 45
CONVENIENT COPY FUNCTIONS DUAL PAGE COPY The dual page copy function produces separate copies of two adjoining pages on the document glass. It is especially useful when copying books and other bound documents. [Example] Copying the right and left pages of a book Book original Dual page copy • A - Sharp AR-M237 | AR-M237 | AR-M277 Operation Manual Suite - Page 46
the proper order for center-stapling and folding into a booklet. (two-sided) 2468 1357 The finished copies can be folded. First page First page • Scan the originals in order from the the paper size is 100% selected, touch the [AUTO IMAGE] key. A suitable ratio will be automatically selected. 3 - Sharp AR-M237 | AR-M237 | AR-M277 Operation Manual Suite - Page 47
and repeat the copy procedure. • To increase the number of originals that can be scanned, install more memory or increase the memory allocation in the key operator programs. (See the "Key operator's guide".) Example: Copying 130 sheets (8-1/2" x 11" size originals) Originals page 1 page 101 100 - Sharp AR-M237 | AR-M237 | AR-M277 Operation Manual Suite - Page 48
the original with the next original and press the [START] key ( ). Repeat this step until all originals have been scanned, and then touch the [READ-END] key if necessary. Note • The images may be rotated depending on the number of originals and the orientation of the originals and copy paper. • To - Sharp AR-M237 | AR-M237 | AR-M277 Operation Manual Suite - Page 49
Mixed feeding is explained on page 25. 2 Touch the [MANUAL] key. GINAL SIZE AUTO MANUAL MIX SIZE ORIGINAL FEEDING MOD 3 Select the original size. ORIGINAL SIZE OK AUTO MANUAL 5½x8½ 8½x11 8½x11R 8½x13 OK 8½x14 11x17 AB INCH [MANUAL] key is highlighted and the selected paper size is - Sharp AR-M237 | AR-M237 | AR-M277 Operation Manual Suite - Page 50
from one-sided or two-sided originals One-sided originals One-sided copies (copying onto a cover) 4 3 2 1 4 3 2 1 SHARP Cover original SHARP 1 3 5 Two-sided originals 4 2 SHARP 5 4 3 2 1 Back cover (no copying) Front cover (can copy onto front side) Back cover (no copying) Cover original - Sharp AR-M237 | AR-M237 | AR-M277 Operation Manual Suite - Page 51
for this function. • During cover copying, stream feeding mode will not function even if enabled in the key operator programs. (See the "Key operator's guide".) • To cancel the cover copy function, select the cover copy function again and touch the [CANCEL] key. (See the screen of step 2.) 3 49 - Sharp AR-M237 | AR-M237 | AR-M277 Operation Manual Suite - Page 52
CONVENIENT COPY FUNCTIONS B/W REVERSE COPY The B/W REVERSE feature is used to reverse black and white in a copy to create a negative image. original B/W reverse copy When the B/W reverse function is selected, the exposure mode will be automatically set to TEXT mode. Other exposure modes cannot - Sharp AR-M237 | AR-M237 | AR-M277 Operation Manual Suite - Page 53
see the Key operator's guide. (For explanations of key operator programs for the fax option, see the operation manual for facsimile.) *1 The fax option or network printer function must be installed. *2 The fax option must be installed. *3 The fax option or network scanner function must be installed - Sharp AR-M237 | AR-M237 | AR-M277 Operation Manual Suite - Page 54
ADDRESS CONTROL LIST PRINT RECEIVE MODE KEY OPERATOR PROGRAMS EXIT CLOCK FAX DATA FORWARD 3 Touch the [OK] key in the setting indicate that the item is selected. In the above settings, tray 1 can be used for printer, copy, and fax mode. Tray 2 and tray 3 can only be used for copy mode. • For a - Sharp AR-M237 | AR-M237 | AR-M277 Operation Manual Suite - Page 55
paper size. • To select which trays can be used in each of copy, printer, and fax modes, select the checkboxes ( ) of the desired trays in each mode. • be set for the bypass tray.) Keyboard select When using the fax or network scanner function, you can change the layout of the keyboard that appears - Sharp AR-M237 | AR-M237 | AR-M277 Operation Manual Suite - Page 56
of job programs is prohibited in the key operator programs, it will not be possible to overwrite or delete a job program. G To exit job program memory mode, press the [CLEAR ALL] key ( ) on the operation panel or touch the [EXIT] key on the touch panel. STORING A JOB PROGRAM 1 Press the [ ] key - Sharp AR-M237 | AR-M237 | AR-M277 Operation Manual Suite - Page 57
original, check the original size, and then set the number of copies and any other desired copy settings not stored in the program. When finished, press the [START] key ( ). 2 Touch the program number key of the ACC.#-C desired program. JOB PROGRAMS PRESS PROGRAM NUMBER. The job program will be - Sharp AR-M237 | AR-M237 | AR-M277 Operation Manual Suite - Page 58
enabled for all modes (copy mode, fax mode, network scanner mode, and printer mode) in the key operator programs. (See the "Key operator's guide".) • To print in printer mode when auditing mode is enabled, enter your account number in the printer driver setup screen on your computer. COPYING WHEN - Sharp AR-M237 | AR-M237 | AR-M277 Operation Manual Suite - Page 59
removal, replacing the toner cartridge and cleaning the machine. DISPLAY MESSAGES...58 TROUBLESHOOTING ...60 Trouble Problems related to machine operation . A copy job stops before it is finished. The contrast of the touch panel is too high or too low. Image cannot be rotated. Original size is not - Sharp AR-M237 | AR-M237 | AR-M277 Operation Manual Suite - Page 60
. TONER SUPPLY IS LOW. CHANGE THE TONER CARTRIDGE. CHECK THE TONER CARTRIDGE. THE DOCUMENT FEEDER IS finisher is out of staples. Replace the staple cartridge as explained in "STAPLE CARTRIDGE REPLACEMENT". Paper remains in the stapler compiler. Remove the paper. The memory becomes full while scanning - Sharp AR-M237 | AR-M237 | AR-M277 Operation Manual Suite - Page 61
TROUBLESHOOTING AND MAINTENANCE Message SELECTED PAPER TRAY IS OUT OF SERVICE. CHECK STAPLER POSITION OR STAPLE JAM. (CALL FOR SERVICE SOON.) (MAINTENANCE REQUIRED.) CALL FOR SERVICE. CODE: PLEASE CHECK THE ORIGINAL SIZE. JOB IS CANCELED. Cause and solution Contact your SHARP service center. - Sharp AR-M237 | AR-M237 | AR-M277 Operation Manual Suite - Page 62
the problem using the troubleshooting guide, turn off the power switch, unplug the machine, and contact your SHARP service center. The following problems are related to the general operation of the machine and copying. For problems related the to printer, fax, and network scanner functions, see - Sharp AR-M237 | AR-M237 | AR-M277 Operation Manual Suite - Page 63
TROUBLESHOOTING AND MAINTENANCE Problem Original size is not selected automatically, or copying does not take place on paper that matches the original size. Paper size for a paper tray cannot be set. Order of copies is incorrect. The job is canceled after the originals were being scanned. Not all - Sharp AR-M237 | AR-M237 | AR-M277 Operation Manual Suite - Page 64
TROUBLESHOOTING AND MAINTENANCE Paper feeding problems Problem When using paper fed from the bypass tray, the copied image is skewed. than the maximum number of sheets. The bypass guide is not adjusted to the size of the loaded paper. → Adjust the bypass guide to the size of the loaded paper. The - Sharp AR-M237 | AR-M237 | AR-M277 Operation Manual Suite - Page 65
TROUBLESHOOTING AND MAINTENANCE Image quality problems Problem Copies are too dark or too light. Text is not clear in a copy. Part of the copied image is cut off. Blank copies. Paper is wrinkled or the copied image comes off when the paper surface is rubbed. Copies are smudged or dirty. White or - Sharp AR-M237 | AR-M237 | AR-M277 Operation Manual Suite - Page 66
the finisher (p.70) 1 3 Misfeed in the machine (p.66) 2 4 Misfeed in the bypass tray (p.66) 3 5 Misfeed in the upper paper tray (p.68) 4 6 Misfeed in the lower paper tray (p.69) 5 6 Note If the fax option is installed, all received faxes are stored in memory. The faxes are automatically - Sharp AR-M237 | AR-M237 | AR-M277 Operation Manual Suite - Page 67
the moveable part of the document feeder tray and remove the reversing tray, and then remove the original. Reversing tray Moveable part Note After 3 Reinsert the originals that still must be scanned (Including the original that was being scanned when the misfeed occurred.), and press the [ - Sharp AR-M237 | AR-M237 | AR-M277 Operation Manual Suite - Page 68
TROUBLESHOOTING AND MAINTENANCE MISFEED IN THE BYPASS TRAY 1 Carefully pull the open. 66 Warning The fusing unit is hot. Do not touch the fusing unit when removing misfed paper. Doing so may cause a burn or injury. Caution Do not touch the photoconductive drum (green portion) when removing the - Sharp AR-M237 | AR-M237 | AR-M277 Operation Manual Suite - Page 69
removing the misfed paper. Doing so may damage the drum and cause smudges on copies. • Take care not to let unfixed toner on the misfed paper soil your hands or clothes. 5 6 Close the fusing unit paper guide and press down on the fusing unit release levers. 7 Close the front cover and side cover - Sharp AR-M237 | AR-M237 | AR-M277 Operation Manual Suite - Page 70
TROUBLESHOOTING AND MAINTENANCE MISFEED IN THE CENTER TRAY Remove the paper by pulling it into the center tray. MISFEED IN THE UPPER PAPER TRAY Make sure - Sharp AR-M237 | AR-M237 | AR-M277 Operation Manual Suite - Page 71
TROUBLESHOOTING AND MAINTENANCE MISFEED IN THE LOWER PAPER TRAY G Make sure that there is no misfed paper in the machine before pulling the tray out. (p.66) G Use the following procedure to remove misfeeds that occur in the 500-sheet paper feed unit or 2 x 500-sheet paper feed unit. 1 Open the lower - Sharp AR-M237 | AR-M237 | AR-M277 Operation Manual Suite - Page 72
TROUBLESHOOTING AND MAINTENANCE MISFEED IN THE UPPER EXIT AREA (when a job separator tray kit or finisher (AR-FN5N) is installed) If a job separator tray kit or a finisher is installed, a misfeed may occur in the upper exit area. 1 Open the upper right side cover. 3 Close the upper right side - Sharp AR-M237 | AR-M237 | AR-M277 Operation Manual Suite - Page 73
3 If staple sort copying is being performed, open the paper guide and remove any misfed paper from the stapler compiler. TROUBLESHOOTING AND MAINTENANCE 4 Close the stapler compiler cover. 5 If the offset tray is being used, remove any misfed paper from the offset tray. 5 6 If the top - Sharp AR-M237 | AR-M237 | AR-M277 Operation Manual Suite - Page 74
, gently insert the toner cartridge along the guides until it clicks into place. 2 Pull the toner cartridge out while pressing the lock release lever. Toner cartridge lock release lever When pulling out the toner cartridge, place your other hand on the green part of the cartridge. Handle Note - Sharp AR-M237 | AR-M237 | AR-M277 Operation Manual Suite - Page 75
STAPLE CARTRIDGE REPLACEMENT (when the finisher (AR-FN5N) is installed) When the message "ADD STAPLES." appears, replace the staple cartridge as follows: 1 Open the stapler cover. 5 Remove the tape from the cartridge. 2 Grasp the green portion of the staple box and remove the staple box from the - Sharp AR-M237 | AR-M237 | AR-M277 Operation Manual Suite - Page 76
the jammed staples. 6 Close the stapler cover. CHECKING THE TONER QUANTITY AND TOTAL OUTPUT COUNT The approximate quantity of toner remaining and the total output count can be displayed as explained below. G The output count shows the combined output total of the copy, fax, and printer functions - Sharp AR-M237 | AR-M237 | AR-M277 Operation Manual Suite - Page 77
these parts clean. Stains or dirt on the document glass/RSPF will also be copied. Wipe the document glass, the RSPF and the scanning window on the parts of the fusing unit, creating a risk of fire or electrical shock. Surface of document glass Underside of RSPF Scanning glass for RSPF Scanning - Sharp AR-M237 | AR-M237 | AR-M277 Operation Manual Suite - Page 78
be used as a network scanner. FACSIMILE EXPANSION KIT (AR-FX7) This allows the machine can be used as a facsimile machine. 8MB FAX MEMORY (AR-MM9) Image memory can be expanded by installing the optional fax expansion memory. 256MB EXPANSION MEMORY BOARD (AR-SM5) 512MB EXPANSION MEMORY BOARD (AR-SM6 - Sharp AR-M237 | AR-M237 | AR-M277 Operation Manual Suite - Page 79
PERIPHERAL DEVICES AND SUPPLIES FINISHER (AR-FN5N) When an optional finisher (AR-FN5N) is installed, the machine can automatically staple the sorted copies. Each collated set of copies or group of copies can be stacked offset from the previous set. (Offset function p.35) Part names Top cover Top - Sharp AR-M237 | AR-M237 | AR-M277 Operation Manual Suite - Page 80
AR-D22 contains two 500-sheet paper trays. Part names 500-SHEET PAPER FEED UNIT (AR-D21) Side cover 2x500-SHEET PAPER FEED UNIT (AR-D22) Side cover Tray Tray Specifications AR-D21 AR the machine Note As a part of our policy of continuous improvement, SHARP reserves the right to make design - Sharp AR-M237 | AR-M237 | AR-M277 Operation Manual Suite - Page 81
for this product that are to be replaced by the user are paper and the toner cartridge. For best copying results, be sure to use only SHARP Genuine Supplies which are designed, engineered and tested to maximize the life and performance of SHARP copiers. Look for the Genuine Supplies label on the - Sharp AR-M237 | AR-M237 | AR-M277 Operation Manual Suite - Page 82
Fusing system Developer system Light source Resolution AR-M237 AR-M277 Digital Multifunction System, Desktop OPC drum Fixed Dry, electrostatic transfer Sheets, bound 100 sheets) Heat rollers Magnetic brush development Xenon lamp Scan: 400 dpi Scan: 400 dpi Output: 600 dpi Output: 1200 dpi - Sharp AR-M237 | AR-M237 | AR-M277 Operation Manual Suite - Page 83
APPENDIX Gradation Scanning: 256 Printing: 2 value Power supply AC 120V, 60 Hz, 12A Power consumption Max. 1.4 kW Overall dimensions (with bypass tray folded) 24-17/32" (W) x 24" (D) (623 mm (W) x 609.5 mm (D)) Weight Approx. 103.7 lbs. (47 kg) (Not includes toner cartridge) Dimensions - Sharp AR-M237 | AR-M237 | AR-M277 Operation Manual Suite - Page 84
Name : AR-270NT / AR-270T / AR-270ST / AR-270FT / AR-270NT-J / AR-270ST-C/ AR-270FT-T (Black Toner) Supplier Identification : Sharp Corporation 22- United Kingdom France Austria Italy Spain Netherlands Sweden Switzerland U.A.E. (Name and Telephone Number) Sharp Electronics Corporation Sharp - Sharp AR-M237 | AR-M237 | AR-M277 Operation Manual Suite - Page 85
Human Health Effects : There are no anticipated carcinogenic effects from exposure based on animal tests performed using toner. When used as intended according to instructions, studies do not indicate any symptoms of fibrosis will occur. Environmental Effects : No data are available. Specific - Sharp AR-M237 | AR-M237 | AR-M277 Operation Manual Suite - Page 86
dust mask and goggles are recommended when handling a large quantity of toner or during long term exposure, as with any non-toxic dust. 9. the development of lung tumors in rats receiving chronic inhalation exposures to free carbon black at levels that induce particle overload of the lung. Studies - Sharp AR-M237 | AR-M237 | AR-M277 Operation Manual Suite - Page 87
Chronic Effect Data Revised: Jul. 31. 2002 Data Issued: Apr. 2. 2001 MSDS No. F-00981 : In a study in rats of chronic inhalation exposure to a typical toner, a mild to moderate degree of lung fibrosis was observed in 92% of the rats in the high concentration (16mg/m3) exposure group, and a minimal - Sharp AR-M237 | AR-M237 | AR-M277 Operation Manual Suite - Page 88
IDENTIFICATION Product Name : AR-271ND / AR-271DV / AR-271SD / AR-271SD-C (Black Developer) Supplier Identification : Sharp Corporation 22-22 Nagaike- United Kingdom France Austria Italy Spain Netherlands Sweden Switzerland U.A.E. (Name and Telephone Number) Sharp Electronics Corporation Sharp - Sharp AR-M237 | AR-M237 | AR-M277 Operation Manual Suite - Page 89
Human Health Effects : There are no anticipated carcinogenic effects from exposure based on animal tests performed using toner. When used as intended according to instructions, studies do not indicate any symptoms of fibrosis will occur. Environmental Effects : No data are available. Specific - Sharp AR-M237 | AR-M237 | AR-M277 Operation Manual Suite - Page 90
a dust mask and goggles are recommended when handling a large quantity of toner or during long term exposure, as with any non-toxic dust. the development of lung tumors in rats receiving chronic inhalation exposures to free carbon black at levels that induce particle overload of the lung. Studies - Sharp AR-M237 | AR-M237 | AR-M277 Operation Manual Suite - Page 91
MATERIAL SAFETY DATA SHEET Page: 4/4 Chronic Effect Data Issued: Aug. 1. 2003 MSDS No. F-31201 : In a study in rats of chronic inhalation exposure to a typical toner, a mild to moderate degree of lung fibrosis was observed in 92% of the rats in the high concentration (16mg/m3) exposure group, and - Sharp AR-M237 | AR-M237 | AR-M277 Operation Manual Suite - Page 92
COPY] key 21, 27, 28 500-sheet paper feed unit 69, 76, 78 512MB expansion memory board 76 8MB fax memory 76 A ABCDEF configuration 53 [ACC.#-C] key 10, 56 Account number 56 Adjusting the exposure 29 Audting mode 56 [AUTO IMAGE] key 30 Auto tray switching 53 Automatic ratio selection 30 - Sharp AR-M237 | AR-M237 | AR-M277 Operation Manual Suite - Page 93
the network scanner function 53 Number of sent and received fax pages 53 Number of times the stapler was used 53 Number of two-sided copies 53 Numeric keys 10 O Offset function 35, 36 Offset tray 35, 71, 77 Operation panel 8 Optional equipment 76 Orientation of the original (Staple sort - Sharp AR-M237 | AR-M237 | AR-M277 Operation Manual Suite - Page 94
indicator 10 Print server card 76 Printer expansion kit 76 [PRIORITY] key 12 PS3 expansion kit 76 Q QWERTY configuration 53 R [READ-END] key 36, 38, 45, 46 Recycled paper 15 Reduction key 31 Reduction/enlargement/zoom 30 Release roller 65 Replacing the toner cartridge 72 Reversing tray - Sharp AR-M237 | AR-M237 | AR-M277 Operation Manual Suite - Page 95
66 - Center tray 68 - Lower paper tray 69 - Machine 66 - Output tray 70 - RSPF 65 - Upper exit area 70 - Upper paper tray 68 Staple cartridge, replacing 73 Staple jams, removing 74 Toner cartridge, replacing 72 Toner, checking 74 Total output count, checking 74 Troubleshooting 60 93 - Sharp AR-M237 | AR-M237 | AR-M277 Operation Manual Suite - Page 96
is only intended for service purposes. Any connection to this terminal may cause malfunctions of the copy machine. Instruction for service technician: The cable length for the service terminal has to be less than 10 feet (3 m). RSPF connector Finisher connector Parallel connector USB connector - Sharp AR-M237 | AR-M237 | AR-M277 Operation Manual Suite - Page 97
the hardware, software or firmware embodied in or used in conjunction with this Product. Your sole remedy, in the event that you encounter any difficulties with this Product, is against the authorized dealer from which you purchased the Product. AR-M237 Digital Multifunctional System AR-M277 Digital - Sharp AR-M237 | AR-M237 | AR-M277 Operation Manual Suite - Page 98
SETUP GUIDE Page • INTRODUCTION Back cover • SOFTWARE FOR THE SHARP AR-M230/M270 SERIES 2 • BEFORE INSTALLATION 2 • INSTALLING THE SOFTWARE 3 • CONNECTING TO A COMPUTER 10 • CONFIGURING THE PRINTER DRIVER 11 • CONFIGURING THE PC-FAX DRIVER WHEN USING A USB CABLE (if the PC-FAX driver - Sharp AR-M237 | AR-M237 | AR-M277 Operation Manual Suite - Page 99
install and configure the software that is required for the printer function of the machine. The procedure for viewing the online manual is also explained. • The screen images in this manual are mainly for Windows® XP. With other versions of Note Windows®, some screen images may be different from - Sharp AR-M237 | AR-M237 | AR-M277 Operation Manual Suite - Page 100
SOFTWARE FOR THE SHARP AR-M230/M270 SERIES 2 BEFORE INSTALLATION ...2 ● HARDWARE AND SOFTWARE REQUIREMENTS 2 ● INSTALLATION ENVIRONMENT AND INSTALLATION PROCEDURE 2 INSTALLING THE SOFTWARE 3 ● INSTALLATION IN WINDOWS XP (USB/PARALLEL CABLE 3 ● INSTALLATION IN WINDOWS 98/ME/2000 (USB CABLE - Sharp AR-M237 | AR-M237 | AR-M277 Operation Manual Suite - Page 101
FOR THE SHARP AR-M230/M270 SERIES The CD-ROM that accompanies the machine contains the following software: • Printer driver The printer driver enables you to use the printer function of the machine. • PC-FAX driver The PC-FAX driver lets you easily send faxes from your computer through the machine - Sharp AR-M237 | AR-M237 | AR-M277 Operation Manual Suite - Page 102
" button to exit the installer. In this case, reinstall the software from the beginning after solving the problem. INSTALLATION IN WINDOWS XP (USB/PARALLEL CABLE) 1 The USB or parallel cable must not be connected to the machine. Make sure that the cable is not connected before proceeding. If the - Sharp AR-M237 | AR-M237 | AR-M277 Operation Manual Suite - Page 103
installation of the SHARP software is complete" appears, click the "OK" button. 4 Click the "Finish" button when the message informs you that setup is successful. 11 When the "Finish" screen appears, click the "Close" button. When "After Windows system restarts, connect the interface cable to the - Sharp AR-M237 | AR-M237 | AR-M277 Operation Manual Suite - Page 104
of the printer driver. "SHARP AR-XXXX" will appear in the "Found New Hardware Wizard" dialog box. Select "Install the software automatically (Recommended)" and click the "Next" button. Follow the on-screen instructions. Caution If a warning window appears regarding the "Windows logo test - Sharp AR-M237 | AR-M237 | AR-M277 Operation Manual Suite - Page 105
the "Cancel" button to close the window and disconnect the cable. Note The cable will be connected in step 12. 2 Insert the CD-ROM into your computer's CD-ROM drive. 3 Double-click "My Computer" ( ), and then double-click the CD-ROM icon ( ). 4 Double-click the "setup" icon ( ). If the language - Sharp AR-M237 | AR-M237 | AR-M277 Operation Manual Suite - Page 106
"Yes" button. When "The installation of the SHARP software is complete" appears, click the "OK" button. 10 Begin the installation of the PC-FAX driver (if "PC-FAX Driver" was selected in Step 7). Follow the on-screen instructions. • When the model selection window appears, select model name of your - Sharp AR-M237 | AR-M237 | AR-M277 Operation Manual Suite - Page 107
If an incorrect package is displayed, click the "Back" button and select the correct packages. 9 Begin installation of the printer driver (if "Printer Driver" was selected in Step 7). Follow the on-screen instructions. If you are using Windows 95/NT 4.0, go to step 12. 10 When you are asked how the - Sharp AR-M237 | AR-M237 | AR-M277 Operation Manual Suite - Page 108
" for the printer port. 15 When "The installation of the SHARP software is complete" appears, click the "OK" button. 16 Begin the installation of the PC-FAX driver (if "PC-FAX Driver" was selected in Step 7). Follow the on-screen instructions. • When the model selection window appears, select model - Sharp AR-M237 | AR-M237 | AR-M277 Operation Manual Suite - Page 109
was originally equipped with USB and had Windows 98, Windows Me, Windows 2000 Professional, Windows XP Professional or Windows XP Home Edition preinstalled. • Do not connect the interface cable before installing the printer driver. The interface cable must be connected during installation of the - Sharp AR-M237 | AR-M237 | AR-M277 Operation Manual Suite - Page 110
from the "Setting Paper Size" menu. Repeat for each tray. 2 Click the "SHARP AR-XXXX" printer driver icon and select "Properties" from the "File" menu. If you are using Windows NT 4.0/2000/XP, go to step 4. 3 In Windows 95/98/Me, click the "Setup" tab. 4 Click the "Configuration" tab and set the - Sharp AR-M237 | AR-M237 | AR-M277 Operation Manual Suite - Page 111
installed. Configure the port after installing the printer driver (pages 3 to 9). 1 Click the "start" button, click "Control Panel", click "Printers and Other Hardware", and then click "Printers and Faxes". In operating systems other than Windows XP, click the "Start" button, select "Settings", and - Sharp AR-M237 | AR-M237 | AR-M277 Operation Manual Suite - Page 112
: Provides information on how to print a document. Printer sharing: Explains how to configure the machine for use as a shared printer. Troubleshooting: Provides instructions on how to solve driver or software problems. Note To view the online manual, your computer must have Acrobat Reader 5.0 or - Sharp AR-M237 | AR-M237 | AR-M277 Operation Manual Suite - Page 113
online manual. Troubleshooting information can also be found in the README files for each of the software programs. To view a README file, click the "Display README" button in the "Select Packages" screen. (p.3, 6, 8) Printer driver cannot be installed (Windows 2000/XP) If the printer driver cannot - Sharp AR-M237 | AR-M237 | AR-M277 Operation Manual Suite - Page 114
beside "Other devices". If "SHARP AR-XXXX" appears, select and delete it. Note If "Other devices" does not appear, close the "Device Manager" window. 4 Install the software as explained in "INSTALLING THE SOFTWARE". Plug and play screen does not appear (when using a USB cable) If the Plug and - Sharp AR-M237 | AR-M237 | AR-M277 Operation Manual Suite - Page 115
MODEL AR-FX7 FACSIMILE EXPANSION KIT OPERATION MANUAL Page • BEFORE USING THE FAX FEATURE 4 • BASIC OPERATIONS 12 • ADVANCED TRANSMISSION METHODS 26 • TRANSMISSION USING F-CODES 51 • CONVENIENT METHODS OF USE 61 • PROGRAMMING 65 • TROUBLESHOOTING 83 • KEY OPERATOR PROGRAMS 90 - Sharp AR-M237 | AR-M237 | AR-M277 Operation Manual Suite - Page 116
cable that was provided with the machine. • To reduce the risk of fire, use only UL-Listed No.26 AWG or larger telecommunication line cord. Note • This manual (fax function) describes the AR-M237/AR-M277 model with optional job separator tray kit (AR-TR3), and optional facsimile expansion kit (AR - Sharp AR-M237 | AR-M237 | AR-M277 Operation Manual Suite - Page 117
state's public utility commission, public service commission, or corporation commission for more your FAX machine, you should complete the following steps: See page 97 of this Operation manual. the telephone line has been disconnected at the network interface. • Use caution when installing or - Sharp AR-M237 | AR-M237 | AR-M277 Operation Manual Suite - Page 118
or problems which cannot be solved by reading this manual, please contact Sharp Electronics Corporation P.O. Box 650 Mahwah, NJ 07430-2135 Telephone: 1-800-BE-SHARP A plug and jack used to connect this equipment to the premises wiring and telephone network must comply with the applicable FCC Part 68 - Sharp AR-M237 | AR-M237 | AR-M277 Operation Manual Suite - Page 119
THE FAX FEATURE SETTINGS REQUIRED FOR THE FAX FUNCTION 4 PART NAMES AND FUNCTIONS 5 G OPERATION PANEL 5 G PARTS OF THE MACHINE 6 G FAX MODE TRANSMITTING A TWO-SIDED DOCUMENT ..17 G FAXING A LARGE NUMBER OF PAGES .....18 MANUALLY SETTING THE SCANNING SIZE .. 20 SELECTING RESOLUTION AND EXPOSURE - Sharp AR-M237 | AR-M237 | AR-M277 Operation Manual Suite - Page 120
83 VIEWING THE COMMUNICATION ACTIVITY REPORT 85 PRINTING REPORTS 85 WHEN AN ALARM SOUNDS AND A WARNING MESSAGE IS DISPLAYED 86 TROUBLESHOOTING 87 G FAX PROBLEMS 88 8 KEY OPERATOR PROGRAMS KEY OPERATOR PROGRAM LIST 91 G KEY OPERATOR PROGRAM MENU........... 93 USING THE KEY OPERATOR PROGRAMS..94 - Sharp AR-M237 | AR-M237 | AR-M277 Operation Manual Suite - Page 121
power switch turned on at all times. Faxes cannot be received if the power is turned off lithium battery inside the unit keeps settings and programmed information in memory. • When the unit will not operate correctly. If this should occurr please contact your Authorized Sharp Dealer or Service - Sharp AR-M237 | AR-M237 | AR-M277 Operation Manual Suite - Page 122
Before using the unit as a fax machine, make sure that the following information has been programmed correctly. Make sure the correct date and time have been set Make sure the correct date and time have been programmed in the unit (refer to "CUSTOM SETTINGS" of operation manual for copier). If the - Sharp AR-M237 | AR-M237 | AR-M277 Operation Manual Suite - Page 123
. The light stays on constantly when a fax is waiting in memory for transmission. 9 [CUSTOM SETTINGS] key Use to customize the machine settings to better suit your needs. See "CUSTOM SETTINGS" in the operation manual for copier. When using the fax function, destinations can be stored (p.65) and - Sharp AR-M237 | AR-M237 | AR-M277 Operation Manual Suite - Page 124
USING THE FAX FEATURE PARTS OF THE MACHINE 12 3 4 11 5 6 7 13 8 12 9 10 1 Exit area The original exits here after transmission or scanning into memory. 2 Document feeder tray Place the original face-up in this tray for transmission.(p.10) 3 Original guides Adjust these guides to match - Sharp AR-M237 | AR-M237 | AR-M277 Operation Manual Suite - Page 125
MODES ADDRESS REVIEW 7 DIRECT TX MEMORY TX 8 1 10 9 1 Message display Messages appear here to indicate the current status of the machine. When the machine is ready to send, an icon appears to the left. 2 Memory and reception mode display This shows the amount of fax memory that is free and - Sharp AR-M237 | AR-M237 | AR-M277 Operation Manual Suite - Page 126
or dual page scan is selected, the special function icon appears here. Address directory screen (alphabetically ordered) If "DEFAULT DISPLAY SETTINGS" [FAX] key is pressed. 2 READY TO SEND. SPEAKER REDIAL A B C D 1 E F G H CONDITION 3 SETTINGS SUB ADDRESS ADDRESS REVIEW FREQUENT - Sharp AR-M237 | AR-M237 | AR-M277 Operation Manual Suite - Page 127
faxed. • There are restrictions on originals that can be scanned using the RSPF. See "POINTS TO NOTE WHEN MAKING COPIES" in the operation manual for copier (1000 mm) (unit : inch) Scanning area of original Note that the edges of an original cannot be scanned. Area that cannot be scanned : 0.2" (5 - Sharp AR-M237 | AR-M237 | AR-M277 Operation Manual Suite - Page 128
stack into the document feeder tray until it stops. The stack should not be higher than the indicator line (maximum 100 pages). Note If originals are placed both in the RSPF and on the document glass, only the original in the RSPF will be scanned. 2 Adjust the original guides on the RSPF to - Sharp AR-M237 | AR-M237 | AR-M277 Operation Manual Suite - Page 129
cards". A key can be accessed by touching its card. (p.8) To prevent calling or sending a fax to in KER memory. However, when an F-code transmission is performed, the machine only retains the fax number; the speaker, and then dial. • Faxes must be sent manually when using on-hook dialing. (p.61) - Sharp AR-M237 | AR-M237 | AR-M277 Operation Manual Suite - Page 130
mode. SCAN FAX JOB STATUS DATA LINE DATA CUSTOM SE When the [FAX] key light is on, the machine is in fax mode. If the light is not on, press the [FAX] key. 2 Make sure that memory transmission mode is selected. SUB ADDRESS SPECIAL MODES ADDRESS REVIEW DIRECT TX MEMORY TX Memory transmission - Sharp AR-M237 | AR-M237 | AR-M277 Operation Manual Suite - Page 131
If the power is turned off or there is an interruption in the power supply while an original is being scanned using the RSPF, scanning will stop and a misfeed will occur. After the power is restored, remove the misfed original as explained in "MISFEED REMOVAL" in the operation manual for copier. 13 - Sharp AR-M237 | AR-M237 | AR-M277 Operation Manual Suite - Page 132
scanning, all pages of the original are scanned into memory before the destination is dialed and transmission begins. The number of pages that can be held in memory F-code faxed in direct transmission mode. • The following funtions cannot be used when direct transmission mode is selected: image - Sharp AR-M237 | AR-M237 | AR-M277 Operation Manual Suite - Page 133
glass, you must manually set the original size. ("MANUALLY SETTING THE SCANNING SIZE" (p.20)) Error Correction Mode (ECM) Noise on the line can sometimes cause distortions in a transmitted fax image. When this happens, the ECM function automatically resends the part of the image that was distorted - Sharp AR-M237 | AR-M237 | AR-M277 Operation Manual Suite - Page 134
SHARP GROUP CORPO. TPS FREQUENT USE ABCD EFGHI JKLMN OPQ See page 8 for information on using the address directory screen. The key you touched is highlighted. If you touch the wrong key, touch the key again to cancel the selection. 4 Continue from step 7 of "BASIC PROCEDURE FOR SENDING FAXES - Sharp AR-M237 | AR-M237 | AR-M277 Operation Manual Suite - Page 135
fax both sides of two-sided document by memory transmission. 1 Make sure that the machine is in fax mode. SCAN FAX JOB STATUS DATA LINE DATA CUSTOM SE When the [FAX] key light is on, the machine is in fax OK initial screen. MANUAL 2-SIDED TABLET JOB BUILD OTATE THE IMAGE 90 DEGREES A two - Sharp AR-M237 | AR-M237 | AR-M277 Operation Manual Suite - Page 136
JOB BUILD] key. 6 Perform steps 4 to 6 of "BASIC PROCEDURE FOR SENDING FAXES" (p.12). 7 Press the [START] key ( ). Scanning of the originals begins. When scanning is finished, the [READ-END] key appears in the touch panel. SIZE OK MANUAL 2-SIDED TABLET JOB BUILD OTATE THE IMAGE 90 DEGREES 18 - Sharp AR-M237 | AR-M237 | AR-M277 Operation Manual Suite - Page 137
guide.) When the screen reverts to the initial screen, the scanned originals will be transmitted. 2 Note • If the memory becomes full while originals are being scanned, a message will appear and scanning originals. • When scanning the first set of originals, the [ROTATE THE IMAGE 90 DEGREES] - Sharp AR-M237 | AR-M237 | AR-M277 Operation Manual Suite - Page 138
MANUALLY SETTING THE SCANNING SIZE If you load an original that is not a standard size (such as an AB size), or if the size is not detected correctly, you must touch the [ORIGINAL] key and set the original size manually. Perform the following steps after placing the document in the RSPF or on the - Sharp AR-M237 | AR-M237 | AR-M277 Operation Manual Suite - Page 139
original with the machine in fax mode (p.12), and then manual). Touch this key if your original has small characters or diagrams. The original will be scanned This setting gives the best image quality, however, transmission default resolution setting is Standard. If desired, you can change the default - Sharp AR-M237 | AR-M237 | AR-M277 Operation Manual Suite - Page 140
the key. For a lighter image 1 3 5 touch the key. 4 Touch the [OK] key. O MANUAL 3·5 You will return to the OK initial screen. The selected exposure will appear in the top half of the [EXPOSURE] key. Note • When using the document glass to scan a multi-page original, the original - Sharp AR-M237 | AR-M237 | AR-M277 Operation Manual Suite - Page 141
manual for copier. 1 Press the [JOB STATUS] key. 4 Touch the [PRIORITY] key. FAX JOB STATUS LINE DATA CUSTOM SETTING 2 Touch the [FAX JOB] key. WAITING WAITING WAITING FAX JOB The fax the priority job will begin when the current job finishes. If a job key for a broadcast-type transmission - Sharp AR-M237 | AR-M237 | AR-M277 Operation Manual Suite - Page 142
transmission is selected, the name or number of the destination to which the fax is currently being transmitted appears. If the job has not yet begun, the name or number of the first destination to which the fax will be transmitted appears. To return to the job status screen, touch - Sharp AR-M237 | AR-M237 | AR-M277 Operation Manual Suite - Page 143
operation manual for copier to load appropriate paper. Incoming 8-½" x 11" and A4 size faxes will be guide. If received faxes cannot be printed If the machine runs out of paper or toner, or a paper jam occurs, or if the machine is printing a print or copy job, received faxes will be held in memory - Sharp AR-M237 | AR-M237 | AR-M277 Operation Manual Suite - Page 144
DESTINATIONS IN A SINGLE OPERATION (BROADCAST TRANSMISSION) This feature is used to send a fax to multiple destinations in a single operation. The document to be transmitted is scanned into memory and then successively transmitted to the selected destinations. This feature is convenient for such - Sharp AR-M237 | AR-M237 | AR-M277 Operation Manual Suite - Page 145
and then re-enter the correct digit(s). If you have already completed entry of a fax number, you can delete the number using steps 4 and 5. If you select an ADDRESS REVIEW 5 Check the destinations. SELECT ADDRESS TO DELETE. ADDRESS REVIEW 0666211221 SHARP GROUP CORPO.TPS When you have finished - Sharp AR-M237 | AR-M237 | AR-M277 Operation Manual Suite - Page 146
different phone line. When a fax has been received to memory, the data light to the right of the [FAX] key blinks (see "If received faxes cannot be printed" (p.25)). 2 Printing not possible because of paper or toner problem Other machine Your machine 3 "Transfer" instruction using custom settings - Sharp AR-M237 | AR-M237 | AR-M277 Operation Manual Suite - Page 147
programmed, a fax can still be forwarded by manually entering the finished Press the [JOB STATUS] key, and then cancel forwarding in the same way as a regular fax transmission. ("CANCELING A FAX TRANSMISSION" (p.24)) The fax busy or a transmission error occurs, the fax returns to print standby - Sharp AR-M237 | AR-M237 | AR-M277 Operation Manual Suite - Page 148
scanned into memory. It is not possible to place the document in the RSPF or on the document glass and have it scanned at the specified time of transmission. • To set the date and time in the machine, refer to "CUSTOM SETTINGS" of operation manual for copier TRANSMISSION 1 In fax mode, touch the - Sharp AR-M237 | AR-M237 | AR-M277 Operation Manual Suite - Page 149
• Serial polling (p.32) • F-code polling (p.54) • F-code confidential transmission (p.57) • F-code relay request transmission (p.59) Note • is completed. • If a timer transmission job is given priority in the fax job status screen ("PRIORITY TRANSMISSION OF A STORED JOB" (p.23)), the timer - Sharp AR-M237 | AR-M237 | AR-M277 Operation Manual Suite - Page 150
a Super G3 or G3 machine and supports the polling function. The polling function allows your machine to call a fax machine that has a document ready for machine and asking the sending machine to fax a document is called "polling". Scanning a document into memory and automatically sending it when the - Sharp AR-M237 | AR-M237 | AR-M277 Operation Manual Suite - Page 151
transmission) 3 Document data previously scanned into memory 4 Document data is automatically in that machine. • If the other fax machine is a Sharp machine (excluding some models), you may REVIEW the [CONDITION DIRECT TX MEPMOLOLRIYNGTX SETTINGS] key to display the condition DUAL PAGE SCAN - Sharp AR-M237 | AR-M237 | AR-M277 Operation Manual Suite - Page 152
ADVANCED TRANSMISSION METHODS 4 When you have finished entering the destination(s), press the [START] key( ). "JOB STORED." appears in the screen. Your machine prints the operation Press the [JOB STATUS] key and then cancel the operation as explained. ("CANCELING A FAX TRANSMISSION" (p.24)) 34 - Sharp AR-M237 | AR-M237 | AR-M277 Operation Manual Suite - Page 153
to fax machines whose fax number you have programmed in your machine, or use ID numbers to restrict polling ("MEMORY BOXES AND SUB-ADDRESSES/PASSCODES REQUIRED FOR F-CODE TRANSMISSION" (p.52)). Caution When using the polling memory function, do not set the reception mode to MANUAL. (p.62) Scanning - Sharp AR-M237 | AR-M237 | AR-M277 Operation Manual Suite - Page 154
to the right of the [PUBLIC BOX] key. 1 Touch the [SPECIAL MODES] key in fax mode and then touch the [MEMORY BOX] key. SPECIAL MODES POLLING DIRECT TX PROGRAM SUB ADDRESS ADDRESS REVIEW SLOW SCAN MODE MEMORY TX MEMORY BOX If the address book screen appears, touch the [CONDITION SETTINGS] key to - Sharp AR-M237 | AR-M237 | AR-M277 Operation Manual Suite - Page 155
Box when they are no longer needed. 1 Touch the [SPECIAL MODES] key in fax mode and then touch the [MEMORY BOX] key. SPECIAL MODES POLLING DIRECT TX PROGRAM SUB ADDRESS ADDRESS REVIEW SLOW SCAN MODE MEMORY TX MEMORY BOX If the address book screen appears, touch the [CONDITION SETTINGS] key to - Sharp AR-M237 | AR-M237 | AR-M277 Operation Manual Suite - Page 156
system number against the transmitting machine's ID numbers (Sharp machines only*) Your (receiving) machine [Preparations] document will be sent to any fax machine that polls you. • When using the polling memory function with polling security enabled, the fax number of the polling machine(s) - Sharp AR-M237 | AR-M237 | AR-M277 Operation Manual Suite - Page 157
is already highlighted, the MEMORY BOX function has already been enabled. To disable the function, touch the [SLOW SCAN MODE] key so that the key is no longer highlighted. 3 Touch the [OK] key. You will return to the OK condition settings screen. 1/2 SCAN MODE 5 Fax the document. (p.12 - Sharp AR-M237 | AR-M237 | AR-M277 Operation Manual Suite - Page 158
in fax mode and then touch the [DUAL PAGE SCAN] key. SUB ADDRESS If the address book SPECIAL MODES DIRECT TX ADDRESS REVIEW MEMORY TX scan after pressing the [START] key ( ) and scanning the first original, change originals and repeat scanning until all originals have been scanned. When finished - Sharp AR-M237 | AR-M237 | AR-M277 Operation Manual Suite - Page 159
(p.30) in that it is not cleared from memory after transmission takes place. A program thus allows you destination fax numbers can be stored. 3 USING A PROGRAM 1 In fax mode, load the document. (p.10) SCAN FAX JOB REVIEW the [CONDITION DIRECT TX MPEOMLOLRIYNGTX SETTINGS] key to DUAL PAGE SCAN - Sharp AR-M237 | AR-M237 | AR-M277 Operation Manual Suite - Page 160
O : SERVICE CENTER FAX # : 0333829161 FROM : SHARP FAX # : 0666211221 code polling memory (p.54), relay request transmission (p.50), or polling memory (p.35). 1 In fax mode, place the original. (p.10) SCAN DATA FAX SPECIAL MODES ADDRESS REVIEW SPECIAL MODES DIRECT TX MEMORY TX If the address - Sharp AR-M237 | AR-M237 | AR-M277 Operation Manual Suite - Page 161
, place the original. (p.10) SCAN DATA FAX JOB STATUS LINE DATA CUSTOM SE 2 Touch the [SPECIAL MODES] key, the key, and then the [TX MESSAGE] key. READY TO SEND. SPECIAL MODES PECIAL MODES DIRECT TX COVER SHEET SENDING OPTIONS SUB ADDRESS ADDRESS REVIEW MEMORY TX TX MESSAGE If the address - Sharp AR-M237 | AR-M237 | AR-M277 Operation Manual Suite - Page 162
the receiving machine MAY-11-200X-FRI 03:00 PM SHARP PLANNING DIV. FAX No.0666211221 P.001/001 (1) (2) (3) (4) (1) Date and time: programmed in the custom settings (See "CUSTOM SETTINGS" in operation manual for copier). (2) Sender's name: programmed in the key operator programs. ("OWN NUMBER - Sharp AR-M237 | AR-M237 | AR-M277 Operation Manual Suite - Page 163
wish to use a different sender's name for different destinations. 1 In fax mode, touch the [SPECIAL MODES] key. AUTO RECEPTION BO If the 3 Touch the desired sender key in the list. SENDER LIST 02 SHARP CORPORATION 04 SHARP GROUP 06 XX GROUP Note If multiple senders have been programmed and a - Sharp AR-M237 | AR-M237 | AR-M277 Operation Manual Suite - Page 164
memory (confidential box) of the receiving machine instead of being printed out. The fax can only be printed out when the recipient enters a confidential ID code can only be used when the other fax machine is a Sharp model that has the confidential fax function. For more information, consult your - Sharp AR-M237 | AR-M237 | AR-M277 Operation Manual Suite - Page 165
function and that it is programmed appropriately to receive confidential faxes. If the receiving machine has more than one box for SENDING OPTIONS] key. SPECIALSUMOBDEASDDRESS SPECIAL MODES DIRECT TX ADDRESS REVIEW COVER SHEET MEMORY TX SENDING OPTIONS f the address book screen appears, touch - Sharp AR-M237 | AR-M237 | AR-M277 Operation Manual Suite - Page 166
ahead of the other jobs, after the current job is finished. ORIGINAL CONF. BOX 4 Touch the appropriate memory box key. MEMORY BOX - CONFIDENTIAL BOX SHARP GROUP CORPO.TPS " " appears next to memory boxes that have received faxes. Note • A confidential box cannot be deleted if it is holding - Sharp AR-M237 | AR-M237 | AR-M277 Operation Manual Suite - Page 167
broadcast function. For more information, consult your SHARP service center. • To allow a relay request to take place, the fax number of the relay request machine (the programmed sender's number) must be programmed in the relay machine as a relay ID code ("ID NUMBER MODE" (p.102)). • To make a relay - Sharp AR-M237 | AR-M237 | AR-M277 Operation Manual Suite - Page 168
. 1 Touch the [SPECIAL MODES] key , the key, and then the [SENDING OPTIONS] key. SPECIALSUMOBDEASDDRESS SPECIAL MODES DIRECT TX ADDRESS REVIEW COVER SHEET MEMORY TX SENDING OPTIONS If the address book screen appears, touch the [CONDITION SETTINGS] key to display the condition settings screen - Sharp AR-M237 | AR-M237 | AR-M277 Operation Manual Suite - Page 169
require that the other fax machine be a similar Sharp machine; however, F-code transmission enables these functions to be performed with any other machine that supports F-code transmission. TRANSMISSION BETWEEN MACHINES SUPPORTING F-CODES This machine supports the "F-code" standard as established by - Sharp AR-M237 | AR-M237 | AR-M277 Operation Manual Suite - Page 170
CODE TRANSMISSION Fax machines that support F-code transmission enable the creation of a "memory box" in the unit's memory. The memory box is used to store documents received from another fax memory box and the term "passcode" for the password that allows communication; however, other fax machines - Sharp AR-M237 | AR-M237 | AR-M277 Operation Manual Suite - Page 171
ACC.#-C SHARP GROUP fax number. (p.67) • Manual transmission (p.61) using a sub-address and passcode is not possible. CREATING A MEMORY BOX FOR F-CODE TRANSMISSION F-code operations that use memory boxes include F-code polling memory (p.54), F-code confidential transmission (p.57), and F-code - Sharp AR-M237 | AR-M237 | AR-M277 Operation Manual Suite - Page 172
F-CODE POLLING MEMORY F-code polling memory allows one fax machine to call another fax machine and initiate reception of a document that has been scanned into the other machine's F-code polling memory box. Calling another machine and initiating reception is called F-code polling, and scanning a - Sharp AR-M237 | AR-M237 | AR-M277 Operation Manual Suite - Page 173
polling box by printing it out. Caution When using F-code polling memory, do not set the reception mode to manual reception. Scanning a document into an F-code polling memory box The procedure for scanning a document into an F-code polling memory box (p.103) is almost the same as the procedure - Sharp AR-M237 | AR-M237 | AR-M277 Operation Manual Suite - Page 174
glass, and then follow the steps below. Note • You must know the sub-address (SEP) and passcode (PWD) of the other machine's F-code polling memory box. • Serial polling (selecting multiple fax machines to be polled using a group key or by touching the [NEXT ADDRESS] key) is not possible with - Sharp AR-M237 | AR-M237 | AR-M277 Operation Manual Suite - Page 175
machine's F-code confidential memory box is called F-code confidential transmission. Note • For Sharp's regular confidential transmission function, which uses the programmed sender's fax number and ID code, see "SENDING AND RECEIVING CONFIDENTIAL FAXES" on page 46. • See "F-CODE MEMORY BOX" on - Sharp AR-M237 | AR-M237 | AR-M277 Operation Manual Suite - Page 176
after printing. • Multiple faxes can be received to an F-code confidential memory box. 1 In fax mode, touch the [SPECIAL MODES] key and then touch the [MEMORY BOX] key. SUB ADDRESS If the address book screen appears, touch SPECIAL MODES ADDRESS REVIEW SLOW SCAN MODE the [CONDITION DIRECT - Sharp AR-M237 | AR-M237 | AR-M277 Operation Manual Suite - Page 177
request transmission". Note • For information on Sharp's reqular relay broadcast function, which uses the programmed sender's number and relay ID code, see "SENDING FAXES USING THE RELAY REQUEST FUNCTION" on page 49. • To create an F-code relay broadcast memory box and program, edit, and delete - Sharp AR-M237 | AR-M237 | AR-M277 Operation Manual Suite - Page 178
finished. USING THE F-CODE RELAY REQUEST FUNCTION (your machine requests a relay broadcast) First ask the operator of the other F-code machine to create an F-code relay broadcast memory sub-address and passcode after the fax number. The document will be stored in the memory box of the relay machine, - Sharp AR-M237 | AR-M237 | AR-M277 Operation Manual Suite - Page 179
the connection. This procedure is called manual transmission. Note Automatic redialing ("If the receiving party is busy" (p.15)) will not take place if the line is busy. 1 Make sure that the machine is in fax mode. SCAN FAX JOB STATUS DATA LINE DATA CUSTOM SE When the [FAX] key light is on, the - Sharp AR-M237 | AR-M237 | AR-M277 Operation Manual Suite - Page 180
CORPORATION ACC.#-C SHARP GROUP key or a rapid key that includes a sub-address and passcode. 7 After the other party switches to fax reception, press 8 Replace the extension phone. RECEIVING A FAX AFTER TALKING (MANUAL RECEPTION) When an extension phone is connected to the machine and you - Sharp AR-M237 | AR-M237 | AR-M277 Operation Manual Suite - Page 181
the extension phone still lifted, touch the [FAX RECEIVE] key. FAX MEMORY:100% ADDRESS BOOK FAX RECEIVE Reception begins when the other party the received fax will be printed after the previously stored jobs are finished. • You can talk on the extension phone and manually receive a fax while the - Sharp AR-M237 | AR-M237 | AR-M277 Operation Manual Suite - Page 182
image sent as a fax. For more information on using the PC-FAX function, see the "Operation manual" that is installed along with the PC-FAX driver. To open the manual, click the Windows Start button, select "All Programs" ("Programs" in operating systems other than Windows XP), "SHARP PC-FAX Driver - Sharp AR-M237 | AR-M237 | AR-M277 Operation Manual Suite - Page 183
procedure for using programs is explained "PROGRAMMING FREQUENTLY USED OPERATIONS" on page 41, and the procedure for using relay groups is explained in "SENDING FAXES USING THE RELAY REQUEST FUNCTION" on page 49.) A combined total of 500 rapid keys and group keys can be stored. Eight programs and - Sharp AR-M237 | AR-M237 | AR-M277 Operation Manual Suite - Page 184
PROGRAMMING 3 Touch the [DIRECT ADDRESS / PROGRAM] key. ESS CONTROL The DIRECT ADDRESS / PROGRAM menu appears. DIRECT ADDRESS / PROGRAM 4 Touch the desired key and perform the programming operation. 5 See the pages indicated below for the operation you wish to perform. CUSTOM SETTINGS DIRECT - Sharp AR-M237 | AR-M237 | AR-M277 Operation Manual Suite - Page 185
for the name. Refer to page 80 for the procedure for entering letters. 2 Touch the [INITIAL] key. INITIAL NAME INDEX KEY NAME SHARP CORPORATION FAX 69 6 Touch the desired index key. DIRECT ADDRESS / RAPID NEXT INDEX SELECT THE CUSTOM INDEX WHERE YOU REGISTER THIS ADDRESS. USER 1 USER - Sharp AR-M237 | AR-M237 | AR-M277 Operation Manual Suite - Page 186
password after the fax number, go to step 12. Note • For information on sub-addresses and passwords, see "TRANSMISSION BETWEEN MACHINES SUPPORTING F-CODES FAX No See page 80 for the KEY NAME SHARP change either of the two settings. When finished, touch the [OK] key. Transmission speed - Sharp AR-M237 | AR-M237 | AR-M277 Operation Manual Suite - Page 187
right international correspondence mode can help alleviate these problems. • If errors frequently occur when sending a fax to a foreign country, try each of modes 1 to 3 and select the mode that enables the best transmission. 15 If you have finished programming rapid keys, touch the [EXIT] key. If - Sharp AR-M237 | AR-M237 | AR-M277 Operation Manual Suite - Page 188
finished editing or deleting, touch the [EXIT] key. 3 Touch the key of the item that you wish to change (change the information in the same way as you stored the information on pages 67 to 69). DIRECT ADDRESS / AMEND/DELETE DELETE EXIT NAME SHARP CORPORATION INITIAL S INDEX USER 3 FAX - Sharp AR-M237 | AR-M237 | AR-M277 Operation Manual Suite - Page 189
C GROUP CORPO. TPS B SHARP CORPORATION OK 1/1 10-KEY PAD ADDRESS REVIEW FREQUENT USE ABCD EFGHI JKLMN the [10-KEY PAD] key and enter a full fax number with the numeric keys. See steps 9 to 12 is 6 explained on page 80. 7 If you have finished programming group keys, touch the [EXIT] key. If you - Sharp AR-M237 | AR-M237 | AR-M277 Operation Manual Suite - Page 190
when the [ADDRESS REVIEW] key is touched. See step 4 on page 71. Rapid dial keys can also be deleted from the broadcast list. • When finished, touch the [OK ADDRESS. A B C GROUP SHARP CORPORATION CORPO. TPS OK 1/1 10-KEY PAD ADDRESS REVIEW DELETE THE ADDRESS? SHARP CORPORATION NO If you wish - Sharp AR-M237 | AR-M237 | AR-M277 Operation Manual Suite - Page 191
FAX TRANSMISSION" (p.24)) • The group key is included in the end receiving machines for an F-code relay broadcast operation. ("Editing or deleting a memory that includes dual page scanning are an original size PROGRAM FOR SHARP SETTINGS ADDRESS MODES ADDRESS REVIEW DIRECT TX MEMORY TX 6 - Sharp AR-M237 | AR-M237 | AR-M277 Operation Manual Suite - Page 192
FOR SHARP SETTINGS ADDRESS RESOLUTION SPECIAL MODES 2 ADDRESSES STANDARD POLLING NEXT EXIT EXPOSURE AUTO 6 If you are finished storing AMEND/DELETE SELECT ADDRESS TO AMEND/DELETE. PROGRAM PROGRAM FOR SHARP EMAIL NEWS GROUP ABYS FAX FOREMAT A EXIT ADDRESS BOOK RELAY GROUP 2 Touch the [ - Sharp AR-M237 | AR-M237 | AR-M277 Operation Manual Suite - Page 193
The number entry screen for the relay machine SHARP CORPO appears. RELAY STATION RECIPIENT 6 3 Press the numeric keys to enter the fax number of the relay machine. DIRECT ADDRESS / RELAY GROUP NEXT EXIT 01 RELAY STATION CANCEL OK ENTER THE RELAY STATION FAX No. VIA THE 10-KEY PAD, THEN - Sharp AR-M237 | AR-M237 | AR-M277 Operation Manual Suite - Page 194
REC. REC. ADDRESS REVIEW [DIAL] key Enter the fax number of the receiving to enter a group key number from 01 to 99 that is stored in the your SHARP service center. (Also see the operation manual for copier.) storing screen appears. 11 If you are finished storing relay groups, touch the [EXIT] key - Sharp AR-M237 | AR-M237 | AR-M277 Operation Manual Suite - Page 195
delete. DIRECT ADDRESS / AMEND/DELETE SELECT ADDRESS TO AMEND/DELETE. RELAY GROUP SHARP CORPORATION SHARP GROUP E CORPO. TPS D F G H EXIT ADDRESS BOOK 1/1 PROGRAM • completed and then edit or delete the relay group ("CANCELING A FAX TRANSMISSION" (p.24)). The relay group is included in a - Sharp AR-M237 | AR-M237 | AR-M277 Operation Manual Suite - Page 196
[OK] key. The new name appears in the screen of step 3. O CUSTOM INDEX 5 If you wish to program another index name, repeat steps 3 and 4. 6 When finished, touch the [OK] key. To change a user index name, re-enter the name as explained in steps 3 and 4. 3 Touch an index key ([USER 1] to [USER - Sharp AR-M237 | AR-M237 | AR-M277 Operation Manual Suite - Page 197
3 Touch the SENDING ADDRESS LIST key. B STATUS LINE DATA CUSTOM SETTINGS FAX REPORT SENDING ADDRESS LIST 2 Touch the [LIST PRINT] key. Y T NUMBER LIST GROUP LIST RELAY GROUP LIST PROGRAM LIST "PRINT JOB IN MEMORY. PLEASE WAIT UNTIL PRINT OUT." appears in the message display and printing - Sharp AR-M237 | AR-M237 | AR-M277 Operation Manual Suite - Page 198
a number or symbol. SPACE ABC abc AB/ab 12 The cursor ( ) moves forward and a space is entered. 5 Touch the key. NAME Sharp CANCEL OK SPACE 6 Touch the [ä] key. NAME Sharp ABC abc AB/ab 12 CANCEL OK SPACE ABC/abc To switch between upper case and lower case, touch the key. When - Sharp AR-M237 | AR-M237 | AR-M277 Operation Manual Suite - Page 199
character entry. You can also enter numbers and symbols. 9 When finished, touch the [OK] key. NAME Sharp äÄ CANCEL OK SPACE ABC/abc You will exit the character entry screen " in the operation Note manual for copier. (The above explanation assumes that "KEYBOARD 1" is selected.) 6 81 - Sharp AR-M237 | AR-M237 | AR-M277 Operation Manual Suite - Page 200
PROGRAMMING Entering numbers and symbols 1 Touch the [AB/ab 12#$%] key. NAME CANCEL OK 3 When you have finished entering characters, touch the [OK] key. NAME CANCEL OK 1&1 SPACE ABC abc AB/ab 12 When the characters "12#$%" are highlighted, number/symbol entry mode - Sharp AR-M237 | AR-M237 | AR-M277 Operation Manual Suite - Page 201
TROUBLESHOOTING This chapter contains information to help you make efficient use of the fax features of the machine, including solutions to common problems ERROR REPORT ONLY / NO PRINTED REPORT G Receiving: PRINT OUT ALL REPORT / PRINT OUT ERROR REPORT IMAGE MEMORY PRINT SELECT SETTING" (p.99)) 83 - Sharp AR-M237 | AR-M237 | AR-M277 Operation Manual Suite - Page 202
polling memory box. F-code transmission was attempted, however, the other machine does not support F-code communication. An F-code transmission was refused by the other machine because of an incorrect sub-address or other reason. The communication handshake signals or image signals were distorted - Sharp AR-M237 | AR-M237 | AR-M277 Operation Manual Suite - Page 203
LIST Documents scanned into polling memory and F-code polling memory. G PASSCODE LIST Programmed sender information, relay request settings, and polling settings. G CONFIDENTIAL RECEPTION LIST..... Confidential box numbers (Sharp mode and F-code boxes) that have received faxes and the number - Sharp AR-M237 | AR-M237 | AR-M277 Operation Manual Suite - Page 204
cartridge. operation manual for copier CHANGE THE TONER CARTRIDGE. The toner cartridge is out of toner and the received document cannot be printed. → Replace the toner cartridge. THE MEMORY BECOMES The memory became full while the original was being 15 FULL. (Pg.No.XX) scanned. SEND SCANNED - Sharp AR-M237 | AR-M237 | AR-M277 Operation Manual Suite - Page 205
, see "TROUBLESHOOTING AND MAINTENANCE" in the operation manual for copier. Fax problems Trouble The machine does not operate correctly The machine does not operate. Transmission problems Dialing is not possible. Transmission is not possible. The transmitted image prints out blank at the receiving - Sharp AR-M237 | AR-M237 | AR-M277 Operation Manual Suite - Page 206
TROUBLESHOOTING FAX PROBLEMS Problems that are related to the fax function are explained in the following. For paper misfeeds, see "MISFEED REMOVAL" in the operation manual for copier. For general machine problems, copier problems, printer problems, and network scanner problems, see the - Sharp AR-M237 | AR-M237 | AR-M277 Operation Manual Suite - Page 207
time. → Set the clock to the correct time. A message appears in the display instructing you to add toner or paper. → Restore printing capability as instructed by the display message. Printing will begin. A paper tray is not selected for fax mode in the paper tray settings. → Select a paper tray for - Sharp AR-M237 | AR-M237 | AR-M277 Operation Manual Suite - Page 208
operator programs for the fax features of the machine. For key operator programs that are related to general operation, the copy function, the printer function, and the network scanner function, see the key operator's guide. To access the key operator programs, the key operator code must be entered - Sharp AR-M237 | AR-M237 | AR-M277 Operation Manual Suite - Page 209
SOUND: Medium FAX DEFAULT SETTINGS TRANSACTION REPORT PRINT SELECT SETTING • SINGLE SENDING: 98 PRINT OUT ERROR REPORT ONLY • BROADCASTING: PRINT OUT ALL REPORT • RECEIVING: NO PRINTED REPORT • CONFIDENTIAL RECEPTION: PRINT OUT NOTICE PAGE IMAGE MEMORY PRINT PRINT OUT ERROR 99 SELECT SETTING - Sharp AR-M237 | AR-M237 | AR-M277 Operation Manual Suite - Page 210
CASE OF • NUMBER OF 100 COMMUNICATION TIMES: 1 (times) ERROR • INTERVAL: 1 (min.) QUICK ON LINE Enabled 100 SENDING DEFAULT SENDING MEMORY TX 100 MODE AUTO COVER SHEET Disabled 100 SLOW SCAN MODE Disabled 100 FAX RECEIVE SETTINGS AUTO RECEIVE Enabled 101 REDUCE SETTING DUPLEX - Sharp AR-M237 | AR-M237 | AR-M277 Operation Manual Suite - Page 211
NUMBER PRINT POSITION SETTING ROTATION SENDING SETTING CALL TIMER AT MEMORY SENDING RECALL IN CASE OF LINE BUSY RECALL IN CASE OF COMMUNICATION ERROR QUICK ON LINE SENDING DEFAULT SENDING MODE AUTO COVER SHEET SLOW SCAN MODE FAX RECEIVE SETTINGS AUTO RECEIVE REDUCE SETTING DUPLEX RECEPTION SETTING - Sharp AR-M237 | AR-M237 | AR-M277 Operation Manual Suite - Page 212
of key operator programs. KEY OPERATOR PROGRAMS ACCOUNT CONTROL ENERGY SAVE COPY SETTINGS PRINT SETTINGS LIST PRINT KEY OPERATOR CODE CHANGE OPERATION SETTINGS SCANNER SETTINGS PRODUCT KEY EXIT DEVICE CONTROL FAX SETTINGS 5 Use the numeric keys to enter the new 5-digit key operator - Sharp AR-M237 | AR-M237 | AR-M277 Operation Manual Suite - Page 213
KEY OPERATOR PROGRAMS KEYS USED IN KEY OPERATOR PROGRAMS Example: Auditing mode KEY OPERATOR PROGRAMS ACCOUNT CONTROL 1 AUDITING MODE 2 TOTAL PAGES PER ACCOUNT RESETTING ACCOUNT OK 1/3 The following keys appear in screens that require the entry of numerical values. 20 (1 999) 3 4 5 1 - Sharp AR-M237 | AR-M237 | AR-M277 Operation Manual Suite - Page 214
printer function, and the network scanner function, see the key operator's guide. Note You can check key operator program settings for the fax function by printing them out. ("LIST PRINT" (p.105)) FAX SETTINGS KEY OPERATOR PROGRAMS FAX SETTINGS OK FAX DEFAULT SETTINGS FAX RECEIVE SETTINGS FAX - Sharp AR-M237 | AR-M237 | AR-M277 Operation Manual Suite - Page 215
of the resolution settings, see page 21. INITIAL EXPOSURE SETTING This program is used to set the default exposure for scanning in fax mode. [AUTO] or [MANUAL] can be selected for the exposure. When [MANUAL] is selected, the exposure can be adjusted to one of five levels. [1] is the lightest level - Sharp AR-M237 | AR-M237 | AR-M277 Operation Manual Suite - Page 216
01 AM PM Touch the [HOUR] key and then set the hour by touching the and keys. Set the minute in the same way. Touch [AM] or [PM] and then touch the [OK] key. 98 [AUTO PRINT AT MEMORY FULL] and [PRINT DAILY AT DESIGNATED TIME] can be simultaneously selected. The factory default - Sharp AR-M237 | AR-M237 | AR-M277 Operation Manual Suite - Page 217
KEY OPERATOR PROGRAMS IMAGE MEMORY PRINT SELECT SETTING This program is used to select the conditions for including a copy of part of the first page of the transmitted document on transaction reports. Selections are [PRINT OUT ALL REPORT], [PRINT OUT ERROR REPORT ONLY], and [NO PRINTED REPORT]. - Sharp AR-M237 | AR-M237 | AR-M277 Operation Manual Suite - Page 218
a line error. One scanning a document into polling memory or F-code polling memory, or when performing polling, direct transmission, relay broadcast transmission, F-code relay broadcast transmission, or manual transmission. This program is initially disabled (factory default setting). SLOW SCAN - Sharp AR-M237 | AR-M237 | AR-M277 Operation Manual Suite - Page 219
. This program is initially disabled (factory default setting). RECEIVED DATA PRINT CONDITION When this program is enabled and a received fax is held in memory because there is a problem that prevents printing such as no suitable paper, any faxes received after that fax which can be printed will be - Sharp AR-M237 | AR-M237 | AR-M277 Operation Manual Suite - Page 220
POLLING SECURITY SETTING When performing polling memory, enable this program to restrict default setting). Note When polling security is enabled, store the fax fax number is called a relay ID code. The other machine must be a Sharp machine (excluding certain models). Up to 10 relay ID codes - Sharp AR-M237 | AR-M237 | AR-M277 Operation Manual Suite - Page 221
. Three types of memory boxes can be programmed: F-code memory polling boxes, F-code confidential boxes, and F-code relay broadcast boxes. Follow the procedure below to program, edit, or delete a memory box. Programming an F-code memory box A box name, sub-address, password, and specific functions - Sharp AR-M237 | AR-M237 | AR-M277 Operation Manual Suite - Page 222
when your machine is the relay machine and receives a fax in its F-code relay broadcast memory box. Note • A total of 120 end receiving machines KEY PAD] key to enter full fax numbers with the numeric keys. 4 To check the stored end receiving machines, touch the [ADDRESS REVIEW] key. A list of the - Sharp AR-M237 | AR-M237 | AR-M277 Operation Manual Suite - Page 223
PROGRAMS LIST G FAX ACCOUNT USAGE LIST* G CONFIDENTIAL CODE LIST G F-CODE MEMORY BOX LIST G JUNK FAX NUMBER LIST * Only appears when AUDITING MODE is enabled in the key operator programs. The factory default setting for AUDITING MODE is disabled. (See the key operator's guide.) To print a list - Sharp AR-M237 | AR-M237 | AR-M277 Operation Manual Suite - Page 224
9 Chapter 9 APPENDIX This chapter contains reference information regarding the fax features of the machine. 106 - Sharp AR-M237 | AR-M237 | AR-M277 Operation Manual Suite - Page 225
Program function F-code support Automatic document feeding Image memory Error Correction Mode (ECM) Public switched telephone network MH, MR, MMR, JBIG (MMR and JBIG during Super G3 transmission) Super G3, G3 (the machine can only send faxes to and receive faxes from machines that support G3 or - Sharp AR-M237 | AR-M237 | AR-M277 Operation Manual Suite - Page 226
feeder tray 6, 10 Document glass 6, 10 Dual page scan 40 E Editing and deleting - F-code memory boxes 103 - Group indexes 78 - Group keys 72 - Programs 74 - Rapid keys 70 - Relay group 77 Entering characters 80 Exposure, selecting 22 Extension phone 61 F Fax default settings 96 Fax - Sharp AR-M237 | AR-M237 | AR-M277 Operation Manual Suite - Page 227
6 Parts of the machine 6 Passcode list 85 Passcodes 52 Pause 13 PC-FAX 64 Polling function - Polling function 33 - Polling security 38 - Serial polling 32 Polling memory 35 Polling memory (Public Box 35 Power switch 3, 6 Printing - Confidential boxes 48 - F-code confidential memory boxes - Sharp AR-M237 | AR-M237 | AR-M277 Operation Manual Suite - Page 228
Exposure, selecting 22 Programming - F-code memory boxes 103 - Group indexes 78 - Group keys 71 - Programming 65 - Programs 73 - Rapid dial keys 67 - Relay groups 75 Resolution, selecting 21 Scanning size 20 Speaker volume setting 98 Troubleshooting Alarm sounds 86 Communication activity - Sharp AR-M237 | AR-M237 | AR-M277 Operation Manual Suite - Page 229
indicated on the copying machine. The registration number is indicated on the fax printed circuit board and on the copying machine. AVIS POUR NOS UTILISATEURS AU CANADA AVIS la norme NMB-003 du Canada. Sharp Electronics of Canada Ltd. 335 Britannia Road East, Mississauga, Ontario, L4Z 1W9 Canada - Sharp AR-M237 | AR-M237 | AR-M277 Operation Manual Suite - Page 230
AR-M230/M270 Series Online Manual Start Click this "Start" button. - Sharp AR-M237 | AR-M237 | AR-M277 Operation Manual Suite - Page 231
your model, see "PART NAMES AND FUNCTIONS" in the operation manual for copier. ● This manual refers to the Reversing single pass feeder as the "RSPF". ● The screen images and procedures that appear in this manual are mainly for Windows® XP. With other versions of Windows®, some screen images may be - Sharp AR-M237 | AR-M237 | AR-M277 Operation Manual Suite - Page 232
can click on a bookmark to jump directly to that section. How to Print Out This Manual To print this manual, select "Print" from the "File" menu of Acrobat Reader. Select the desired printer settings in the "Print" dialog box, and then click the "OK" button. Takes you back page by page. CONTENTS - Sharp AR-M237 | AR-M237 | AR-M277 Operation Manual Suite - Page 233
Rotating the print image 180 degrees 13 Printing a watermark Stapling printed pages (when a finisher is installed) 14 15 5 INDEX Giving priority to a print job 16 Canceling a print job 17 2 PRINTER SHARING Sharing the printer using windows networking 18 Shared printer settings 19 Client - Sharp AR-M237 | AR-M237 | AR-M277 Operation Manual Suite - Page 234
will appear. 4 Make sure that "SHARP AR-XXXX" is selected as the printer. If you need to change any print settings, click the "Preferences" button ("Properties" button in Windows 95/98/Me/NT 4.0) to open the printer driver setup screen. The printer driver setup screen will appear. ON LINE indicator - Sharp AR-M237 | AR-M237 | AR-M277 Operation Manual Suite - Page 235
key in the touch panel, and specify the same paper type as in the printer driver. (part 2) When "Paper Selection" is set to "Auto Select" If "Paper Selection" is set to "Auto Select" in the "Paper" tab of the printer driver setup screen and the correct size of paper for a print job is not loaded in - Sharp AR-M237 | AR-M237 | AR-M277 Operation Manual Suite - Page 236
" in the operation manual for copier. If you wish to select the "Paper Source" or "Paper Type" when printing, be sure to select these settings in the "Configuration" tab of the printer driver setup screen. (See "CONFIGURING THE PRINTER DRIVER" in the software setup guide.) You selected a "Paper - Sharp AR-M237 | AR-M237 | AR-M277 Operation Manual Suite - Page 237
Click the "SHARP AR-XXXX" printer driver icon and select "Properties" from the "File" menu. 3 Click the "SHARP AR-XXXX" printer driver icon and select "Properties" from the "File" menu. In Windows NT 4.0, select "Document Defaults" to open Note the printer driver setup screen. 3 In Windows 95/98 - Sharp AR-M237 | AR-M237 | AR-M277 Operation Manual Suite - Page 238
of the window and then click the setting. Some restrictions exist on the combinations of settings that can be selected in the printer driver setup screen. When exit the from a list of choices. dialog box. 3 Print setting image 8 "Cancel" button This shows the effect of the Click this button - Sharp AR-M237 | AR-M237 | AR-M277 Operation Manual Suite - Page 239
printer driver setup screen and select "2-Sided (Book)" or "2-Sided (Tablet)" from "Document Style" in the "Main" tab. ☞See Basic printing for details on how to open the printer driver . (See "CUSTOM SETTINGS" in the operation manual for copier.) ● Two-sided printing is not possible if disabled - Sharp AR-M237 | AR-M237 | AR-M277 Operation Manual Suite - Page 240
driver setup screen and select "2-Up" or "4-Up" for "N-Up Printing" on the "Main" tab. ☞See Basic printing for details on how to open the printer driver. The "N-Up Printing" setting is not available when "Fit To Paper Size" is selected. Note ☞Fitting the printed image to the paper N-Up Border - Sharp AR-M237 | AR-M237 | AR-M277 Operation Manual Suite - Page 241
when "N-Up Printing" is selected. Note ☞Printing multiple pages on one page 1 Click the "Paper" tab in the printer driver setup screen. 2 Select the original size (Ledger) of the print image in "Paper Size". 4 Select the actual size of paper to be used for printing (Letter). The size of the - Sharp AR-M237 | AR-M237 | AR-M277 Operation Manual Suite - Page 242
printer driver. The following example shows correct and incorrect rotation of an address printed on an envelope. Print data Printing result Portrait Rotate 180 degrees Portrait Rotate 180 degrees ABCD ABCD ABCD Note The procedure for loading paper is explained in operation manual for copier - Sharp AR-M237 | AR-M237 | AR-M277 Operation Manual Suite - Page 243
, click the "Watermarks" tab, and follow the steps below. ☞See Basic printing for details on how to open the printer driver. How to Print a Watermark From the "Watermark" drop-down list, select the watermark that you wish to print (for example "CONFIDENTIAL"), and start printing. Print - Sharp AR-M237 | AR-M237 | AR-M277 Operation Manual Suite - Page 244
B5, and Foolscap. ● Paper types that can be used for staple printing are Plain, Letter Head, Recycled and Color. ● Staple printing is not possible when the ROPM function is disabled. (See "CONFIGURING THE PRINTER DRIVER" in the software setup guide.) ● Stapling is not possible if disabled in the key - Sharp AR-M237 | AR-M237 | AR-M277 Operation Manual Suite - Page 245
print job status screen to give priority to the job. For more information on using the job status screen, see operation manual for copier. 1 Press the [JOB STATUS] key. FAX JOB STATUS LINE DATA CUSTOM SETTING 4 Touch the [PRIORITY] key. A message appears asking you TING DETAIL to confirm the - Sharp AR-M237 | AR-M237 | AR-M277 Operation Manual Suite - Page 246
in progress or waiting to be printed can be canceled. Use the print job status screen to cancel the job. 1 Press the [JOB STATUS] key. FAX JOB STATUS LINE DATA CUSTOM SETTING 3 The job in progress and the jobs waiting to be printed appear. Touch the key of the job that - Sharp AR-M237 | AR-M237 | AR-M277 Operation Manual Suite - Page 247
SHARING Sharing the printer using windows networking The machine can be used as a shared printer in a Windows 95/98/Me/NT 4.0/2000/XP network environment. Note that the Windows network environment must already be established. Client Print server Shared printer Client Client "Print server - Sharp AR-M237 | AR-M237 | AR-M277 Operation Manual Suite - Page 248
, open the printer folder and continue the setup procedures from Step 6. 6 Click "Printers and Other Hardware" in the control panel, and click "Printers and Faxes". In operating systems other than Windows XP, double-click the printer icon. 7 Click the "SHARP AR-XXXX" printer driver icon and select - Sharp AR-M237 | AR-M237 | AR-M277 Operation Manual Suite - Page 249
click "Printers and Faxes". In Windows 95/98/Me/2000, click "Printers". 3 Click "Add a printer" in "Printer Tasks". In Windows 95/98/Me/2000, double-click the "Add Printer" icon. The "Add Printer Wizard" will appear. 4 Click the "Next" button. 5 Select "A network printer, or a printer attached to - Sharp AR-M237 | AR-M237 | AR-M277 Operation Manual Suite - Page 250
the printer to be shared in the network, click the "OK" button and then click the "Next" button. CONTENTS INDEX The contents of this window will vary depending on your network environment. 8 Select settings in the "Default Printer" screen, and click the "Next" button. 9 Click the "Finish" button - Sharp AR-M237 | AR-M237 | AR-M277 Operation Manual Suite - Page 251
properties after installing the printer driver. For the procedure for installing the printer driver, see "INSTALLING THE SOFTWARE" in the Software Setup Guide. 1 Click the "Start" button, select "Settings", and then click "Printers". 2 Click the "SHARP AR-XXXX" printer driver icon and select - Sharp AR-M237 | AR-M237 | AR-M277 Operation Manual Suite - Page 252
describes how to solve printer problems. Refer to the relevant section based on the problem. To load paper, remove paper misfeeds, load staples in the finisher, remove jammed staples, or replace the toner cartridge, see "TROUBLESHOOTING" in operation manual for copier. Printing does not take - Sharp AR-M237 | AR-M237 | AR-M277 Operation Manual Suite - Page 253
are USB and parallel cables. Check which type of cable is supported by your computer. For the specifications of the interface cable, see "CONNECTING TO A COMPUTER" in the software setup guide. ■ If the interface cable becomes disconnected If the interface cable becomes disconnected, even only - Sharp AR-M237 | AR-M237 | AR-M277 Operation Manual Suite - Page 254
you are using Windows XP, the "Found New Hardware Note Wizard" may appear after you change the port setting. In this case, click the "Cancel" button to close the wizard, and then reinstall the printer driver as explained in "INSTALLING THE SOFTWARE" in the software setup guide. CONTENTS INDEX 25 - Sharp AR-M237 | AR-M237 | AR-M277 Operation Manual Suite - Page 255
above errors occurs, a message will appear in the touch panel to alert you. Follow the instructions in the message to clear the error. Printing will automatically resume when the error is cleared. For information on handling errors, see "TROUBLESHOOTING" in the operation manual for copier. CONTENTS - Sharp AR-M237 | AR-M237 | AR-M277 Operation Manual Suite - Page 256
" and then click "Printers". 2 Check if the "SHARP AR-XXXX" printer driver icon is shown. If the printer icon of the machine does not appear, the printer driver is not installed correctly. Follow the instructions in the software setup guide to correctly install the printer driver. ■ Is your machine - Sharp AR-M237 | AR-M237 | AR-M277 Operation Manual Suite - Page 257
in the "Advanced" tab of the printer driver is "Normal" or "Photo", slow printing may result. Be sure to select a print quality that is suitable for the document or image being printed. Stapling is not possible (when a finisher is installed) ■ Is stapling disabled in the key operator programs - Sharp AR-M237 | AR-M237 | AR-M277 Operation Manual Suite - Page 258
TROUBLESHOOTING Print quality is not satisfactory Check the paper being used ■ Non-standard paper used? Check that the paper conforms to the specification. Refer to "LOADING PAPER" in the operation manual for copier printing takes place on the back side, toner will not adhere well to the paper and - Sharp AR-M237 | AR-M237 | AR-M277 Operation Manual Suite - Page 259
3 TROUBLESHOOTING Print quality is not satisfactory (part 2) The printed image is coarse ■ Has the printer driver been specified to suit both paper and the print job? You can select "Draft", "Normal" or "Photo" for the print quality in the "Advanced" tab of the printer driver setup screen. When " - Sharp AR-M237 | AR-M237 | AR-M277 Operation Manual Suite - Page 260
executed. screen. (See "CONFIGURING THE PRINTER DRIVER" in the software setup guide.) If you wish to use the ROPM function, set the print quality to "Draft" or increase memory. Please refer to the operation manual for the solution method. When the Staple function is selected: Select "Draft" for - Sharp AR-M237 | AR-M237 | AR-M277 Operation Manual Suite - Page 261
"SHARP AR-M230/M270 Series Printer Driver" from the list of applications. For more information, refer to your operating manual or to the help files for your operating system. 4 Restart your computer. When reinstalling the printer driver, install it correctly as Note explained in software setup guide - Sharp AR-M237 | AR-M237 | AR-M277 Operation Manual Suite - Page 262
default setting for memory used for the printer function is 16 MB. The proportion of IMC memory allocated to the printer function can be changed in the key operator programs. See "MEMORY FOR PRINTER" in the key operator's guide. As a part of our policy of continuous improvement, SHARP reserves - Sharp AR-M237 | AR-M237 | AR-M277 Operation Manual Suite - Page 263
manual 3 I "Image Orientation 13 IMC memory 31 Introduction 2 N Notice Page 31 "N-Up Printing 11 O ON LINE indicator 5 Opening the printer 8 "Output 6 P "Paper Selection 6 "Paper Source 7 "Paper Type 7 Part of the printed image is missing....30 PRINT 5 [PRINT] key 5 Printer driver
-
 1
1 -
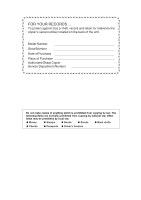 2
2 -
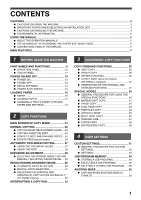 3
3 -
 4
4 -
 5
5 -
 6
6 -
 7
7 -
8
-
9
-
10
-
11
-
12
-
13
-
14
-
15
-
16
-
17
-
18
-
19
-
20
-
21
-
22
-
23
-
24
-
25
-
26
-
27
-
28
-
29
-
30
-
31
-
32
-
33
-
34
-
35
-
36
-
37
-
38
-
39
-
40
-
41
-
42
-
43
-
44
-
45
-
46
-
47
-
48
-
49
-
50
-
51
-
52
-
53
-
54
-
55
-
56
-
57
-
58
-
59
-
60
-
61
-
62
-
63
-
64
-
65
-
66
-
67
-
68
-
69
-
70
-
71
-
72
-
73
-
74
-
75
-
76
-
77
-
78
-
79
-
80
-
81
-
82
-
83
-
84
-
85
-
86
-
87
-
88
-
89
-
90
-
91
-
92
-
93
-
94
-
95
-
96
-
97
-
98
-
99
-
100
-
101
-
102
-
103
-
104
-
105
-
106
-
107
-
108
-
109
-
110
-
111
-
112
-
113
-
114
-
115
-
116
-
117
-
118
-
119
-
120
-
121
-
122
-
123
-
124
-
125
-
126
-
127
-
128
-
129
-
130
-
131
-
132
-
133
-
134
-
135
-
136
-
137
-
138
-
139
-
140
-
141
-
142
-
143
-
144
-
145
-
146
-
147
-
148
-
149
-
150
-
151
-
152
-
153
-
154
-
155
-
156
-
157
-
158
-
159
-
160
-
161
-
162
-
163
-
164
-
165
-
166
-
167
-
168
-
169
-
170
-
171
-
172
-
173
-
174
-
175
-
176
-
177
-
178
-
179
-
180
-
181
-
182
-
183
-
184
-
185
-
186
-
187
-
188
-
189
-
190
-
191
-
192
-
193
-
194
-
195
-
196
-
197
-
198
-
199
-
200
-
201
-
202
-
203
-
204
-
205
-
206
-
207
-
208
-
209
-
210
-
211
-
212
-
213
-
214
-
215
-
216
-
217
-
218
-
219
-
220
-
221
-
222
-
223
-
224
-
225
-
226
-
227
-
228
-
229
-
230
-
231
-
232
-
233
-
234
-
235
-
236
-
237
-
238
-
239
-
240
-
241
-
242
-
243
-
244
-
245
-
246
-
247
-
248
-
249
-
250
-
251
-
252
-
253
-
254
-
255
-
256
-
257
-
258
-
259
-
260
-
261
-
262
-
263
 |
 |
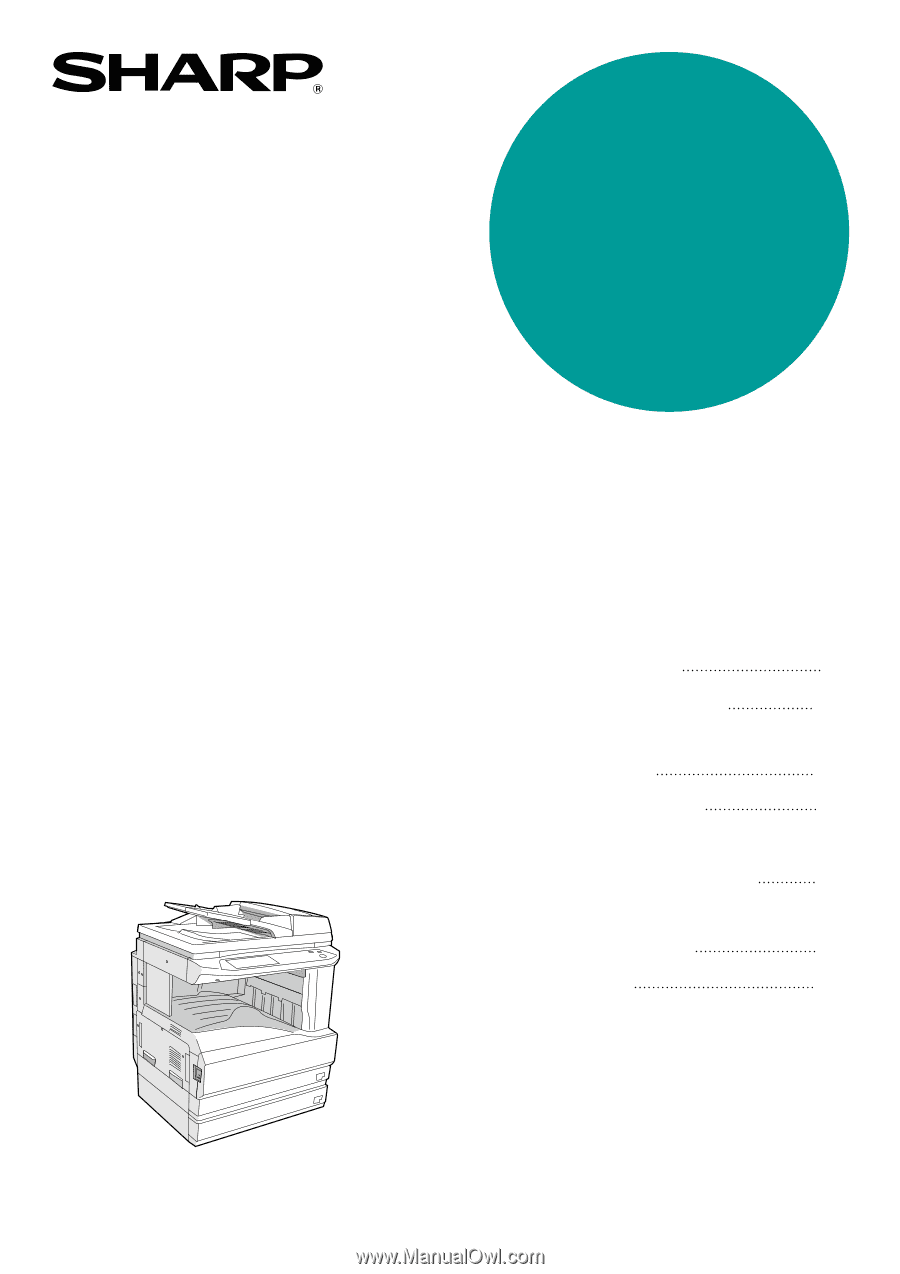
MODEL
AR-M237
AR-M277
DIGITAL MULTIFUNCTIONAL
SYSTEM
OPERATION MANUAL
(for copier)
•
BEFORE USING
THE MACHINE
•
COPY FUNCTIONS
•
CONVENIENT COPY
FUNCTIONS
•
USER SETTINGS
•
TROUBLESHOOTING
AND MAINTENANCE
•
PERIPHERAL DEVICES
AND SUPPLIES
•
APPENDIX
8
21
35
51
57
76
80
Page