Toshiba Satellite Pro 4300 User Manual
Toshiba Satellite Pro 4300 Manual
 |
View all Toshiba Satellite Pro 4300 manuals
Add to My Manuals
Save this manual to your list of manuals |
Toshiba Satellite Pro 4300 manual content summary:
- Toshiba Satellite Pro 4300 | User Manual - Page 1
TOSHIBA USER'S MANUAL Model 4200/4300 Series R - Toshiba Satellite Pro 4300 | User Manual - Page 2
herein. Toshiba Satellite Pro 4200/4300 Series Portable Personal Computer User's Manual First edition January 2000 Disclaimer This manual has been validated and reviewed for accuracy. The instructions and descriptions it contains are accurate for the Satellite Pro 4200/4300 Series Portable Personal - Toshiba Satellite Pro 4300 | User Manual - Page 3
EU Declaration of Conformity This product carries the CE-Mark in accordance with the related European Directives. CE-Marking is the responsibility of Toshiba Europe, Hammfelddamm 8, 41460 Neuss, Germany. User's Manual iii - Toshiba Satellite Pro 4300 | User Manual - Page 4
iv User's Manual - Toshiba Satellite Pro 4300 | User Manual - Page 5
as a "CLASS 1 LASER PRODUCT". To use this model properly, read the instruction manual carefully and keep this manual for your future reference. In case of any trouble with this model, please contact your nearest "AUTHORISED service station". To prevent direct exposure to the laser beam, do not try - Toshiba Satellite Pro 4300 | User Manual - Page 6
as a "CLASS 1 LASER PRODUCT". To use this model properly, read the instruction manual carefully and keep this manual for your future reference. In case of any trouble with this model, please contact your nearest "AUTHORISED service station". To prevent direct exposure to the laser beam, do not try - Toshiba Satellite Pro 4300 | User Manual - Page 7
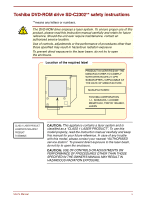
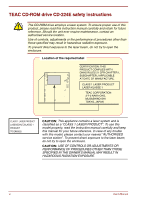
Toshiba CD-ROM drive XM-1902B safety instructions The CD-ROM drive employs a laser system. To ensure proper use of this product, please read this instruction manual carefully and retain for future reference. Should the unit ever require maintenance, contact an authorised service location. Use of - Toshiba Satellite Pro 4300 | User Manual - Page 8
Toshiba text of the manual. Stress injury Carefully read the Safety Instruction Manual. It contains information long time, avoid direct contact with the metal plate supporting the I/O ports. It can become hot. Mobile phones Use remove a PC card that has been used for a long time. viii User's Manual - Toshiba Satellite Pro 4300 | User Manual - Page 9
still fulfils the required standards. To avoid in general EMC problems following advice should be observed: Only CE marked options should devices or machines in the near surrounding area Therefore Toshiba strongly recommend that the electromagnetic compatibility of this product . User's Manual ix - Toshiba Satellite Pro 4300 | User Manual - Page 10
termination point. In the event of problems, you should contact your equipment supplier Specific switch settings or software setup are required for each network, please refer to the relevant sections of the user guide specific function on specific national networks can be given. x User's Manual - Toshiba Satellite Pro 4300 | User Manual - Page 11
the display closed 2-1 Left side 2-2 Right side 2-3 Back side 2-4 Underside 2-6 Front with the display open 2-7 Indicators 2-8 Drives...2-10 3 ½" diskette drive 2-10 DVD-ROM drive (available for some Satellite Pro 4320 Series) ..... 2-10 CD-ROM drive 2-12 AC adaptor 2-13 User's Manual xi - Toshiba Satellite Pro 4300 | User Manual - Page 12
Restoring the complete system 3-8 Restoring Toshiba utilities and drivers 3-8 Chapter 4: Operating Basics 4-1 Using AccuPoint™ II 4-1 AccuPoint™ II precautions 4-2 Replacing the cap 4-2 Using CD-ROM/DVD-ROM drives 4-3 Loading compact discs 4-3 Removing compact discs 4-6 Disk care 4-7 CDs - Toshiba Satellite Pro 4300 | User Manual - Page 13
Replacing the battery pack 6-8 Removing the battery pack 6-8 Installing the battery pack 6-10 Starting the computer by password 6-11 Power-up modes 6-12 Hotkeys 6-13 TSETUP 6-13 Panel power off 6-13 System auto off 6-13 Auto Power On 6-13 Ring indicator power on 6-14 User's Manual xiii - Toshiba Satellite Pro 4300 | User Manual - Page 14
SYSTEM SETUP 7-3 Default configuration 7-3 TSETUP options 7-4 Memory 7-4 Password 7-4 Battery 7-4 Hard Disk Mode 7-7 Password security 7-15 How to set the passwords 7-16 How to reset the passwords 7-18 Enabling TSETUP access in user password mode 7-20 Making a password service diskette - Toshiba Satellite Pro 4300 | User Manual - Page 15
9: Troubleshooting 9-1 Problem solving process 9-1 Preliminary checklist 9-1 Analysing the problem 9-2 Hardware and system checklist 9-3 System start-up 9-3 Self test 9-3 Power 9-4 Password 9-6 Hotkeys 9-6 Keyboard 9-6 LCD panel 9-7 Hard disk drive 9-7 CD-ROM drive 9-8 User's Manual - Toshiba Satellite Pro 4300 | User Manual - Page 16
need further assistance 9-25 Before you call 9-25 Where to write 9-25 Appendix A: Specifications A-1 Appendix B: AC Power Cord and Connectors B-1 Appendix C: The Toshiba International Warranty C-1 Appendix D: Keyboard Layouts D-1 Appendix E: Display Controller and Modes E-1 Appendix F: If - Toshiba Satellite Pro 4300 | User Manual - Page 17
-performance computing. This manual tells how to set up and begin using your Satellite Pro 4200 or 4300 Series computer. It also provides detailed information on configuring your computer, basic operations and care, using optional devices and troubleshooting. If you are a new user of computers or if - Toshiba Satellite Pro 4300 | User Manual - Page 18
's power resources and battery save modes. Chapter 7, Setup and Password Security, explains how to configure the computer using the TSETUP program. It also tells how to set a password. Chapter 8, Optional Devices, describes the optional hardware available. Chapter 9, Troubleshooting, provides - Toshiba Satellite Pro 4300 | User Manual - Page 19
action such as ABC clicking an icon or entering text, the icon's name or the text icon. Messages Messages are used in this manual to bring important information to your attention. that improper use of equipment or failure to follow instructions may cause data loss or damage your equipment. - Toshiba Satellite Pro 4300 | User Manual - Page 20
xx User's Manual - Toshiba Satellite Pro 4300 | User Manual - Page 21
not preinstalled by Toshiba. Equipment checklist Carefully unpack your computer. Save the box and packing materials for future use. Check to make sure you have all the following items: Satellite Pro 4200 or 4300 Series Portable Personal Computer Universal AC adaptor and power cord Spare AccuPoint - Toshiba Satellite Pro 4300 | User Manual - Page 22
: • Satellite Pro 4200 or 4300 Series Personal Computer User's Manual • Satellite Pro 4200 or 4300 Series QuickStart • Microsoft Windows manual package • Safety Instruction Manual If any of the items are missing or damaged, contact your dealer immediately. Features The computer uses Toshiba - Toshiba Satellite Pro 4300 | User Manual - Page 23
a 3D graphics accelerator to maximize video performance and enable flickerless display. It support features a peak bandwith of 2x the PCI bus. The universal AC adaptor provides power to the system and recharges the batteries. It comes with a detachable power cord User's Manual Introduction 1-3 - Toshiba Satellite Pro 4300 | User Manual - Page 24
. This drive supports the following formats: • Audio CD • CD-Extra • Photo CD™ • CDR (Read Only) • ISO 9660 • CD-Rewritable (Read Only) DVD-ROM drive A full-size, DVD-ROM drive module lets you run (available for Satellite either 12 cm (4.72") or 8 cm (3.15") digital video Pro 4320 Series - Toshiba Satellite Pro 4300 | User Manual - Page 25
. Use the USB drivers that come with external USB devices. If your operating system does not support USB, you can still use a USB mouse and keyboard by setting the USB Legacy item in TSETUP to Enabled. Refer to Chapter 7, Setup and Password Security, for details. User's Manual Introduction 1-5 - Toshiba Satellite Pro 4300 | User Manual - Page 26
video jack lets you transfer NTSC or PAL data to external devices. Memory expansion Two sockets are available for installation of 32, socket 64 or 128 MB memory modules. International modem A built-in modem provides capability for data and fax communication and supports User's Manual - Toshiba Satellite Pro 4300 | User Manual - Page 27
or cursor control. A microprocessor in the computer's intelligent power supply detects the battery's charge and calculates the remaining battery capacity. It also protects electronic components from abnormal conditions, such as voltage overload from an AC adaptor. User's Manual Introduction 1-7 - Toshiba Satellite Pro 4300 | User Manual - Page 28
Saver. If you use Windows 98, you can specify the Power Save Mode in the Running on batteries item of the Power Save Modes window in Power Saver. Two levels of password security are available: supervisor and user. This feature prevents unauthorized access to your computer. A hotkey function blanks - Toshiba Satellite Pro 4300 | User Manual - Page 29
power again, you can continue working right where you left off. The Resume mode is called Suspend/Resume in Windows 95 and Standby in Windows 98. The functions are essentially the same. Do not remove the battery pack while the computer is in Resume mode. Data in memory will be lost. User's Manual - Toshiba Satellite Pro 4300 | User Manual - Page 30
manual, help files or read.me files. Power Saver Utility Hardware setup TSETUP DVD Video Player (DVD models only) To access this power the Control Panel, double-click the Toshiba Hardware Setup icon. An easy-to-use Refer to Chapter 7, Setup and Password Security. The DVD Video Player is used to - Toshiba Satellite Pro 4300 | User Manual - Page 31
more powerful and convenient to use. The following options are available: Memory expansion Battery pack AC adaptor Battery Station III. However, Card Station III is not compatible with the Satellite Pro 4320. The Card Station IV provides the ports available on the User's Manual Introduction 1-11 - Toshiba Satellite Pro 4300 | User Manual - Page 32
1-12 Introduction User's Manual - Toshiba Satellite Pro 4300 | User Manual - Page 33
position. DISPLAY LATCH SYSTEM INDICATORS DISKETTE DRIVE Diskette drive Front of the computer with display closed This drive lets you use both 1.44 MB icons for monitoring the status of DC IN, Power, Battery, Built-in HDD and Diskette/CD-ROM drive. Details are given later in this chapter. - Toshiba Satellite Pro 4300 | User Manual - Page 34
side. SECURITY LOCK PC CARD SLOT MICROPHONE JACK HEADPHONE JACK FAN POWER POWER BUTTON PC CARD RESET LOCK LOCK VOLUME CONTROL The left side of the computer Power Press the power button to turn the computer's power on and off. Power button lock Set this lock to the locked position to - Toshiba Satellite Pro 4300 | User Manual - Page 35
either a CD-ROM drive or a DVD-ROM drive. See Chapter 4, Operating Basics, for information on using the drive and caring for CDs. DVD-ROM drive A full-size DVD-ROM drive module lets you run (available for Satellite either 12 cm (4.72") or 8 cm (3.15") digital video Pro 4320) disk/compact disk - Toshiba Satellite Pro 4300 | User Manual - Page 36
of AC adaptor that comes with the computer. Using the wrong adaptor can damage your computer. External monitor port This 15-pin port lets you connect an external video display. or other parallel device. This port supports Extended Capabilities Port (ECP) standard. 2-4 The Grand Tour User's Manual - Toshiba Satellite Pro 4300 | User Manual - Page 37
Video out Use this port to connect an external PS/2 compatible mouse or keyboard. The computer automatically recognizes which device you have connected when you turn on the power cover. Plug a RCA video connector into this jack for output of NTSC or PAL data. User's Manual The Grand Tour 2-5 - Toshiba Satellite Pro 4300 | User Manual - Page 38
This cover protects the battery pack, which powers the computer when the AC adaptor is not connected. For detailed information on the battery pack, refer to Chapter 6, Power and Power-Up Modes. Battery latch Slide this latch open to remove the battery pack. Expansion memory sockets Use these - Toshiba Satellite Pro 4300 | User Manual - Page 39
on the AC adaptor the display screen's image will be somewhat brighter than when it operates on battery power. The lower brightness level is intended to save battery power. Display hinges as audio alarms, such as low battery condition, generated by the system. User's Manual The Grand Tour 2-7 - Toshiba Satellite Pro 4300 | User Manual - Page 40
labelled keys) for numeric input when the Numeric mode icon lights green. Refer to the Keypad overlay section in Chapter 5, The Keyboard. 2-8 The Grand Tour User's Manual - Toshiba Satellite Pro 4300 | User Manual - Page 41
a low battery charge. Refer to Chapter 6, Power and Power-Up Modes. This indicator glows green when the computer is accessing the hard disk. This indicator glows green when the computer is accessing a diskette in the diskette drive or a disc in the CD-ROM/DVD-ROM drive. User's Manual The Grand - Toshiba Satellite Pro 4300 | User Manual - Page 42
data and damage the diskette or the drive. DVD-ROM drive (available for some Satellite Pro 4320 Series) A full-size DVD-ROM drive module lets you run either 12 cm (4.72") or 8 cm (3.15") digital video disk/compact disk without using an adaptor. The drive is configured as Regional Playback Control - Toshiba Satellite Pro 4300 | User Manual - Page 43
drive supports the following formats: DVD-ROM DVD-Video Audio CD CD-EXTRA Photo CD CD-R (read only) ISO 9660 CD-Rewritable (read only) EJECT BUTTON CD-IN-USE INDICATOR EJECT HOLE The DVD-ROM drive , Indian Subcontinent, Africa, North Korea, Mongolia China User's Manual The Grand Tour 2-11 - Toshiba Satellite Pro 4300 | User Manual - Page 44
drive lets you run either 12 cm (4.72") or 8 cm (3.15") compact discs without using an adaptor. The computer is configured with either a CD-ROM drive or a DVD-ROM drive. This drive supports the power to the computer is off. Check the Diskette/CD-ROM Drive indicator when you use the CD-ROM drive. Do - Toshiba Satellite Pro 4300 | User Manual - Page 45
and Power-Up Modes, for details. TOSHIBA The AC adaptor Use of the wrong adaptor could damage your computer. Toshiba assumes no liability for any damage in such case. The current ratings are: Satellite Pro 4300 series 60W, 15V DC, 4 Amperes All other models 45W, 15V DC, 3 Amperes User's Manual - Toshiba Satellite Pro 4300 | User Manual - Page 46
2-14 The Grand Tour User's Manual - Toshiba Satellite Pro 4300 | User Manual - Page 47
space - for your health and safety Connecting the AC adaptor Opening the display Turning on the power Turning off the power Restarting the computer Restoring the preinstalled software Setting up and peripheral devices Seating and posture Lighting Work habits User's Manual Getting Started 3-1 - Toshiba Satellite Pro 4300 | User Manual - Page 48
environment. Make sure there is adequate space around the computer for proper ventilation. Make sure the AC power cord connects to an outlet that is close to the computer and easily accessible. The temperature should be the same height and distance as the computer. 3-2 Getting Started User's Manual - Toshiba Satellite Pro 4300 | User Manual - Page 49
chair in relation to the computer and keyboard as well as the support it gives your body are primary factors in reducing work strain. Refer pressure on the back of your thighs. Adjust the back of your chair so it supports the lower curve of your spine. Sit straight so that your knees, hips and elbows - Toshiba Satellite Pro 4300 | User Manual - Page 50
pointers on exercises for such stress points as hands and wrists, please check with your library or book vendor. Also refer to the computer's Safety Instruction Manual. 3-4 Getting Started User's Manual - Toshiba Satellite Pro 4300 | User Manual - Page 51
cord to the AC adaptor 2. Connect the AC adaptor's DC output plug to the DC IN input port on the back of the computer. Connecting the adaptor to the computer 3. Plug the power cord into a live wall outlet. The Battery and DC IN indicators on the front of the computer should glow. User's Manual - Toshiba Satellite Pro 4300 | User Manual - Page 52
drive is empty. If a diskette is in the drive, press the eject button and remove the diskette. 2. Slide the power button lock to the left to unlock the power button. 3. Press and hold the computer's power button for two or three seconds. 3-6 Getting Started Turning on the power User's Manual - Toshiba Satellite Pro 4300 | User Manual - Page 53
a problem with a software application and the computer does not accept keyboard input, press the reset button. 5. Turn the power off, wait 10 to 15 seconds, then turn the power on again by pressing the power button. (This method works only when the computer is in boot mode.) User's Manual Getting - Toshiba Satellite Pro 4300 | User Manual - Page 54
. 4. After recovery is complete, remove the Product Recovery CD. 5. Press Ctrl + Alt + Del to restart the system. Refer to your Microsoft user's manual for Window's setup instructions. Restoring Toshiba utilities and drivers If Windows is working properly, individual drivers or applications can be - Toshiba Satellite Pro 4300 | User Manual - Page 55
gives information on basic operations including using AccuPoint™ II and using the CD-ROM/DVD-ROM drive. It also provides tips on caring for disks and your computer and on heat dispersal. Using menu item or to manipulate text or graphics designated by the pointer. User's Manual Operating Basics 4-1 - Toshiba Satellite Pro 4300 | User Manual - Page 56
™ II operation. For example, if You touch the AccuPoint™ II during power-up. You apply constant, soft pressure to the AccuPoint™ II. There after prolonged use. 1. To remove the AccuPoint™ II cap, firmly grasp the cap and pull it straight up. ACCUPOINT II CAP PEG Removing the AccuPoint™ II cap 2. - Toshiba Satellite Pro 4300 | User Manual - Page 57
(outer edge) DVD-ROM drive (available for Satellite Pro 4320 series) CD DVD 10.3-speed (centre) 24-speed (outer edge) 2.5-speed (centre) 6-speed (outer edge) Loading compact discs To load CDs, follow the steps below and refer to the accompanying figures. 1. Turn on the power. 2. a. Press the CD - Toshiba Satellite Pro 4300 | User Manual - Page 58
will not open the drawer when the computer's power is off. If the power is off, you can open the drawer by inserting a slender object (about 1.5 cm) such as a straightened paper clip into the eject hole just to the right of the eject button. Manual release with the eject hole 3. Grasp the drawer - Toshiba Satellite Pro 4300 | User Manual - Page 59
, label side up, in the drawer. Inserting a CD Be careful not to touch the lens or the area around it. Doing so could cause the drive to malfunction. 5. Press gently at the centre of the CD until you feel it click into place. The CD should lie below the top of - Toshiba Satellite Pro 4300 | User Manual - Page 60
pops open slightly, wait a moment to make sure the CD has stopped spinning before pulling the drawer fully open. Turn off the power before you use the eject hole. If the CD is spinning when you open the drawer, the CD could fly off the spindle and cause injury. 4-6 Operating Basics User's Manual - Toshiba Satellite Pro 4300 | User Manual - Page 61
can grasp it. Hold the CD gently and lift it out. Removing a CD 3. Push the centre of the drawer to close the edge on the centre hole. Fingerprints on the surface may prevent the drive from properly reading data. 5. Do not expose to direct sunlight, extreme . User's Manual Operating Basics 4-7 - Toshiba Satellite Pro 4300 | User Manual - Page 62
metal covering or touch the diskette's magnetic surface. Fingerprints may prevent the diskette drive from reading data from the diskette. 3. Data may be lost if the diskette in which it will be used. Selection using Toshiba utility This utility is used with Windows 95/98 and Windows NT. 1. Click - Toshiba Satellite Pro 4300 | User Manual - Page 63
icon with the primary mouse button to display a list of countries that the modem supports. A sub menu for telephony location information will also be displayed. A check will icon with the secondary mouse button to display the following menu. User's Manual The setting menu Operating Basics 4-9 - Toshiba Satellite Pro 4300 | User Manual - Page 64
disable the following settings: Show flags for country selection. The national flags of supported countries are displayed. AutoRun Mode The country-selecting utility starts automatically when you start cable into a telephone jack. 4-10 Operating Basics Connecting the internal modem User's Manual - Toshiba Satellite Pro 4300 | User Manual - Page 65
-in HDD and Diskette/CD-ROM/DVD-ROM drive indicators on the computer. If a diskette is in the diskette drive, remove it. If a CD-ROM is in the CD-ROM drive, remove it. Also make sure the CD-ROM drawer is securely closed. Turn off the power to the computer. Disconnect all peripherals before moving - Toshiba Satellite Pro 4300 | User Manual - Page 66
fan or lowers the CPU operating speed. Use Power Saver Utility or the TSETUP program to select one Auto 1 (Windows 98) the CPU processing speed. Battery optimized (Windows Lowers the CPU processing speed first, enters Resume mode and automatically shuts down. 4-12 Operating Basics User's Manual - Toshiba Satellite Pro 4300 | User Manual - Page 67
. The Shift keys, the Tab key, and the BkSp (backspace) key perform the same function as their typewriter counterparts but also have special computer functions. User's Manual The Keyboard 5-1 - Toshiba Satellite Pro 4300 | User Manual - Page 68
key, keys marked with icons execute specific functions on the computer. See the keyboard, it cannot be used if you have installed an American keyboard driver in MS-DOS or Windows. The Euro symbol By pressing Alt Gr patches and updates. You may need to update the fonts on your printer to be - Toshiba Satellite Pro 4300 | User Manual - Page 69
Toshiba computers and is used in combination with other keys to form soft keys. Soft keys are key combinations that enable, disable or configure specific scroll lock key. It also has additional Enter, Ctrl and Alt keys to the power on default for both settings is off. User's Manual The Keyboard 5-3 - Toshiba Satellite Pro 4300 | User Manual - Page 70
) to lock the cursor on a specific line. The power on default is off. Fn + Enter Press Fn + Enter to simulate Enter on the enhanced keyboard's numeric keypad. enter the password. If no password is set, press Enter or F1. See Chapter 7, Setup and Password Security. 5-4 The Keyboard User's Manual - Toshiba Satellite Pro 4300 | User Manual - Page 71
F2 changes the battery save mode. If you press Fn + F2 in a Windows 95 environment, an icon panel is displayed showing the setting. If you press Fn + F2 in a Windows 98 environment, the Power Scheme menu is Int. → Sim. → Ext. Ext. → Int. → Sim. Sim. → Ext. → Int. User's Manual The Keyboard 5-5 - Toshiba Satellite Pro 4300 | User Manual - Page 72
Toshiba keyboards. If you use an external keyboard attached to the computer, you can execute Fn key combinations by emulating the Fn key. For example, you might hold down left Shift + left Ctrl then press F3 to change the power up mode. See Chapter 7, Setup and Password The Keyboard User's Manual - Toshiba Satellite Pro 4300 | User Manual - Page 73
[ 4 5 6 - J End 1 K L 2 PgDn 3 : ; + " ´ N M < > ? , . / Ins 0 Del . / ~ Alt ` Ins Del BkSp } ] \ Enter Shift Home PgUp PgDn End The numeric keypad overlay Temporarily using normal keyboard Release Fn to continue using the overlay. User's Manual The Keyboard 5-7 - Toshiba Satellite Pro 4300 | User Manual - Page 74
. 3. Release Alt + Fn, and the ASCII character appears on the display screen. A list of ASCII characters with their codes is shown in Appendix G. 5-8 The Keyboard User's Manual - Toshiba Satellite Pro 4300 | User Manual - Page 75
• LED: Battery orange DC IN green • Operates • No charge • LED: Battery off DC IN green Power off (no operation) • Trickle charge • LED: Battery green DC IN green • Quick charge • LED: Battery orange DC IN green • No charge • LED: Battery off DC IN green User's Manual Power and Power-Up Modes - Toshiba Satellite Pro 4300 | User Manual - Page 76
. The AC adaptor must be connected to recharge the battery. Indicates the AC adaptor is connected and charging the battery. Indicates the AC adaptor is connected and the battery is fully charged. Under any other conditions, the indicator does not light. 6-2 Power and Power-Up Modes User's Manual - Toshiba Satellite Pro 4300 | User Manual - Page 77
power status with the AC adaptor connected: Green Indicates the AC adaptor is connected and supplying proper power to the computer. Flashing orange Indicates a problem with the power supply or overheating of the CPU. Plug the AC does not light. User's Manual Power and Power-Up Modes 6-3 - Toshiba Satellite Pro 4300 | User Manual - Page 78
(NiMH) battery and should be replaced only by your dealer or by a Toshiba service representative. The battery can explode if not properly replaced, used, handled or disposed of. Dispose of the battery as required by local ordinances or regulations. 6-4 Power and Power-Up Modes User's Manual - Toshiba Satellite Pro 4300 | User Manual - Page 79
properly. 9. Charge the battery pack only in the computer or in a battery charger designated as an approved option. 10. Reverse polarity should be avoided with all batteries. The battery is designed so that it cannot be installed in reverse polarity. User's Manual Power and Power-Up Modes 6-5 - Toshiba Satellite Pro 4300 | User Manual - Page 80
. To ensure the battery charges to its full capacity, charge the battery at room temperature of 10° to 30°C (50° to 88°F). The battery is nearly completely discharged. Leave the AC adaptor connected for a few minutes and the battery should begin charging. 6-6 Power and Power-Up Modes User's Manual - Toshiba Satellite Pro 4300 | User Manual - Page 81
7, Setup and Password Security. How often and how long you use the hard disk, CD-ROM and the diskette drive. How much charge the battery contained to begin with. How you use optional devices, such as a PC Card, to which the battery supplies power. Enabling Resume mode conserves battery power if - Toshiba Satellite Pro 4300 | User Manual - Page 82
battery pack while the computer is in Resume mode. Data in memory will be lost. 1. Save your work. 2. Turn the computer's power off. Make sure the Power indicator is off. 3. Remove all cables connected to the computer. 4. Turn the computer upside down. 6-8 Power and Power-Up Modes User's Manual - Toshiba Satellite Pro 4300 | User Manual - Page 83
battery cover 6. Lay the battery cover upside down. Push the latches to the outside and lift out the battery pack. Removing the battery pack For environmental reasons, do not throw away a spent battery pack. Please return spent battery packs to your Toshiba dealer. User's Manual Power and Power - Toshiba Satellite Pro 4300 | User Manual - Page 84
. 4. Lay the battery pack in the cover and make sure it is secured by the latches. Inserting the battery pack 5. Make sure the battery latch is set to the open position, then align the back edge of the cover with the icon and gently press down and back. 6-10 Power and Power-Up Modes User's Manual - Toshiba Satellite Pro 4300 | User Manual - Page 85
latch into place to secure the battery pack. Securing the battery cover Starting the computer by password If you registered a password as supervisor or user, you must enter it to start the computer. If you forget your password, use the password service diskette. For more information about how - Toshiba Satellite Pro 4300 | User Manual - Page 86
password service diskette is faulty. In this case, contact your dealer. If the boot priority is set for the hard disk, press the reset button and hold down F key to boot from the diskette drive. Power-up modes The computer has three power-up modes: Hibernation (saves data in memory to the hard disk - Toshiba Satellite Pro 4300 | User Manual - Page 87
power-up modes: Resume and Boot. See Chapter 7, Setup and Password Security, for details. The Resume mode is called Suspend/Resume in Windows 95 and Standby in Windows 98. The functions are essentially the same. Panel power off You can set up your computer so that power Power On - Toshiba Satellite Pro 4300 | User Manual - Page 88
signal from a remote modem, it sends a ring indicator power on call to the computer. This feature does not work with a PC Card under Windows 95. Refer to Chapter 7, Setup and Password Security, for an explanation of how to enable ring indicator power on. 6-14 Power and Power-Up Modes User's Manual - Toshiba Satellite Pro 4300 | User Manual - Page 89
SETUP screen is displayed when you execute the file TSETUP.EXE, which is stored in the Windows subdirectory on your hard disk. If the supervisor password is set and you log onto the computer with the user password, you cannot access the TSETUP program. User's Manual Setup and Password Security - Toshiba Satellite Pro 4300 | User Manual - Page 90
(1/2) and SYSTEM SETUP (2/2). SYSTEM SETUP (1/2) ACPI BIOS version = x.xx MEMORY DISPLAY Total = 65536 KB Power On Display = Auto-Selected PASSWORD Not Registered LCD Display Stretch = Disabled TV Config. OTHERS BATTERY Power-up Mode = Resume Battery Save Mode = Full power CPU Cache - Toshiba Satellite Pro 4300 | User Manual - Page 91
a specific group by pressing the first letter (highlighted) of the group's name. For example, press B to go to the Battery group. Accepting changes and exiting SYSTEM SETUP 1. settings are not changed: • Hard Disk Mode • Password • Write Policy User's Manual Setup and Password Security 7-3 - Toshiba Satellite Pro 4300 | User Manual - Page 92
's total memory. Password This option allows you to set or reset the user password for power on and instant security. Registered Not Registered The user password has been registered. The user password has not been registered. If the supervisor password has been registered, it must be entered to - Toshiba Satellite Pro 4300 | User Manual - Page 93
battery power. This option, allows you to set the battery save parameters on the sub-window, BATTERY SAVE OPTIONS. When you select this option, the automatic setting feature (Full Power or Low Power) is disabled and the user-preferred parameters become effective. User's Manual Setup and Password - Toshiba Satellite Pro 4300 | User Manual - Page 94
. Auto-Selected Simultaneous If a PS/2 mouse is connected to the computer when you turn on the power, the PS/2 mouse is enabled and the AccuPoint II is disabled. Otherwise, the AccuPoint II is the computer. Left Ctrl, Left Alt and Del cannot be used. 7-6 Setup and Password Security User's Manual - Toshiba Satellite Pro 4300 | User Manual - Page 95
change the setting, you will have to reformat the hard disk for the appropriate setting. Enhanced IDE (Normal) support Enhanced IDE. If this mode is selected with MS-DOS, up to 504 MB is logically available even though the disk's capacity is larger than 504 MB. User's Manual Setup and Password - Toshiba Satellite Pro 4300 | User Manual - Page 96
manually select a boot device by pressing one of the following keys while the computer is booting: F Selects the diskette drive. B Selects the HDD. C Selects the CD/DVD-ROM. This procedure does not affect the settings. Power an external monitor. 7-8 Setup and Password Security User's Manual - Toshiba Satellite Pro 4300 | User Manual - Page 97
Power On Display Lets you set the display to be used when the computer is booted. Auto-Selected Selects an external monitor if not you need to configure the computer with these options depends primarily on the kind of software or peripherals you use. User's Manual Setup and Password Security 7-9 - Toshiba Satellite Pro 4300 | User Manual - Page 98
: A supervisor password is set, but a user password is not set. If a supervisor password and a user password are both set and the user password is used to log onto the computer, this item will appear if no restriction is placed on the user password. 7-10 Setup and Password Security User's Manual - Toshiba Satellite Pro 4300 | User Manual - Page 99
and day. If the alarm date is set to Disabled, the computer will be powered on once when the set time is reached. Press ↓ to move the cursor to Battery Alarm Panel Close Alarm = Enabled = Enabled System Beep Use this feature to enable or disable the system beep. User's Manual Setup and Password - Toshiba Satellite Pro 4300 | User Manual - Page 100
Panel Power On/Off This option allows you to automatically turn your computer on or off by opening or closing the display panel. Second page port is the same as that for the Built-in Modem or Parallel port, the port(s) is set to Not Used or disabled. 7-12 Setup and Password Security User's Manual - Toshiba Satellite Pro 4300 | User Manual - Page 101
setting LPT 1 LPT 2 LPT 3 Not Used Others I/O address 378H 278H 3BCH Interrupt level 7 5 7 (Disables port) (Other settings made automatically by plug-and-play operating systems) User's Manual Setup and Password Security 7-13 - Toshiba Satellite Pro 4300 | User Manual - Page 102
does not work properly with the AutoSelected and CardBus/16bit settings, use this setting for 16-bit PC Cards. When Device Config is set to Setup by OS, you must set the PC Card to Auto-Selected. 7-14 Setup and Password Security User's Manual - Toshiba Satellite Pro 4300 | User Manual - Page 103
and user passwords are registered. They do not apply if only the user password is registered. User password log on The following restrictions apply when you log on with a user password: TSETUP F, B, C switch No access You cannot use the F, B, C keys to change boot priority. User's Manual Setup - Toshiba Satellite Pro 4300 | User Manual - Page 104
as a string of asterisks. For example, if you enter a password consisting of four characters, the display is shown as: Enter Password ---> **** 5. Press Enter. The following message appears, allowing you to verify the password. Verify Password ---> 7-16 Setup and Password Security User's Manual - Toshiba Satellite Pro 4300 | User Manual - Page 105
and the display changes to: SUPERVISOR PASSWORD = Registered USER PASSWORD MODE = Unable to run SETUP Do you want to change the setting ? If you do not want to provide user access to the TSETUP program, press N to return to the DOS prompt. To provide user access to TSETUP, press Y and continue - Toshiba Satellite Pro 4300 | User Manual - Page 106
the power, your latest supervisor password setting will be cancelled. 7. A switch on the supervisor's password command lets you enable or disable TSETUP access in user password mode. Refer to the section Enabling TSETUP access in user password mode in this chapter. 7-18 Setup and Password Security - Toshiba Satellite Pro 4300 | User Manual - Page 107
described in the earlier section, How to set the passwords, to set a new user password. After you register or delete a user password, if you press the reset switch before turning off the power, your latest user password setting will be cancelled. User's Manual Setup and Password Security 7-19 - Toshiba Satellite Pro 4300 | User Manual - Page 108
TSETUP, the supervisor must copy the SVPW.EXE file to a diskette and delete it from the hard disk. 1. a.) When you register a supervisor password the following message appears. USER PASSWORD MODE = Unable to run SETUP Do you want to change the setting ? To change the setting, press Y and go to - Toshiba Satellite Pro 4300 | User Manual - Page 109
Enter. The following menu appears: 1. Able to run SETUP 2. Unable to run SETUP 3. Unable to show Processor Serial Number item. Select number ? • If you select 1, TSETUP access is enabled (and other restrictions disabled). The following is displayed: USER PASSWORD MODE = Able to run SETUP - Toshiba Satellite Pro 4300 | User Manual - Page 110
contact your dealer if you cannot remember the password. The password service diskette does not work when the computer is in Resume or Hibernation mode. Refer to Chapter 6, Power and Power-Up Modes, for details on using the password service diskette. 7-22 Setup and Password Security User's Manual - Toshiba Satellite Pro 4300 | User Manual - Page 111
function enabled. The message above is not displayed. In either case you have to enter the password. If you enter an invalid password three times in succession, the computer will shut down. You must turn the power back on to retry password entry. User's Manual Setup and Password Security 7-23 - Toshiba Satellite Pro 4300 | User Manual - Page 112
7-24 Setup and Password Security User's Manual - Toshiba Satellite Pro 4300 | User Manual - Page 113
its versatility. This chapter describes connection or installation of the following types of devices: Cards/memory PC Cards Memory modules Power devices Additional battery pack Battery charger Peripheral devices Card Station IV Card Station III with Spacer Port Replicator Parallel printer External - Toshiba Satellite Pro 4300 | User Manual - Page 114
, one in each connector, or one Type III card in the bottom connector. Windows' hot-install feature lets you install PC Cards while the computer's power is on. To install a PC Card, follow the steps below. 1. Release the PC Card lock. 2. Insert the PC Card and press gently to ensure a firm - Toshiba Satellite Pro 4300 | User Manual - Page 115
position. If you connect a security cable to the computer, the PC Card lock will be blocked, preventing removal or installation of a PC Card. To remove or install a PC Card, first remove the security cable. Securing the PC Card lock After installing the card, refer to the card's documentation and - Toshiba Satellite Pro 4300 | User Manual - Page 116
Grasp the PC Card and remove it. Removing a PC Card Memory expansion You can install additional memory in the computer's memory module sockets to increase the amount of RAM. This section describes how to install and remove a memory module. Before you install or remove a memory module, turn off the - Toshiba Satellite Pro 4300 | User Manual - Page 117
3. Turn the computer upside down and remove the battery (refer to Chapter 6, Power and Power-Up Modes). 4. Remove two screws securing the memory module socket cover. 5. Slide your fingernail or a thin object under the cover and lift it off. Removing the memory module socket cover 6. Fit the module - Toshiba Satellite Pro 4300 | User Manual - Page 118
down and remove the battery and two screws securing the memory module socket cover. 3. Slide your fingernail or a thin object under the cover and lift it off. 4. Push the latches to the outside to release the module. A spring will force one end of the module up. 8-6 Optional Devices User's Manual - Toshiba Satellite Pro 4300 | User Manual - Page 119
may cause memory access problems. Removing the memory module 6. Seat the cover and secure it with two screws and replace the battery. 7. CD \Windows and press Enter. 4. Type HALLOC /C and press Enter. 5. Type Exit and press Enter, and the computer will restart. User's Manual Optional Devices 8-7 - Toshiba Satellite Pro 4300 | User Manual - Page 120
and identifies the locations of its connectors. Use only the AC adaptor that came with the Card Station IV or the Satellite Pro 4320. Do not use the AC adaptor that came with your Satellite Pro 4280 computer to connect the Card Station IV to a power source. In addition to the ports available on the - Toshiba Satellite Pro 4300 | User Manual - Page 121
steady the Card Station IV as you push the computer forward with your thumbs. Guide rails These rails guide the computer to a proper connection with the Card Station IV. Metal latches These latches easy disconnection of the computer from the Card Station IV User's Manual Optional Devices 8-9 - Toshiba Satellite Pro 4300 | User Manual - Page 122
The back D C IN 15 V DC IN 15V Parallel port The AC adaptor connects to this socket. Use this Centronics-compatible, 25-pin parallel monitor port This 15-pin port lets you connect an external video monitor. Note that the Resume feature is effective with an Optional Devices User's Manual - Toshiba Satellite Pro 4300 | User Manual - Page 123
II) or one 10.5 mm PC Card (Type III). You can install any industry standard PC Card such as a SCSI adaptor, Ethernet adaptor or flash memory card. Keep foreign objects out of the PC Card Slot. A pin or similar object can damage the computer's circuitry - Toshiba Satellite Pro 4300 | User Manual - Page 124
AC adaptor The AC adaptor converts AC power to DC power and reduces the voltage supplied to the Card Station IV. It can automatically adjust to any voltage from 100 to 240 volts and to a frequency of either 50 or 60 hertz, enabling you to use the computer in almost any country. TOSHIBA The AC - Toshiba Satellite Pro 4300 | User Manual - Page 125
engaging pins on the Card Station IV are down. 3. Seat the computer between the Card Station IV's guide rails. 4. Grasp the finger grips on either side of the Card Station IV and slowly push the lock position, you will not be able to remove or install a PC Card. User's Manual Optional Devices 8-13 - Toshiba Satellite Pro 4300 | User Manual - Page 126
Connecting the AC adaptor To supply AC power to the computer, connect the AC adaptor as shown below. Connecting the AC adaptor Disconnecting the Card Station IV To disconnect the Card Station IV, follow the steps does not appear if you are using Windows 98. 8-14 Optional Devices User's Manual - Toshiba Satellite Pro 4300 | User Manual - Page 127
power source. Card Station III can be used via an optional Spacer with the Satellite Pro 4280 series. However, it is not compatible with the Satellite Pro 4320. Connecting methods are explained later in this chapter. Before connecting, make sure the engaging pins are down. Before connecting, remove - Toshiba Satellite Pro 4300 | User Manual - Page 128
to steady the Card Station III as you push the computer forward with your thumbs. Guide rails These rails guide the computer to a proper connection with the Card Station III. Metal latches These latches engage holes on the computer to secure the connection. 8-16 Optional Devices User's Manual - Toshiba Satellite Pro 4300 | User Manual - Page 129
III) card. This slot supports CardBus. (Slot 2) DRIVE PORT (NOT USED) SECURITY LOCK SLOT The back D C IN 15 V DC IN 15V MIDI/Joystick port The AC adaptor connects to this socket. This port enables connection of a MIDI joystick for use with games or other specialized software. User's Manual - Toshiba Satellite Pro 4300 | User Manual - Page 130
computer's parallel port. External monitor port This 15-pin port lets you connect an external video monitor. Note that the Resume feature is effective with an external monitor. Serial port Use port Use this port to connect a PS/2 compatible pointing device. 8-18 Optional Devices User's Manual - Toshiba Satellite Pro 4300 | User Manual - Page 131
(Type II) or a 10.5 mm (type III) card. This slot supports CardBus. (Slot 3) PC Card lock Push this lever toward the front of to unlock the card. External diskette drive port Security lock slot The external diskette drive port is not used with this User's Manual The spacer Optional Devices 8-19 - Toshiba Satellite Pro 4300 | User Manual - Page 132
unlock position. 2. Seat the computer between the spacer guide rails and push the computer forward to secure it on the spacer. Connecting the computer to the spacer 3. Connect the spacer with computer to the Card Station III as described in the next section. 8-20 Optional Devices User's Manual - Toshiba Satellite Pro 4300 | User Manual - Page 133
back of the computer to push the computer forward to disconnect it. Make sure the computer does not pop out too forcefully. Connecting the spacer User's Manual Optional Devices 8-21 - Toshiba Satellite Pro 4300 | User Manual - Page 134
are down (pull the release lever forward). 2. Seat the spacer between the guide rails on the Card Station III. Connecting the spacer 3. Hold the Card together on each side and slide the spacer forward with your thumbs. 4. Remove the rubber cover from the computer's Docking Interface port, and set the - Toshiba Satellite Pro 4300 | User Manual - Page 135
between the spacer guide rails and push the computer forward to secure the connection with the Card Station III. Connecting the computer Connecting the AC adaptor To supply AC power to the computer, connect the AC adaptor as shown below. User's Manual Connecting the AC adaptor Optional Devices - Toshiba Satellite Pro 4300 | User Manual - Page 136
connection, but do not force the card into position. Before you turn on the power to the computer, make sure it is in boot mode. 4. Set the lock , preventing removal or installation of a PC Card. To remove or install a PC Card, first remove the security cable. 8-24 Optional Devices User's Manual - Toshiba Satellite Pro 4300 | User Manual - Page 137
the computer is in boot mode, then turn off the power. If the computer is not attached, do not remove the card unless the computer was in Boot mode the last card will pop out slightly. Removing a card from the Card Station III 4. Grasp the card and pull it out. User's Manual Optional Devices 8-25 - Toshiba Satellite Pro 4300 | User Manual - Page 138
so no cabling is necessary. The AC adaptor connects the Port Replicator to a power source. Before connecting, make sure the engaging pins are down. Before connecting, remove the rubber cover from the computer's jack Volume control Universal Serial Bus (two) 8-26 Optional Devices User's Manual - Toshiba Satellite Pro 4300 | User Manual - Page 139
steady the Port Replicator as you push the computer forward with your thumbs. Guide rails These rails guide the computer to a proper connection with the Port Replicator. Metal latches These latches pins engage holes on the computer to secure the connection. User's Manual Optional Devices 8-27 - Toshiba Satellite Pro 4300 | User Manual - Page 140
The back D C IN 15 V DC IN 15V MIDI/Joystick port The AC adaptor connects to this socket. This port enables connection of a MIDI joystick for External monitor port This 15-pin port lets you connect an external video monitor. Note that the Resume feature is effective with an external monitor - Toshiba Satellite Pro 4300 | User Manual - Page 141
Card Station to deter theft. Attach one end of the cable to the Port Replicator and the other end to a desk or other large object. User's Manual Optional Devices 8-29 - Toshiba Satellite Pro 4300 | User Manual - Page 142
. To connect the Port Replicator, follow the steps below. 1. Remove the rubber cover from the Docking Interface port. 2. Make sure the Port Replicator are down. 3. Seat the computer between the Port Replicator's guide rails. 4. Grasp the finger grips on either side of the Port Devices User's Manual - Toshiba Satellite Pro 4300 | User Manual - Page 143
Connecting the AC adaptor To supply AC power to the computer, connect the AC adaptor as shown below. Connecting the AC adaptor Disconnecting the Port Replicator To disconnect the Port Replicator, follow from the Port Replicator 4. Lift off the computer. User's Manual Optional Devices 8-31 - Toshiba Satellite Pro 4300 | User Manual - Page 144
the printer. 7. Turn on the computer. 8. Start the Hardware Setup program. Refer to Chapter 1, Introduction. 9. Select the Parallel/Printer tab from the Hardware Setup window. 10. Set the mode to ECP and press OK. 11 and double click the Add Printer icon. 8-32 Optional Devices User's Manual - Toshiba Satellite Pro 4300 | User Manual - Page 145
the external monitor port on the computer. The computer supports VGA and Super VGA video modes. To connect a monitor, follow the steps Introduction, for directions on starting Hardware Setup or to Chapter 7, Setup and Password Security, for details on TSETUP. . User's Manual Optional Devices 8-33 - Toshiba Satellite Pro 4300 | User Manual - Page 146
the setting for Pointing Devices under the Others options in the Setup program. If Simultaneous is selected, you can operate both the computer and pull out the mouse connector. Consult your mouse manual for instructions on how to install necessary software. PS/2 keyboard Use the User's Manual - Toshiba Satellite Pro 4300 | User Manual - Page 147
anchor your computer to a desk or other heavy object to help prevent unauthorized removal of the computer. Attach one end of a cable to the desk and will not be able to remove or install a PC Card. To remove or install a PC Card, first remove the security cable. User's Manual Optional Devices 8-35 - Toshiba Satellite Pro 4300 | User Manual - Page 148
8-36 Optional Devices User's Manual - Toshiba Satellite Pro 4300 | User Manual - Page 149
such as the troubleshooting tips in this chapter and the diagnostic test program, TDIAGS, try to discover the specific actions that caused the problem. The questions and procedures offered in this chapter are meant as a guide, they are not definitive problem solving techniques. Many problems can be - Toshiba Satellite Pro 4300 | User Manual - Page 150
find a software problem, check your hardware. First run through the items in the preliminary checklist above. If you still cannot correct the problem, try to identify the source. The next section provides checklists for individual components and peripherals. 9-2 Troubleshooting User's Manual - Toshiba Satellite Pro 4300 | User Manual - Page 151
Monitor Hard disk drive Sound system CD-ROM drive USB Diskette drive Hibernation System start-up When the computer does not start properly, check the following items: Self Test Power Sources Power-on Password Self test When the computer starts up, the self test will be run automatically - Toshiba Satellite Pro 4300 | User Manual - Page 152
computer and a power outlet. Check the condition of the cord and terminals. If the cord is frayed or damaged, replace it. If the terminals are soiled, wipe them with cotton or a clean cloth. If the AC adaptor still does not power the computer, contact your dealer. 9-4 Troubleshooting User's Manual - Toshiba Satellite Pro 4300 | User Manual - Page 153
6, Power and Power-Up Modes. Problem Battery doesn't power the computer Battery doesn't charge when the AC power cord is attached (Battery indicator does not glow orange) Battery doesn't power the computer as long as expected Procedure The battery may be discharged. Connect the AC power cord to - Toshiba Satellite Pro 4300 | User Manual - Page 154
make a password service diskette or if it doesn't work, see your dealer. Problem Cannot enter password Procedure Refer to the Password security section in Chapter 7, Setup and Password Security. Hotkeys are still unable to use the keyboard, consult your dealer. 9-6 Troubleshooting User's Manual - Toshiba Satellite Pro 4300 | User Manual - Page 155
software is causing the difficulty. Run the diagnostics program TDIAGS. Contact your dealer if the problems continue. Hard disk drive Refer to Chapter 7, Setup and Password Security, for more information. Problem Computer does not boot from hard drive Slow performance Procedure Insert a system - Toshiba Satellite Pro 4300 | User Manual - Page 156
a problem. Make sure the hardware not configuration match's your software's needs. Check the CD's documentation. Check the type of CD you are using. The drive supports audio CDs, photo CDs, ISO 9660 and CD plus. If problems persist, contact your dealer. 9-8 Troubleshooting User's Manual - Toshiba Satellite Pro 4300 | User Manual - Page 157
, ISO 9660, CD-EXTRA, CD-R (read only), CD-Rewritable (read only) Check the region code on the DVD. It must match that on the DVD drive. Region codes are listed in the DVD-ROM drive section in Chapter 2, The Grand Tour. If problems persist, contact your dealer. User's Manual Troubleshooting 9-9 - Toshiba Satellite Pro 4300 | User Manual - Page 158
for your IrDA compatible device and related software. Problem Infrared devices do not work as expected Procedure Make sure there is no obstruction blocking communication between the computer and the target device. If problems persist, contact your dealer. 9-10 Troubleshooting User's Manual - Toshiba Satellite Pro 4300 | User Manual - Page 159
™ II operation Procedure If a PS/2 or serial mouse is connected, check the Hardware Setup or TSETUP program. The Pointing Device option should be set to Simultaneous to use both the AccuPoint II and an external mouse. If problems persist, contact your dealer. User's Manual Troubleshooting 9-11 - Toshiba Satellite Pro 4300 | User Manual - Page 160
recognize the mouse? Check the software documentation. If problems persist, contact your dealer. Serial mouse Problem Procedure On-screen pointer does not respond to serial mouse? Check the software documentation. If problems persist, contact your dealer. 9-12 Troubleshooting User's Manual - Toshiba Satellite Pro 4300 | User Manual - Page 161
and make sure it is not set for the internal display. Check that the cable connecting the external monitor to the computer is attached firmly. Run the diagnostics program TDIAGS. If problems persist, contact your dealer. User's Manual Troubleshooting 9-13 - Toshiba Satellite Pro 4300 | User Manual - Page 162
to Chapter 7, Setup and Password Security. Problem No sound is 95/98 documentation for information on checking the drivers. If you are using an operating system that does not support USB, you can still use a USB mouse If problems persist, contact your dealer. 9-14 Troubleshooting User's Manual - Toshiba Satellite Pro 4300 | User Manual - Page 163
the display. Refer to Chapter 5, The Keyboard. If problems persist, contact your dealer. If you turn the computer off in Resume mode while the display is on TV, the computer will select either the internal LCD or an external computer CRT as the display device. User's Manual Troubleshooting 9-15 - Toshiba Satellite Pro 4300 | User Manual - Page 164
2. Disconnect the AC adaptor and all peripheral devices. 3. Remove the battery. 4. Remove the memory module from slot B and install it in slot A. 5. Replace the battery and/or connect the AC adaptor. 6. Turn on the power. If problems persist, contact your dealer. 9-16 Troubleshooting User's Manual - Toshiba Satellite Pro 4300 | User Manual - Page 165
prompt C:\>, type TDIAGS. MS-DOS loads the diagnostic test and displays the following screen: TOSHIBA personal computer xxxx DIAGNOSTICS version x.xx (c) copyright TOSHIBA Corp. 19xx Test the DIAGNOSTICS (Y/N) 5. To execute the program type Y; to exit, type N. User's Manual Troubleshooting 9-17 - Toshiba Satellite Pro 4300 | User Manual - Page 166
To select the test, type Y at the prompt, otherwise type N. Component Diskette drive Hard disk drive Printer Prompt Test the FDD (Y/N)? This test writes patterns to the diskette. Use a non-compatible printer may result in garble and processing of excess pages. 9-18 Troubleshooting User's Manual - Toshiba Satellite Pro 4300 | User Manual - Page 167
memory location being tested. The memory test includes conventional and extended memory. If either test aborts: 1. Write down everything that appears on screen. 2. Press Ctrl + Pause (Break) or Ctrl + C to return to the diagnostics menu. 3. Consult your dealer. User's Manual Troubleshooting - Toshiba Satellite Pro 4300 | User Manual - Page 168
Display tests Character attributes After the System/Memory tests end, the Display tests begin ENTER] KEY If your display does not match the test screen, write down the differences and contact your dealer. If it does match, press Enter to continue the display test. 9-20 Troubleshooting User's Manual - Toshiba Satellite Pro 4300 | User Manual - Page 169
character set test by pressing Enter. If your screen doesn't ENTER] KEY If the display screen matches the figure above, press Enter to start the next test. If your screen doesn't match the diagnostic test display, write down the differences and contact your dealer. User's Manual Troubleshooting - Toshiba Satellite Pro 4300 | User Manual - Page 170
RED BROWN MAGENTA WHITE PRESS [ENTER] KEY The remaining screens 640 x 200 mode 6, 640 x 200 mode E, 640 x 350 mode 10 and 640 x 480 mode display similar tests. 640*XXX GRAPHICS DISPLAY EVEN DOTS ODD DOTS ALL DOTS DRIVEN DRIVEN DRIVEN PRESS [ENTER] KEY 9-22 Troubleshooting User's Manual - Toshiba Satellite Pro 4300 | User Manual - Page 171
selected to test the hard disk, you see the following message: HARD DISK TEST IN PROGRESS 805000 If this test aborts, write down any messages and consult your dealer. The computer or the drive may require service. Press Enter to return to the DIAGNOSTICS MENU. User's Manual Troubleshooting 9-23 - Toshiba Satellite Pro 4300 | User Manual - Page 172
hard printer cord securely Run the test again. If the ABORTED message appears, consult your dealer. If the printer tests successfully, the following message is displayed: DIAGNOSTICS completed Press [Enter key] Press Enter to return to the DIAGNOSTICS MENU. 9-24 Troubleshooting User's Manual - Toshiba Satellite Pro 4300 | User Manual - Page 173
your computer and/or software from. They are your best sources for current information and support. Where to write If you are still unable to solve the problem and suspect that it is hardware related, write to Toshiba at the nearest location listed in Appendix C. User's Manual Troubleshooting 9-25 - Toshiba Satellite Pro 4300 | User Manual - Page 174
9-26 Troubleshooting User's Manual - Toshiba Satellite Pro 4300 | User Manual - Page 175
This appendix summarises the computer's technical specifications. Physical dimensions Weight Size typical 3.18 kilograms This may vary depending on configuration. 309 (w) × 262.5 (d) ) Operating -60 to 3,000 metres Non-operating -60 to 10,000 metres maximum User's Manual Specifications A-1 - Toshiba Satellite Pro 4300 | User Manual - Page 176
MB memory modules. Microprocessor cache 32 KB cache memory is incorporated in the processor. Level 2 cache 256 KB level 2 cache on the Pentium processors and a 128 KB level 2 cache on the Celeron processors. Video RAM 8 MB of RAM is provided for video display. A-2 Specifications User's Manual - Toshiba Satellite Pro 4300 | User Manual - Page 177
. The drive supports the following formats: • Audio CD • CD-EXTRA • Photo CD™ • CD-R (read only) • ISO 9660 • CD-Rewritable (read only) DVD-ROM drive A full-size, DVD-ROM drive module lets you run (available for Satellite either 12 cm (4.72") or 8 cm (3.15") digital video Pro 4320) disk - Toshiba Satellite Pro 4300 | User Manual - Page 178
number of USB-equipped devices to one port on your computer. Video-out This RCA video jack lets you transfer data to external devices. It supports DVD decoding. Docking interface Special port for connecting a CardStation IV, CardStation III and Port Replicator. A-4 Specifications User's Manual - Toshiba Satellite Pro 4300 | User Manual - Page 179
Type II, or • one 10.5 mm Type III Toshiba Bass Enhanced Sound System Built-in Sound Blaster Pro and Windows Sound System compatible sound system provides internal stereo Standard Windows operating system, Toshiba Utilities and drivers preloaded on hard disk. User's Manual Specifications A-5 - Toshiba Satellite Pro 4300 | User Manual - Page 180
Monitor function Pulse Tone AT commands EIA-578 commands Computer's speaker Communication specifications Communication system Data: Full duplex Fax: Half duplex Communication protocol Data ITU and ITU-T V.42 Data compression MNP class 5 and ITU-T V.42bis A-6 Specifications User's Manual - Toshiba Satellite Pro 4300 | User Manual - Page 181
PA2731UE PA2730U PA3024UE-1PRP Power PA2450UY PA2487URG PA2488UE Article 32 MB memory kit 64 MB memory kit 128 MB memory kit Keycaps for German Replicator Spacer (for CardStation III) CardStation IV Universal AC adaptor Lithium-ion battery pack Battery charger User's Manual Specifications A-7 - Toshiba Satellite Pro 4300 | User Manual - Page 182
compatibility (EMC) by the following associations: TÜV DIN GOST TÜV UL CSA FCC Toshiba declares that this product complies with the following directives to be observed for CE marking safety EMC / Radio disturbances EMC / Immunity Disturbances in supply systems A-8 Specifications User's Manual - Toshiba Satellite Pro 4300 | User Manual - Page 183
power standards) Certification agencies U.S. and Canada: UL listed and CSA certified No. 18 AWG, Type SVT or SPT-2 two conductor Australia: Europe: Austria: Belgium: Denmark: Finland: France: Germany: Italy: The Netherlands: AS OVE CEBEC DEMKO SETI UTE VDE IMQ KEMA User's Manual AC Power Cord - Toshiba Satellite Pro 4300 | User Manual - Page 184
power cords must be VDE type, H05VVH2-F and two conductor. For the United States and Canada, plug configuration must be a 2-15P (250 V) or 1-15P (125 V) as designated in the U.S. National Electrical code handbook and the Canadian Electrical Code Part B-2 AC Power Cord and Connectors User's Manual - Toshiba Satellite Pro 4300 | User Manual - Page 185
area, you will never be left without help should any problems arise. What the warranty covers The Warranty covers the computer in the standard version, including the AC adaptor. Batteries, modems, memory expansion kits and other Toshiba branded options, as well as third party expansion boards are - Toshiba Satellite Pro 4300 | User Manual - Page 186
Toshiba Systèmes (France) S.A. 7 Rue Ampère, 92804 Puteaux Cedex Toshiba toshiba.com.au Tel: +43-1-72031000 Fax: +43-1-72031002 http://www.toshiba.at Tel: +32-2-715-8700 Fax: +32-2-725-3030 http://www.toshiba.be Tel: +1-800-663-0378 Fax: +1-905-470-3509 http://www.toshiba http://www.toshiba-tro.de - Toshiba Satellite Pro 4300 | User Manual - Page 187
http://www.toshiba.co.jp http://www.toshiba.nl Norway Scribona Norge A/S; Toshiba PC Service Tel: + 47-22-897-000 Stålfjæra 20, P.O.Box 51, Kalbakken Fax: +47-22-897-389 0901 OSLO http://www.toshiba.se Poland AC www.inea.si Spain Toshiba Information Systems (Espa - Toshiba Satellite Pro 4300 | User Manual - Page 188
toshiba.com Toshiba Japan http://www.toshiba.co.jp Toshiba Canada http://www.toshiba.ca Toshiba Bulletin Board Service addresses Analogue number: ISDN1: ISDN2: Internet BBS: +49 941-7807-999 +49 941-7810500 +49 941-7813131 www.toshiba-tro.de C-4 The Toshiba International Warranty User's Manual - Toshiba Satellite Pro 4300 | User Manual - Page 189
Appendix D Keyboard Layouts Belgian Canadian User's Manual Keyboard Layouts D-1 - Toshiba Satellite Pro 4300 | User Manual - Page 190
Danish French German D-2 Keyboard Layouts User's Manual - Toshiba Satellite Pro 4300 | User Manual - Page 191
Italian Norwegian Polish User's Manual Keyboard Layouts D-3 - Toshiba Satellite Pro 4300 | User Manual - Page 192
Portuguese Spanish Swedish D-4 Keyboard Layouts User's Manual - Toshiba Satellite Pro 4300 | User Manual - Page 193
Swiss-German UK English US English User's Manual Keyboard Layouts D-5 - Toshiba Satellite Pro 4300 | User Manual - Page 194
D-6 Keyboard Layouts User's Manual - Toshiba Satellite Pro 4300 | User Manual - Page 195
number of colours that can be displayed on screen. Software written for a given video mode will run on any computer that supports the mode. The computer's display controller supports all VGA and SVGA modes, the most widely used industry standards. User's Manual Display Controller and Modes E-1 - Toshiba Satellite Pro 4300 | User Manual - Page 196
rates. Also, consider that if your software supports both graphics and text modes, the screen display may appear to operate faster using a text mode. Table 1. Video modes Type Resolution Character LCD matrix (pels) 5kHz 60/75/85Hz 31.5/37.6/43.3kHz E-2 Display Controller and Modes User's Manual - Toshiba Satellite Pro 4300 | User Manual - Page 197
Table 1. Video modes Type Resolution Character LCD matrix (pels) colours CRT colours Scanning frequency Ver./Hor. 8 x 16 16M of 16M* 16M of 16M 60Hz 48.3/60.0/68.7kHz * Enters virtual mode when the LCD screen resolution is 800 x 600 (panning). User's Manual Display Controller and Modes E-3 - Toshiba Satellite Pro 4300 | User Manual - Page 198
E-4 Display Controller and Modes User's Manual - Toshiba Satellite Pro 4300 | User Manual - Page 199
receipt showing where your computer was purchased. Either fax or send the receipt and registration form to the address below. Your registration will be entered in a database, which is used to track Toshiba computers at our service points around Europe. User's Manual If your computer is stolen F-1 - Toshiba Satellite Pro 4300 | User Manual - Page 200
Theft Registration Send to: Toshiba Europe GmbH Technical Service and Support Leibnizstr. 2 93055 Regensburg Germany Fax number: +49 (0) 941 7807 925 Country stolen: Machine type: (e.g. Satellite Pro 4280) Model number: (e.g. PA1218E YXT) Serial number: (e.g. 70123456E) Date stolen: Warranty - Toshiba Satellite Pro 4300 | User Manual - Page 201
, however, depend on the software you are using. For most software, the printed output for decimal codes 32 to 128 will match your screen display. User's Manual ASCII Character Codes G-1 - Toshiba Satellite Pro 4300 | User Manual - Page 202
→ 26 SUB 027 1B ← 27 ESC 028 1C 28 FS 029 1D ↔ 29 GS 030 1E 30 RS 031 1F 31 US G-2 ASCII Character Codes User's Manual - Toshiba Satellite Pro 4300 | User Manual - Page 203
W 87 088 58 X 88 089 59 Y 89 090 5A Z 90 091 5B [ 91 092 5C \ 92 093 5D ] 93 094 5E ^ 94 095 5F _ 95 User's Manual ASCII Character Codes G-3 - Toshiba Satellite Pro 4300 | User Manual - Page 204
153 99 Ö 79 154 9A Ü 85 155 9B ¢ 36 156 9C £ 36 157 9D ¥ 36 158 9E Pt 36 159 9F ƒ 36 G-4 ASCII Character Codes User's Manual - Toshiba Satellite Pro 4300 | User Manual - Page 205
166 A6 a 166 167 A7 o 167 168 A8 ¿ 63 169 A9 169 170 AA 170 171 AB 12 171 172 AC 14 172 173 AD ¡ 33 174 AE « 34 175 AF » 34 176 B0 177 B1 178 B2 179 B3 180 D9 218 DA 219 DB 220 DC 221 DD 222 DE 223 DF User's Manual ASCII Character Codes G-5 - Toshiba Satellite Pro 4300 | User Manual - Page 206
⌠ 245 F5 ⌡ 246 F6 ÷ 247 F7 ≈ 248 F8 ° 249 F9 250 FA 251 FB √ 252 FC η 253 FD 2 254 FE 255 FF G-6 ASCII Character Codes User's Manual - Toshiba Satellite Pro 4300 | User Manual - Page 207
described in this instruction or touch any components not specifically described. Installing the modem To install the modem follow the procedures below. Removing the battery pack Before installing the international modem, remove the battery pack. Refer to Chapter 6, Power and Power-Up Modes, for - Toshiba Satellite Pro 4300 | User Manual - Page 208
panel. 3. A plastic strip lies between the keyboard and the palm rest. To remove it, slip your fingernails or a thin object between the strip and the palm . 4. A metal brace lies under the plastic strip at about the midpoint. Remove one screw securing the metal brace and lift it out. 5. Lift up the - Toshiba Satellite Pro 4300 | User Manual - Page 209
a firm connection. 3. Secure the modem board with two screws. Removing two screws and opening the keyboard Replacing the keyboard To replace the battery pack Refer to Chapter 6, Power and Power-Up Modes for details on installing the battery pack. User's Manual International Modem Guide H-3 - Toshiba Satellite Pro 4300 | User Manual - Page 210
Secure the modem slot cover. 6. Replace the keyboard and secure the braces. 7. Install the battery pack. Refer to the installation procedures for details. The international modem is approved by Japan Approvals Institute for Telecommunications Equipment. H-4 International Modem Guide User's Manual - Toshiba Satellite Pro 4300 | User Manual - Page 211
. For example, the AC adaptor modifies the power from a wall outlet for use by the computer. This terms also refers to the add-in circuit cards that control external devices, such as video monitors and magnetic tape devices. allocate: To assign a space or function for a specific task. alphanumeric - Toshiba Satellite Pro 4300 | User Manual - Page 212
components, called chips, which perform a specific function or increase the capabilities of the system. boot: Short for bootstrap. A program that starts or restarts the computer. The program reads instructions from a storage device into the computer's memory. bps: Bits per second. Typically used - Toshiba Satellite Pro 4300 | User Manual - Page 213
memory. capacity: The amount of data that can be stored on a magnetic storage device such as a diskette (floppy disk) or hard video display protocol defined by the IBM Colour/Graphics Monitor Adaptor and its associated circuitry. This protocol supports , memory, input very little power. Integrated - Toshiba Satellite Pro 4300 | User Manual - Page 214
assembled to process data into useful information. configuration: The specific components in your system (such as the terminal, printer, and disk drives) and the settings that define how your system works. You use the Hardware Setup or TSETUP program to control your system configuration. control - Toshiba Satellite Pro 4300 | User Manual - Page 215
driver: A software program, generally part of the operating system, that controls a specific piece of hardware (frequently a peripheral device such as a printer or mouse). dual-scan supertwisted nematic (DSTN) display: A thin-screen, passive matrix colour LCD that meets VGA standards. User's Manual - Toshiba Satellite Pro 4300 | User Manual - Page 216
currently in progress. execute: To interpret and execute an instruction. Extended Capability Port: An industry standard that provides a data buffer, switchable forward and reverse data transmission, and run length encoding (RLE) support. F fast infrared: An industry standard that enables cableless - Toshiba Satellite Pro 4300 | User Manual - Page 217
remove it for servicing. Also called fixed disk. hardware: The physical electronic and mechanical components of a computer system: typically, the computer itself, external disk drives, etc. See also software and firmware. Hardware Setup: A Toshiba , such as speaker volume. User's Manual Glossary 7 - Toshiba Satellite Pro 4300 | User Manual - Page 218
as equivalent to 1024, or 2 raised to the 10th power. See also byte and kilobyte. KB: See kilobyte. keyboard: An input device containing switches that are activated by manually pressing marked keys. Each keystroke activates a switch that transmits a specific code to the computer. For each key, the - Toshiba Satellite Pro 4300 | User Manual - Page 219
video display protocol defined by the IBM Monochrome Display Adaptor and its associated circuitry for direct drive TTL displays that supports out instructions. Also called the central processing unit (CPU), one of the main parts additional instructions beyond the x86 standard. The instructions were - Toshiba Satellite Pro 4300 | User Manual - Page 220
standard architecture for compression of video signals. N non-system disk memory: Memory, usually read-only (ROM), that is capable of permanently storing information. Turning the computer's power off does not alter data stored in non-volatile memory data to and from memory and peripheral devices. - Toshiba Satellite Pro 4300 | User Manual - Page 221
or even. password: A unique string of characters used to identify a specific user. The computer provides various levels of password protection such as user, supervisor and other computers. Power Saver Utility): A Toshiba utility that lets you set the parameters for various power-saving functions. - Toshiba Satellite Pro 4300 | User Manual - Page 222
Memory (RAM): High speed memory within the computer circuitry that can be read or written to. RCA jack: A single-pin connector that carries composite video signals, which include both contrast and colour information. See also S-video. restart: Resetting peripheral devices. Glossary 12 User's Manual - Toshiba Satellite Pro 4300 | User Manual - Page 223
and related documentation associated with a computer system. Specifically refers to computer programs that direct and control the See resume. S-video: This connection provides separate lines for contrast and colour, which produces a video image superior to disk. User's Manual Glossary 13 - Toshiba Satellite Pro 4300 | User Manual - Page 224
ease of use and reliability than earlier expansion methods. V VGA: Video Graphics Array is an industry standard video adaptor that lets you run any popular software. volatile memory: Random access memory (RAM) that stores information as long as power is supplied to the computer. W Warm dock/undock - Toshiba Satellite Pro 4300 | User Manual - Page 225
problems, 9-8 CD-ROM/DVD-ROM drive using, 4-3 Certification, A-8 Certification agencies, B-1 Cleaning the computer, 4-11 compact discs loading, 4-3 removing, 4-6 Compact discs care, 4-7 Computer cleaning, 4-11 moving, 4-11 video out, 4-11 Country selection, 4-8 CPU Cache, 7-10 User's Manual Index - Toshiba Satellite Pro 4300 | User Manual - Page 226
5-3, 5-7 G Graphics controller, 1-3 H Hard disk drive, 1-4 automatic power off, 1-7 problems, 9-7 Hardware setup definition, 1-10 Headphone port, 1-5 Heat 1-6, 2-5 Intelligent power supply, 1-7 International keyboards. See Keyboard International modem, 4-8 International Modem Guide, H-1 User's Manual - Toshiba Satellite Pro 4300 | User Manual - Page 227
, 8-32 Password supervisor, 7-16 Password, 7-4 instant security, 1-8 power on, 1-8 problems, 9-6 registration indication, 7-4 resetting, 7-18 setting, 7-16 starting the computer by, 6-11 supervisor logon, 7-16 user, 7-17 user logon, 7-15 Password security, 7-15 Password service diskette making - Toshiba Satellite Pro 4300 | User Manual - Page 228
Hotkeys, 6-13 Preinstalled software Restoring, 3-8 Printer problems, 9-11 Problems. See also Diagnostic test AC power, 9-4 AccuPoint™ II, 9-11 analysing symptoms, 9-2 CD-ROM drive, 9-8 diskette drive, 9-10 DVD-ROM drive, 9-9 hard disk drive, 9-7 hardware and system checklist, 9-3 Hibernation, 9-15 - Toshiba Satellite Pro 4300 | User Manual - Page 229
Specifications, A-1 Stereo speakers, 2-7 System Auto Off, 6-13. See also machine settings and SETUP, battery save options System indicators, 2-1, 2-9 T The Euro symbol, 5-2 Troubleshooting. See Problems TSETUP, 6-13, 7-1 definition, 1-10 options, 7-4 alarm volume, 7-11 auto power on, 6-13 Battery - Toshiba Satellite Pro 4300 | User Manual - Page 230
Index 6 User's Manual
-
 1
1 -
 2
2 -
 3
3 -
 4
4 -
 5
5 -
 6
6 -
 7
7 -
8
-
9
-
10
-
11
-
12
-
13
-
14
-
15
-
16
-
17
-
18
-
19
-
20
-
21
-
22
-
23
-
24
-
25
-
26
-
27
-
28
-
29
-
30
-
31
-
32
-
33
-
34
-
35
-
36
-
37
-
38
-
39
-
40
-
41
-
42
-
43
-
44
-
45
-
46
-
47
-
48
-
49
-
50
-
51
-
52
-
53
-
54
-
55
-
56
-
57
-
58
-
59
-
60
-
61
-
62
-
63
-
64
-
65
-
66
-
67
-
68
-
69
-
70
-
71
-
72
-
73
-
74
-
75
-
76
-
77
-
78
-
79
-
80
-
81
-
82
-
83
-
84
-
85
-
86
-
87
-
88
-
89
-
90
-
91
-
92
-
93
-
94
-
95
-
96
-
97
-
98
-
99
-
100
-
101
-
102
-
103
-
104
-
105
-
106
-
107
-
108
-
109
-
110
-
111
-
112
-
113
-
114
-
115
-
116
-
117
-
118
-
119
-
120
-
121
-
122
-
123
-
124
-
125
-
126
-
127
-
128
-
129
-
130
-
131
-
132
-
133
-
134
-
135
-
136
-
137
-
138
-
139
-
140
-
141
-
142
-
143
-
144
-
145
-
146
-
147
-
148
-
149
-
150
-
151
-
152
-
153
-
154
-
155
-
156
-
157
-
158
-
159
-
160
-
161
-
162
-
163
-
164
-
165
-
166
-
167
-
168
-
169
-
170
-
171
-
172
-
173
-
174
-
175
-
176
-
177
-
178
-
179
-
180
-
181
-
182
-
183
-
184
-
185
-
186
-
187
-
188
-
189
-
190
-
191
-
192
-
193
-
194
-
195
-
196
-
197
-
198
-
199
-
200
-
201
-
202
-
203
-
204
-
205
-
206
-
207
-
208
-
209
-
210
-
211
-
212
-
213
-
214
-
215
-
216
-
217
-
218
-
219
-
220
-
221
-
222
-
223
-
224
-
225
-
226
-
227
-
228
-
229
-
230
 |
 |

TOSHIBA
R
Model
USER'S
MANUAL
4200/4300
Series