Toshiba Satellite Pro 4300 User Manual - Page 165
Diagnostic test, Executing the diagnostic test program
 |
View all Toshiba Satellite Pro 4300 manuals
Add to My Manuals
Save this manual to your list of manuals |
Page 165 highlights
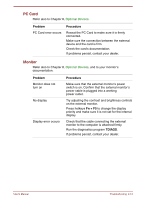
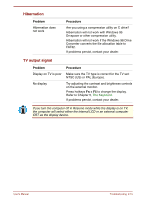
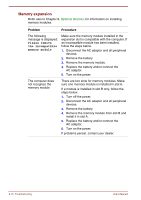
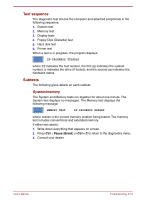
Diagnostic test The diagnostic test program checks system components to help you determine the cause of the computer's problem. Executing the diagnostic test program To start the diagnostics, follow these steps: 1. Check all cables for loose connections. 2. Select Restart (the computer) in MS-DOS mode? from the Shut Down window. 3. Be sure the computer is not in virtual 86 mode. The test will not run in that mode. If you try to run the test in virtual 86 mode, the following message will be displayed: Cannot execute in a virtual 8086 mode. If the preceding message is displayed, remove memory managers from your config.sys file. See your MS-DOS documentation for information on the config.sys file. 4. Go to drive C and at the DOS prompt C:\>, type TDIAGS. MS-DOS loads the diagnostic test and displays the following screen: TOSHIBA personal computer xxxx DIAGNOSTICS version x.xx (c) copyright TOSHIBA Corp. 19xx Test the DIAGNOSTICS (Y/N) 5. To execute the program type Y; to exit, type N. User's Manual Troubleshooting 9-17
-
 1
1 -
2
-
3
-
4
-
5
-
6
-
7
-
8
-
9
-
10
-
11
-
12
-
13
-
14
-
15
-
16
-
17
-
18
-
19
-
20
-
21
-
22
-
23
-
24
-
25
-
26
-
27
-
28
-
29
-
30
-
31
-
32
-
33
-
34
-
35
-
36
-
37
-
38
-
39
-
40
-
41
-
42
-
43
-
44
-
45
-
46
-
47
-
48
-
49
-
50
-
51
-
52
-
53
-
54
-
55
-
56
-
57
-
58
-
59
-
60
-
61
-
62
-
63
-
64
-
65
-
66
-
67
-
68
-
69
-
70
-
71
-
72
-
73
-
74
-
75
-
76
-
77
-
78
-
79
-
80
-
81
-
82
-
83
-
84
-
85
-
86
-
87
-
88
-
89
-
90
-
91
-
92
-
93
-
94
-
95
-
96
-
97
-
98
-
99
-
100
-
101
-
102
-
103
-
104
-
105
-
106
-
107
-
108
-
109
-
110
-
111
-
112
-
113
-
114
-
115
-
116
-
117
-
118
-
119
-
120
-
121
-
122
-
123
-
124
-
125
-
126
-
127
-
128
-
129
-
130
-
131
-
132
-
133
-
134
-
135
-
136
-
137
-
138
-
139
-
140
-
141
-
142
-
143
-
144
-
145
-
146
-
147
-
148
-
149
-
150
-
151
-
152
-
153
-
154
-
155
-
156
-
157
-
158
-
159
-
 160
160 -
 161
161 -
 162
162 -
 163
163 -
 164
164 -
 165
165 -
 166
166 -
 167
167 -
 168
168 -
 169
169 -
 170
170 -
171
-
172
-
173
-
174
-
175
-
176
-
177
-
178
-
179
-
180
-
181
-
182
-
183
-
184
-
185
-
186
-
187
-
188
-
189
-
190
-
191
-
192
-
193
-
194
-
195
-
196
-
197
-
198
-
199
-
200
-
201
-
202
-
203
-
204
-
205
-
206
-
207
-
208
-
209
-
210
-
211
-
212
-
213
-
214
-
215
-
216
-
217
-
218
-
219
-
220
-
221
-
222
-
223
-
224
-
225
-
226
-
227
-
228
-
229
-
230
 |
 |
