Toshiba Satellite Pro 4300 User Manual - Page 118
Removing memory module, Power and, Power-Up Modes
 |
View all Toshiba Satellite Pro 4300 manuals
Add to My Manuals
Save this manual to your list of manuals |
Page 118 highlights
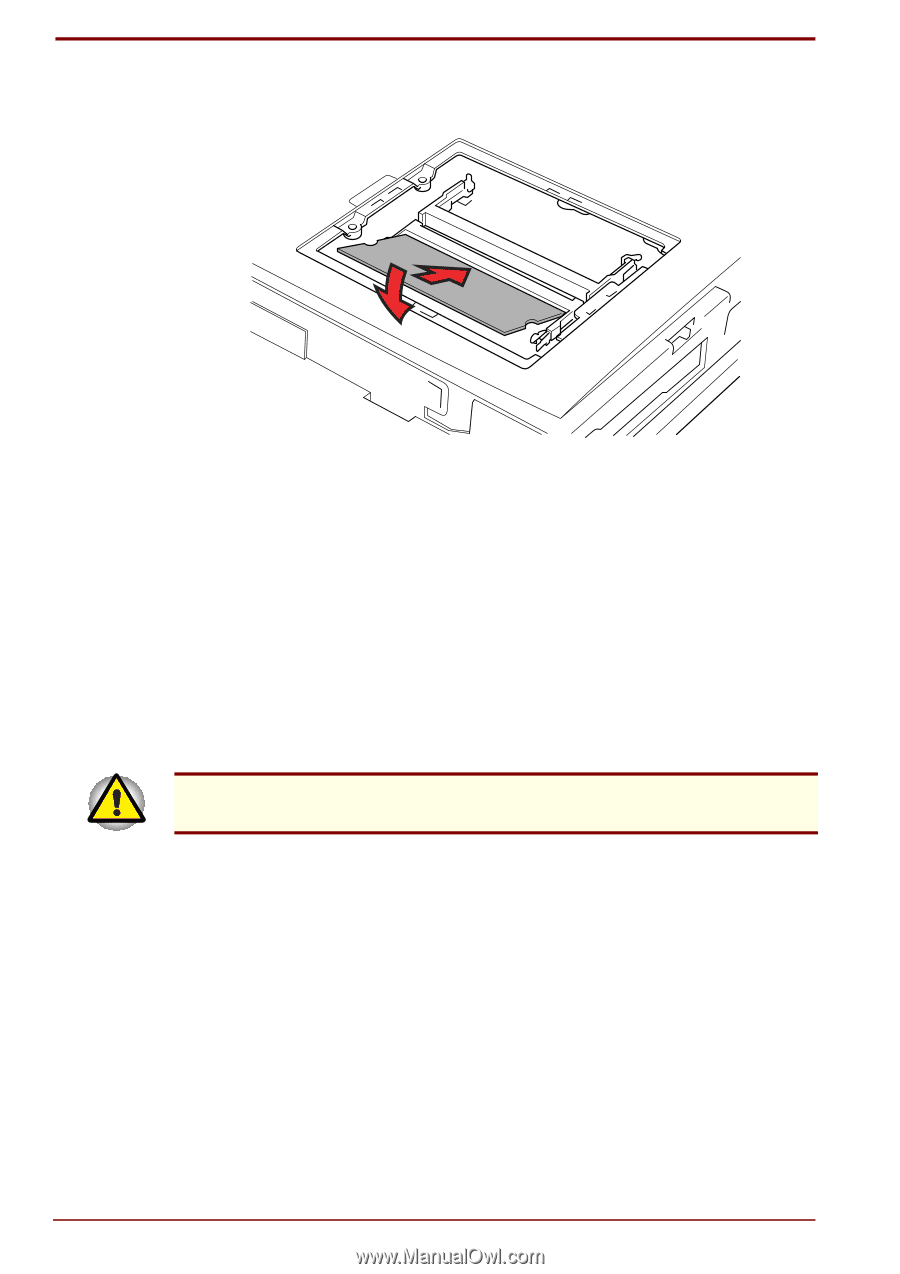
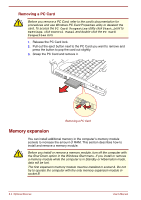
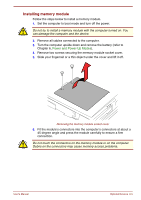
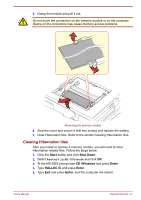
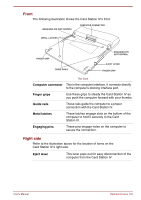
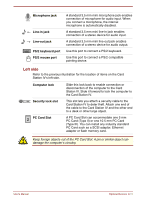
7. Push the module down so it lies flat. Latches on either side will click into place to secure the module. Installing a module 8. Seat the cover and secure it with two screws. 9. Replace the battery pack as described in Chapter 6, Power and Power-Up Modes. 10. Turn the power on and make sure the added memory is recognized. 11. Clear Hibernation files. Refer to the section Clearing Hibernation files. Removing memory module To remove the memory module, make sure the computer is in Boot mode then: 1. Be sure the power is off and all cables are disconnected from the computer. Do not try to remove a memory module with the computer turned on. You can damage the computer and the device. 2. Turn the computer upside down and remove the battery and two screws securing the memory module socket cover. 3. Slide your fingernail or a thin object under the cover and lift it off. 4. Push the latches to the outside to release the module. A spring will force one end of the module up. 8-6 Optional Devices User's Manual
-
 1
1 -
2
-
3
-
4
-
5
-
6
-
7
-
8
-
9
-
10
-
11
-
12
-
13
-
14
-
15
-
16
-
17
-
18
-
19
-
20
-
21
-
22
-
23
-
24
-
25
-
26
-
27
-
28
-
29
-
30
-
31
-
32
-
33
-
34
-
35
-
36
-
37
-
38
-
39
-
40
-
41
-
42
-
43
-
44
-
45
-
46
-
47
-
48
-
49
-
50
-
51
-
52
-
53
-
54
-
55
-
56
-
57
-
58
-
59
-
60
-
61
-
62
-
63
-
64
-
65
-
66
-
67
-
68
-
69
-
70
-
71
-
72
-
73
-
74
-
75
-
76
-
77
-
78
-
79
-
80
-
81
-
82
-
83
-
84
-
85
-
86
-
87
-
88
-
89
-
90
-
91
-
92
-
93
-
94
-
95
-
96
-
97
-
98
-
99
-
100
-
101
-
102
-
103
-
104
-
105
-
106
-
107
-
108
-
109
-
110
-
111
-
112
-
 113
113 -
 114
114 -
 115
115 -
 116
116 -
 117
117 -
 118
118 -
 119
119 -
 120
120 -
 121
121 -
 122
122 -
 123
123 -
124
-
125
-
126
-
127
-
128
-
129
-
130
-
131
-
132
-
133
-
134
-
135
-
136
-
137
-
138
-
139
-
140
-
141
-
142
-
143
-
144
-
145
-
146
-
147
-
148
-
149
-
150
-
151
-
152
-
153
-
154
-
155
-
156
-
157
-
158
-
159
-
160
-
161
-
162
-
163
-
164
-
165
-
166
-
167
-
168
-
169
-
170
-
171
-
172
-
173
-
174
-
175
-
176
-
177
-
178
-
179
-
180
-
181
-
182
-
183
-
184
-
185
-
186
-
187
-
188
-
189
-
190
-
191
-
192
-
193
-
194
-
195
-
196
-
197
-
198
-
199
-
200
-
201
-
202
-
203
-
204
-
205
-
206
-
207
-
208
-
209
-
210
-
211
-
212
-
213
-
214
-
215
-
216
-
217
-
218
-
219
-
220
-
221
-
222
-
223
-
224
-
225
-
226
-
227
-
228
-
229
-
230
 |
 |