3Com 8760 User Guide - Page 22
Using the Power Supply, Using a Power-Over-Ethernet LAN Port, Supply to a 3Com Switch.
 |
UPC - 662705506531
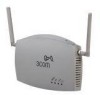
View all 3Com 8760 manuals
Add to My Manuals
Save this manual to your list of manuals |
Page 22 highlights
CHAPTER 2: INSTALLING THE ACCESS POINT USING THE POWER SUPPLY ! CAUTION: To avoid damaging network equipment, make sure that the cables are connected from access point to power supply to LAN as shown above and described below. The power supply can be located at any point between the access point and the LAN access port, wherever a convenient power outlet exists. If you supply your own Ethernet cable for connecting power, be sure that it is standard category 5 straight-through (8-wire) cable that has not been altered in any way. Use of nonstandard cable could damage the access point. Refer to the illustration above, and follow these steps: 1 Connect one end of the Ethernet cable to the Ethernet port on the access point. 2 Connect the other end of the Ethernet cable to the port labeled To Access Point on the power supply. 3 Connect the power cord to the power supply and plug the cord into a power outlet. 4 To link the access point to your Ethernet network, plug one end of another Ethernet cable into the port labeled To Hub/Switch on the power supply, and plug the other end into a LAN port (on a hub or in a wall). USING A POWER-OVER-ETHERNET LAN PORT If your LAN equipment complies with the IEEE 802.3af power-over-Ethernet standard, you can connect the access point directly to a LAN port. For example, the illustration above right shows a connection through a 3Com Ethernet Power Supply to a 3Com Switch. 2-8
-
 1
1 -
2
-
3
-
4
-
5
-
6
-
7
-
8
-
9
-
10
-
11
-
12
-
13
-
14
-
15
-
16
-
 17
17 -
 18
18 -
 19
19 -
 20
20 -
 21
21 -
 22
22 -
 23
23 -
 24
24 -
 25
25 -
 26
26 -
 27
27 -
28
-
29
-
30
-
31
-
32
-
33
-
34
-
35
-
36
-
37
-
38
-
39
-
40
-
41
-
42
-
43
-
44
-
45
-
46
-
47
-
48
-
49
-
50
-
51
-
52
-
53
-
54
-
55
-
56
-
57
-
58
-
59
-
60
-
61
-
62
-
63
-
64
-
65
-
66
-
67
-
68
-
69
-
70
-
71
-
72
-
73
-
74
-
75
-
76
-
77
-
78
-
79
-
80
-
81
-
82
-
83
-
84
-
85
-
86
-
87
-
88
-
89
-
90
-
91
-
92
-
93
-
94
-
95
-
96
-
97
-
98
-
99
-
100
-
101
-
102
-
103
-
104
-
105
-
106
-
107
-
108
-
109
-
110
-
111
-
112
-
113
-
114
-
115
-
116
-
117
-
118
-
119
-
120
-
121
-
122
-
123
-
124
-
125
-
126
-
127
-
128
-
129
-
130
-
131
-
132
-
133
-
134
-
135
-
136
-
137
-
138
-
139
-
140
-
141
-
142
-
143
-
144
-
145
-
146
-
147
-
148
-
149
-
150
-
151
-
152
-
153
-
154
-
155
-
156
-
157
-
158
-
159
-
160
-
161
-
162
-
163
-
164
-
165
-
166
-
167
-
168
-
169
-
170
-
171
-
172
-
173
-
174
-
175
-
176
-
177
-
178
-
179
-
180
-
181
-
182
-
183
-
184
-
185
-
186
-
187
-
188
-
189
-
190
-
191
-
192
-
193
-
194
-
195
-
196
-
197
-
198
-
199
-
200
-
201
-
202
-
203
-
204
-
205
-
206
-
207
-
208
-
209
-
210
-
211
-
212
-
213
-
214
-
215
-
216
-
217
-
218
-
219
-
220
-
221
-
222
-
223
-
224
-
225
-
226
-
227
-
228
-
229
-
230
-
231
-
232
-
233
-
234
-
235
-
236
-
237
-
238
-
239
-
240
-
241
-
242
-
243
-
244
-
245
-
246
-
247
-
248
-
249
-
250
-
251
-
252
-
253
-
254
-
255
-
256
-
257
-
258
-
259
-
260
-
261
 |
 |