Canon XF205 XF200 XF205 Instruction Manual - Page 133
Editing a Custom Picture File’s Settings, Renaming Custom Picture Files
 |
View all Canon XF205 manuals
Add to My Manuals
Save this manual to your list of manuals |
Page 133 highlights
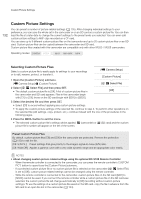
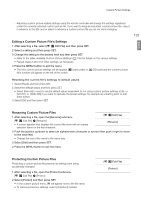
Custom Picture Settings English - Adjusting custom picture related settings using the remote controller will change the settings registered under the currently selected custom picture file. If you want to keep an important custom picture file, copy it in advance to the SD card or select in advance a custom picture file you do not mind changing. 133 Editing a Custom Picture File's Settings 1 After selecting a file, select [, / Edit File] and then press SET. 2 Select a setting and then press SET. 3 Change the setting to the desired level and then press SET. • Refer to the table Available Custom Picture Settings (A 135) for details on the various settings. • Repeat steps 2 and 3 for other settings, as necessary. 4 Press the MENU button to exit the menu. • The new custom picture settings will be applied. / (camcorder) or . (SD card) and the custom picture file's number will appear on the left of the screen. Resetting the current file's settings to default values 1 Select [Reset] and then press SET. 2 Select the default values and then press SET. • Select [Normal] to reset to neutral default values (equivalent to not using custom picture settings at all), or [S/N Pri.] or [Wide DR] if you want to replicate the preset settings, for example as a starting point to edit them further. 3 Select [OK] and then press SET. Renaming Custom Picture Files 1 After selecting a file, open the [Rename] submenu. [, / Edit File] > [Rename] • A screen appears that displays the current file name with an orange selection frame on the first character. [, / Edit File] [Rename] 2 Push the joystick up/down to select an alphanumeric character or symbol then push it right to move to the next field. • Change the rest of the name in the same way. 3 Select [Set] and then press SET. 4 Press the MENU button to exit the menu. Protecting Custom Picture Files Protecting a custom picture file prevents its settings from being accidentally changed. 1 After selecting a file, open the [Protect] submenu. [, / Edit File] > [Protect] 2 Select [Protect] and then press SET. • In the custom picture menu, i will appear next to the file name. • To remove protection settings, select [Unprotect] instead. [, / Edit File] [Protect]
-
 1
1 -
2
-
3
-
4
-
5
-
6
-
7
-
8
-
9
-
10
-
11
-
12
-
13
-
14
-
15
-
16
-
17
-
18
-
19
-
20
-
21
-
22
-
23
-
24
-
25
-
26
-
27
-
28
-
29
-
30
-
31
-
32
-
33
-
34
-
35
-
36
-
37
-
38
-
39
-
40
-
41
-
42
-
43
-
44
-
45
-
46
-
47
-
48
-
49
-
50
-
51
-
52
-
53
-
54
-
55
-
56
-
57
-
58
-
59
-
60
-
61
-
62
-
63
-
64
-
65
-
66
-
67
-
68
-
69
-
70
-
71
-
72
-
73
-
74
-
75
-
76
-
77
-
78
-
79
-
80
-
81
-
82
-
83
-
84
-
85
-
86
-
87
-
88
-
89
-
90
-
91
-
92
-
93
-
94
-
95
-
96
-
97
-
98
-
99
-
100
-
101
-
102
-
103
-
104
-
105
-
106
-
107
-
108
-
109
-
110
-
111
-
112
-
113
-
114
-
115
-
116
-
117
-
118
-
119
-
120
-
121
-
122
-
123
-
124
-
125
-
126
-
127
-
 128
128 -
 129
129 -
 130
130 -
 131
131 -
 132
132 -
 133
133 -
 134
134 -
 135
135 -
 136
136 -
 137
137 -
 138
138 -
139
-
140
-
141
-
142
-
143
-
144
-
145
-
146
-
147
-
148
-
149
-
150
-
151
-
152
-
153
-
154
-
155
-
156
-
157
-
158
-
159
-
160
-
161
-
162
-
163
-
164
-
165
-
166
-
167
-
168
-
169
-
170
-
171
-
172
-
173
-
174
-
175
-
176
-
177
-
178
-
179
-
180
-
181
-
182
-
183
-
184
-
185
-
186
-
187
-
188
-
189
-
190
-
191
-
192
-
193
-
194
-
195
-
196
-
197
-
198
-
199
-
200
-
201
-
202
-
203
-
204
-
205
-
206
-
207
-
208
-
209
-
210
-
211
-
212
-
213
-
214
-
215
-
216
-
217
-
218
-
219
-
220
-
221
-
222
-
223
-
224
-
225
-
226
-
227
-
228
-
229
-
230
-
231
-
232
-
233
-
234
-
235
-
236
-
237
-
238
-
239
-
240
-
241
-
242
-
243
-
244
-
245
-
246
-
247
-
248
-
249
-
250
 |
 |
