Canon XF205 XF200 XF205 Instruction Manual - Page 178
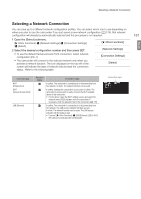
Manual Setup, Camera Access Point, Select the [Camera Access Point] method.
 |
View all Canon XF205 manuals
Add to My Manuals
Save this manual to your list of manuals |
Page 178 highlights
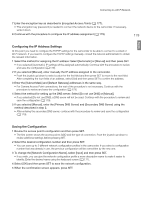
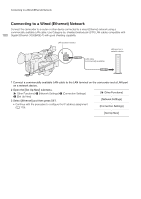
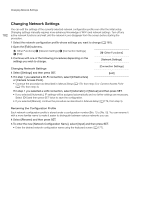
Connecting to a Wi-Fi Network 178 Manual Setup If you prefer, you can enter manually the details of the Wi-Fi network you want to connect to. Follow the instructions on the screen to complete the procedure. 1 Open the [Set Up New] submenu. [w Other Functions] > [Network Settings] > [Connection Settings] > [Set Up New] 2 Select the [Manual] method. [Wi-Fi] > [Infrastructure] > [Manual] 3 To enter the [SSID] (network name), select [Input] and then press SET. • Enter the SSID (network name) of the selected Wi-Fi network using the keyboard screen (A 177). [w Other Functions] [Network Settings] [Connection Settings] [Set Up New] 4 Select the Wi-Fi network's authentication method and then press SET. • If you selected [Shared Key], skip to step 6. 5 Select the Wi-Fi network's encryption method and then press SET. • If the authentication method is [Open], you can select [WEP] and continue to step 6, or [No encryption] and skip to step 7. • If the authentication method is [WPA-PSK] or [WPA2-PSK], you can select [TKIP] or [AES]. 6 Enter the encryption key as described in Encrypted Access Points (A 177). 7 Continue with the procedure to configure the IP address assignment (A 179). Camera Access Point In this mode the camcorder itself serves as a wireless access point to which other Wi-Fi-enabled devices can connect. Initially, basic default network settings for a Camera Access Point connection are saved under network configuration [No.1]. After selecting this network configuration (A 181), you can check the default settings (SSID, password, etc.) on the status screens (A 219) and use them to connect immediately to the camera. If you prefer to add a network configuration using different settings, follow the procedure below. 1 Open the [Set Up New] submenu. [w Other Functions] > [Network Settings] > [Connection Settings] > [Set Up New] 2 Select the [Camera Access Point] method. [Wi-Fi] > [Camera Access Point] 3 To enter the [SSID] (network name), select [Input] and then press SET. • Enter the SSID (network name) the camcorder will use as a Wi-Fi access point using the keyboard screen (A 177). • The network name is needed to connect the network device to the camcorder. If necessary, write it down. [w Other Functions] [Network Settings] [Connection Settings] [Set Up New] 4 Select the wireless connection mode (5 GHz band or 2.4 GHz band) and then press SET. 5 Select the channel and then press SET. • Available channels will be different depending on the wireless connection mode selected in the previous step. 6 Select the encryption method and then press SET. • If you selected [Open/No encryption], skip to step 8. If you selected [WPA2-PSK/AES], continue with step 7.
-
 1
1 -
2
-
3
-
4
-
5
-
6
-
7
-
8
-
9
-
10
-
11
-
12
-
13
-
14
-
15
-
16
-
17
-
18
-
19
-
20
-
21
-
22
-
23
-
24
-
25
-
26
-
27
-
28
-
29
-
30
-
31
-
32
-
33
-
34
-
35
-
36
-
37
-
38
-
39
-
40
-
41
-
42
-
43
-
44
-
45
-
46
-
47
-
48
-
49
-
50
-
51
-
52
-
53
-
54
-
55
-
56
-
57
-
58
-
59
-
60
-
61
-
62
-
63
-
64
-
65
-
66
-
67
-
68
-
69
-
70
-
71
-
72
-
73
-
74
-
75
-
76
-
77
-
78
-
79
-
80
-
81
-
82
-
83
-
84
-
85
-
86
-
87
-
88
-
89
-
90
-
91
-
92
-
93
-
94
-
95
-
96
-
97
-
98
-
99
-
100
-
101
-
102
-
103
-
104
-
105
-
106
-
107
-
108
-
109
-
110
-
111
-
112
-
113
-
114
-
115
-
116
-
117
-
118
-
119
-
120
-
121
-
122
-
123
-
124
-
125
-
126
-
127
-
128
-
129
-
130
-
131
-
132
-
133
-
134
-
135
-
136
-
137
-
138
-
139
-
140
-
141
-
142
-
143
-
144
-
145
-
146
-
147
-
148
-
149
-
150
-
151
-
152
-
153
-
154
-
155
-
156
-
157
-
158
-
159
-
160
-
161
-
162
-
163
-
164
-
165
-
166
-
167
-
168
-
169
-
170
-
171
-
172
-
 173
173 -
 174
174 -
 175
175 -
 176
176 -
 177
177 -
 178
178 -
 179
179 -
 180
180 -
 181
181 -
 182
182 -
 183
183 -
184
-
185
-
186
-
187
-
188
-
189
-
190
-
191
-
192
-
193
-
194
-
195
-
196
-
197
-
198
-
199
-
200
-
201
-
202
-
203
-
204
-
205
-
206
-
207
-
208
-
209
-
210
-
211
-
212
-
213
-
214
-
215
-
216
-
217
-
218
-
219
-
220
-
221
-
222
-
223
-
224
-
225
-
226
-
227
-
228
-
229
-
230
-
231
-
232
-
233
-
234
-
235
-
236
-
237
-
238
-
239
-
240
-
241
-
242
-
243
-
244
-
245
-
246
-
247
-
248
-
249
-
250
 |
 |
