Canon XF205 XF200 XF205 Instruction Manual - Page 192
FTP Transfer in MEDIA Mode
 |
View all Canon XF205 manuals
Add to My Manuals
Save this manual to your list of manuals |
Page 192 highlights
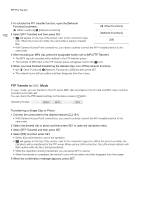
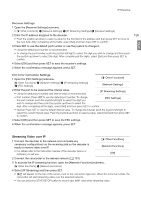
FTP File Transfer 192 3 To activate the FTP transfer function, open the [Network Functions] submenu. [w Other Functions] > [Network Functions] 4 Select [FTP Transfer] and then press SET. [w Other Functions] [Network Functions] • will appear on the top of the screen, next to the connection type icon. When the icons turn white, the camcorder is ready to transfer [Off] files. • With Camera Access Point connections, you need to actively connect the Wi-Fi enabled device to the camcorder. 5 After recording an MP4 clip, press the assignable button set to [MP4 FTP Transfer]. • The MP4 clip just recorded will be added to the FTP transfer queue. • The number of MP4 clips in the FTP transfer queue will appear next to the icon. 6 When you have finished transferring the desired clips, turn off the network functions. • Set [w Other Functions] > [Network Functions] to [Off] and then press SET. • The network icons will turn yellow and then disappear from the screen. FTP Transfer in Mode In mode, you can transfer to the FTP server MXF clips recorded on the CF card and MP4 clips or photos recorded on the SD card. You can check the FTP-related settings on the status screens (A 221). Operating modes: Transferring a Single Clip or Photo 1 Connect the camcorder to the desired network (A 181). • With Camera Access Point connections, you need to actively connect the Wi-Fi enabled device to the camcorder. 2 Select the desired clip or photo and then press SET to open the clip/photo menu. 3 Select [FTP Transfer] and then press SET. 4 Select [OK] and then press SET. • Select [Cancel] instead to cancel the operation. • will appear on the top of the screen, next to the connection type icon. When the icons turn white, the clip/photo will be transferred to the FTP server. When using a LAN connection, the LAN access indicator will flash quickly while the file is being transferred. • While the clip/photo is being transferred, you can press SET to cancel. • When the transfer is completed, the network icons will turn yellow and then disappear from the screen. 5 When the confirmation message appears, press SET.
-
 1
1 -
2
-
3
-
4
-
5
-
6
-
7
-
8
-
9
-
10
-
11
-
12
-
13
-
14
-
15
-
16
-
17
-
18
-
19
-
20
-
21
-
22
-
23
-
24
-
25
-
26
-
27
-
28
-
29
-
30
-
31
-
32
-
33
-
34
-
35
-
36
-
37
-
38
-
39
-
40
-
41
-
42
-
43
-
44
-
45
-
46
-
47
-
48
-
49
-
50
-
51
-
52
-
53
-
54
-
55
-
56
-
57
-
58
-
59
-
60
-
61
-
62
-
63
-
64
-
65
-
66
-
67
-
68
-
69
-
70
-
71
-
72
-
73
-
74
-
75
-
76
-
77
-
78
-
79
-
80
-
81
-
82
-
83
-
84
-
85
-
86
-
87
-
88
-
89
-
90
-
91
-
92
-
93
-
94
-
95
-
96
-
97
-
98
-
99
-
100
-
101
-
102
-
103
-
104
-
105
-
106
-
107
-
108
-
109
-
110
-
111
-
112
-
113
-
114
-
115
-
116
-
117
-
118
-
119
-
120
-
121
-
122
-
123
-
124
-
125
-
126
-
127
-
128
-
129
-
130
-
131
-
132
-
133
-
134
-
135
-
136
-
137
-
138
-
139
-
140
-
141
-
142
-
143
-
144
-
145
-
146
-
147
-
148
-
149
-
150
-
151
-
152
-
153
-
154
-
155
-
156
-
157
-
158
-
159
-
160
-
161
-
162
-
163
-
164
-
165
-
166
-
167
-
168
-
169
-
170
-
171
-
172
-
173
-
174
-
175
-
176
-
177
-
178
-
179
-
180
-
181
-
182
-
183
-
184
-
185
-
186
-
 187
187 -
 188
188 -
 189
189 -
 190
190 -
 191
191 -
 192
192 -
 193
193 -
 194
194 -
 195
195 -
 196
196 -
 197
197 -
198
-
199
-
200
-
201
-
202
-
203
-
204
-
205
-
206
-
207
-
208
-
209
-
210
-
211
-
212
-
213
-
214
-
215
-
216
-
217
-
218
-
219
-
220
-
221
-
222
-
223
-
224
-
225
-
226
-
227
-
228
-
229
-
230
-
231
-
232
-
233
-
234
-
235
-
236
-
237
-
238
-
239
-
240
-
241
-
242
-
243
-
244
-
245
-
246
-
247
-
248
-
249
-
250
 |
 |
