D-Link DSN-540 Software User's Guide for DSN-1100-10 - Page 128
Removing an xStack Storage
 |
UPC - 790069324017
View all D-Link DSN-540 manuals
Add to My Manuals
Save this manual to your list of manuals |
Page 128 highlights
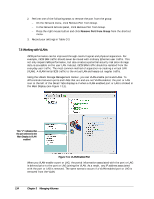
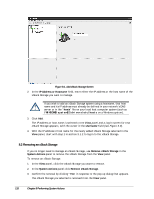
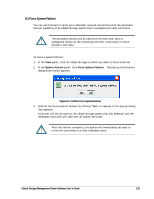
Figure 8-1. Add xStack Storage Screen 2. In the IP Address or Hostname field, enter either the IP address or the host name of the xStack Storage you want to manage. If you wish to add an xStack Storage system using a hostname, that host name and its IP address must already be defined in your network's DNS server or in the "hosts" file on your local host computer system (such as \WINDOWS\system32\drivers\etc\hosts on a Windows system). 3. Click Add. The IP address or host name is selected in the View panel and a Log In screen for that xStack Storage appears, with the cursor in the Username field (see Figure 3-9). 4. With the IP address or host name for the newly added xStack Storage selected in the View panel, start with step 1 in section 3.1.2 to log in to the xStack Storage. 8.2 Removing an xStack Storage If you no longer need to manage an xStack Storage, use Remove xStack Storage in the System Actions panel to remove the xStack Storage from the View panel. To remove an xStack Storage: 1. In the View panel, click the xStack Storage you want to remove. 2. In the System Actions panel click Remove xStack Storage. 3. Confirm the removal by clicking "Yes" in response to the pop-up dialog that appears. The xStack Storage you selected is removed from the View panel. 118 Chapter 8 Performing System Actions
-
 1
1 -
2
-
3
-
4
-
5
-
6
-
7
-
8
-
9
-
10
-
11
-
12
-
13
-
14
-
15
-
16
-
17
-
18
-
19
-
20
-
21
-
22
-
23
-
24
-
25
-
26
-
27
-
28
-
29
-
30
-
31
-
32
-
33
-
34
-
35
-
36
-
37
-
38
-
39
-
40
-
41
-
42
-
43
-
44
-
45
-
46
-
47
-
48
-
49
-
50
-
51
-
52
-
53
-
54
-
55
-
56
-
57
-
58
-
59
-
60
-
61
-
62
-
63
-
64
-
65
-
66
-
67
-
68
-
69
-
70
-
71
-
72
-
73
-
74
-
75
-
76
-
77
-
78
-
79
-
80
-
81
-
82
-
83
-
84
-
85
-
86
-
87
-
88
-
89
-
90
-
91
-
92
-
93
-
94
-
95
-
96
-
97
-
98
-
99
-
100
-
101
-
102
-
103
-
104
-
105
-
106
-
107
-
108
-
109
-
110
-
111
-
112
-
113
-
114
-
115
-
116
-
117
-
118
-
119
-
120
-
121
-
122
-
 123
123 -
 124
124 -
 125
125 -
 126
126 -
 127
127 -
 128
128 -
 129
129 -
 130
130 -
 131
131 -
 132
132 -
 133
133 -
134
-
135
-
136
-
137
-
138
-
139
-
140
-
141
-
142
-
143
-
144
-
145
-
146
-
147
-
148
-
149
-
150
-
151
-
152
-
153
-
154
-
155
-
156
-
157
-
158
 |
 |
