D-Link DSN-540 Software User's Guide for DSN-1100-10 - Page 65
Growing a Volume
 |
UPC - 790069324017
View all D-Link DSN-540 manuals
Add to My Manuals
Save this manual to your list of manuals |
Page 65 highlights
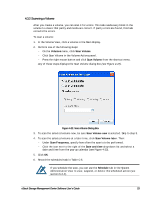
Figure 4-24. Warning Message when Destroying a Volume 3. Click OK to destroy the selected volume or Cancel to keep the volume. 4.3.4 Growing a Volume There may be times when you want to increase the capacity of a volume, while preserving the original composition of the volume. In this case, you can "grow" the volume. To grow a volume: 1. In the Volume View, click a volume in the Main Display. 2. Perform one of the following steps: - On the Volumes menu, click Grow Volume. - Click Grow Volume in the Volume Actions panel. - Press the right mouse button and click Grow Volume from the shortcut menu. Any of these steps displays the Grow Volume dialog box (see Figure 4-25). This dialog box shows the current size of the volume and the maximum size that you can grow it, based on the available disk space and the number of drives required for the volume composition. However, you cannot shrink the size of the volume below its current size. Figure 4-25. Grow Volume Dialog Box 3. Using the New Volume Size controls, increase the size of the volume as required. Do not exceed the Maximum size shown. 4. Click OK. 5. Record the new size in Table C-1. xStack Storage Management Center Software User's Guide 55
-
 1
1 -
2
-
3
-
4
-
5
-
6
-
7
-
8
-
9
-
10
-
11
-
12
-
13
-
14
-
15
-
16
-
17
-
18
-
19
-
20
-
21
-
22
-
23
-
24
-
25
-
26
-
27
-
28
-
29
-
30
-
31
-
32
-
33
-
34
-
35
-
36
-
37
-
38
-
39
-
40
-
41
-
42
-
43
-
44
-
45
-
46
-
47
-
48
-
49
-
50
-
51
-
52
-
53
-
54
-
55
-
56
-
57
-
58
-
59
-
 60
60 -
 61
61 -
 62
62 -
 63
63 -
 64
64 -
 65
65 -
 66
66 -
 67
67 -
 68
68 -
 69
69 -
 70
70 -
71
-
72
-
73
-
74
-
75
-
76
-
77
-
78
-
79
-
80
-
81
-
82
-
83
-
84
-
85
-
86
-
87
-
88
-
89
-
90
-
91
-
92
-
93
-
94
-
95
-
96
-
97
-
98
-
99
-
100
-
101
-
102
-
103
-
104
-
105
-
106
-
107
-
108
-
109
-
110
-
111
-
112
-
113
-
114
-
115
-
116
-
117
-
118
-
119
-
120
-
121
-
122
-
123
-
124
-
125
-
126
-
127
-
128
-
129
-
130
-
131
-
132
-
133
-
134
-
135
-
136
-
137
-
138
-
139
-
140
-
141
-
142
-
143
-
144
-
145
-
146
-
147
-
148
-
149
-
150
-
151
-
152
-
153
-
154
-
155
-
156
-
157
-
158
 |
 |
