D-Link DSN-540 Software User's Guide for DSN-1100-10 - Page 38
Customizing the Date and Time Display
 |
UPC - 790069324017
View all D-Link DSN-540 manuals
Add to My Manuals
Save this manual to your list of manuals |
Page 38 highlights
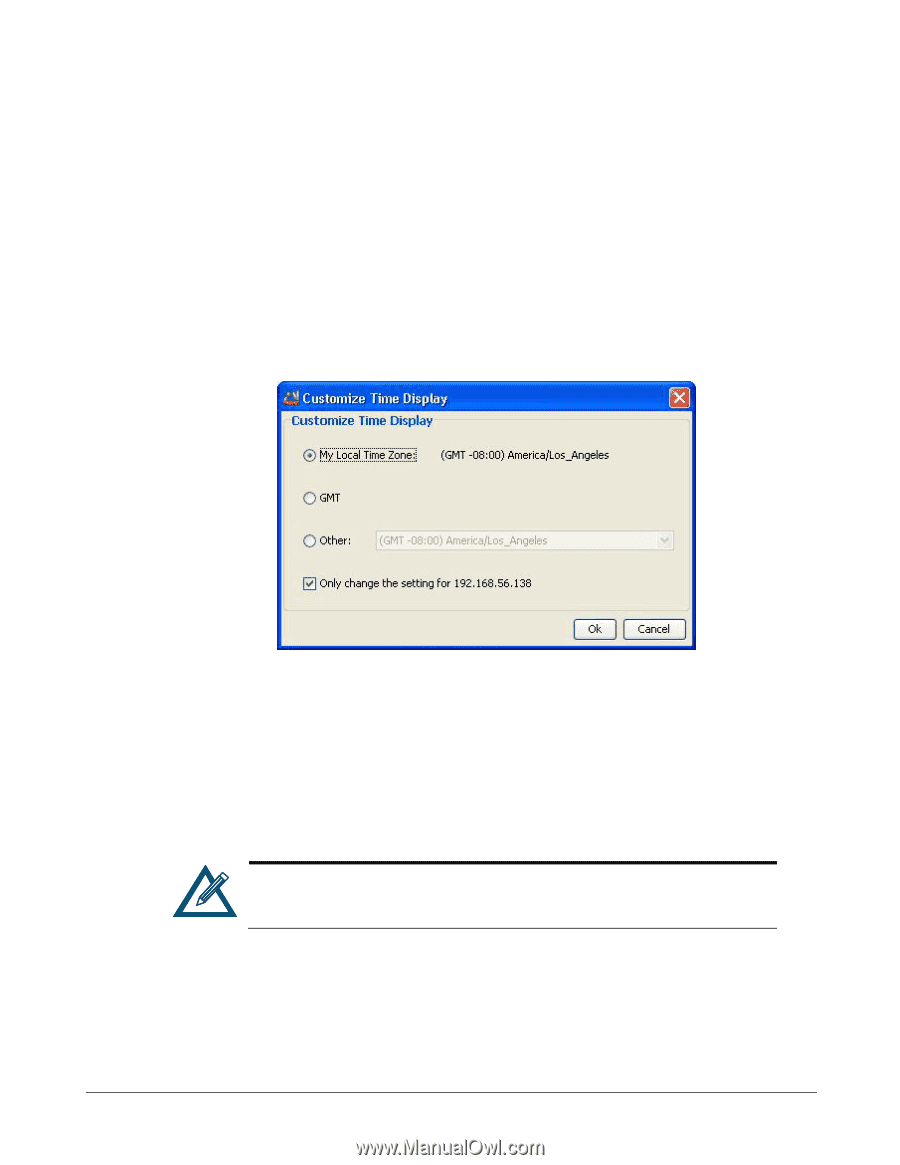
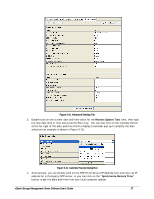
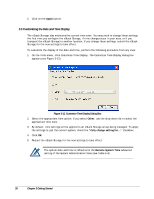
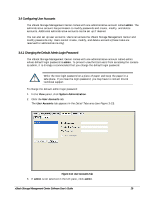
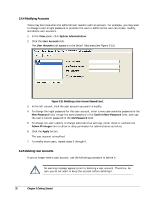
5. Click on the Apply button. 3.3 Customizing the Date and Time Display The xStack Storage also maintains the current time zone. You may need to change these settings the first time you configure the xStack Storage, if time changes occur in your area, or if you transport the xStack Storage to another location. If you change these settings, restart the xStack Storage for the new settings to take effect. To customize the display of the date and time, perform the following procedure from any view. 1. On the Tools menu, click Customize Time Display. The Customize Time Display dialog box appears (see Figure 3-12). Figure 3-12. Customize Time Display Dialog Box 2. Select the appropriate time option. If you select Other, use the drop-down list to select the appropriate time zone. 3. By default, time settings will be applied to all xStack Storage arrays being managed. To apply the settings to just the current system, check the "Only change setting for..." checkbox. 4. Click OK. 5. Restart the xStack Storage for the new settings to take effect. The system date and time is reflected in the Remote System Time advanced setting of the System Administration View (see Table 6-4). 28 Chapter 3 Getting Started
-
 1
1 -
2
-
3
-
4
-
5
-
6
-
7
-
8
-
9
-
10
-
11
-
12
-
13
-
14
-
15
-
16
-
17
-
18
-
19
-
20
-
21
-
22
-
23
-
24
-
25
-
26
-
27
-
28
-
29
-
30
-
31
-
32
-
 33
33 -
 34
34 -
 35
35 -
 36
36 -
 37
37 -
 38
38 -
 39
39 -
 40
40 -
 41
41 -
 42
42 -
 43
43 -
44
-
45
-
46
-
47
-
48
-
49
-
50
-
51
-
52
-
53
-
54
-
55
-
56
-
57
-
58
-
59
-
60
-
61
-
62
-
63
-
64
-
65
-
66
-
67
-
68
-
69
-
70
-
71
-
72
-
73
-
74
-
75
-
76
-
77
-
78
-
79
-
80
-
81
-
82
-
83
-
84
-
85
-
86
-
87
-
88
-
89
-
90
-
91
-
92
-
93
-
94
-
95
-
96
-
97
-
98
-
99
-
100
-
101
-
102
-
103
-
104
-
105
-
106
-
107
-
108
-
109
-
110
-
111
-
112
-
113
-
114
-
115
-
116
-
117
-
118
-
119
-
120
-
121
-
122
-
123
-
124
-
125
-
126
-
127
-
128
-
129
-
130
-
131
-
132
-
133
-
134
-
135
-
136
-
137
-
138
-
139
-
140
-
141
-
142
-
143
-
144
-
145
-
146
-
147
-
148
-
149
-
150
-
151
-
152
-
153
-
154
-
155
-
156
-
157
-
158
 |
 |