D-Link DSN-540 Software User's Guide for DSN-1100-10 - Page 66
Reconfiguring a Volume
 |
UPC - 790069324017
View all D-Link DSN-540 manuals
Add to My Manuals
Save this manual to your list of manuals |
Page 66 highlights
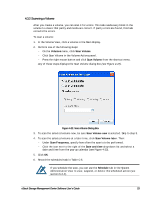
After the volume is grown, the size of the file system that resides on the volume may also need to be increased. For more information, refer to your host operating system documentation (for example, Windows Disk Management). 4.3.5 Reconfiguring a Volume After you create a volume (and it has finished initializing if it is a Parity volume), you can reconfigure its composition, stripe width and depth (if appropriate), number of drives, or volume size. When you reconfigure a volume, a Reconfigure tab in the Detail Tabs lets you view information about the volume being reconfigured (see section 4.4.3). During the volume reconfiguration process, the volume remains online and all of your original data is still available. Although the nominal size of the volume may not change, the physical storage capacity that is needed to accommodate a new volume composition may differ from the original volume. Therefore, you must ensure that sufficient available capacity exists before attempting to reconfigure an existing volume. The volume keeps its original composition until it is reconfigured. After it is reconfigured, the Reconfigure tab is removed from the Detail Tabs and the volume icon in the Volume View changes, if necessary, to indicate the volume's new composition. To reconfigure a volume: 1. In the Volume View, click a volume in the Main Display. 2. Perform one of the following steps: - On the Volumes menu, click Reconfigure Volume. - Click Reconfigure Volume Access in the Volume Actions panel. - Press the right mouse button and click Reconfigure Volume from the shortcut menu. Any of these steps displays the Volume Composition screen of the Create Volume Wizard (see Figure 4-26). 56 Chapter 4 Managing Volumes
-
 1
1 -
2
-
3
-
4
-
5
-
6
-
7
-
8
-
9
-
10
-
11
-
12
-
13
-
14
-
15
-
16
-
17
-
18
-
19
-
20
-
21
-
22
-
23
-
24
-
25
-
26
-
27
-
28
-
29
-
30
-
31
-
32
-
33
-
34
-
35
-
36
-
37
-
38
-
39
-
40
-
41
-
42
-
43
-
44
-
45
-
46
-
47
-
48
-
49
-
50
-
51
-
52
-
53
-
54
-
55
-
56
-
57
-
58
-
59
-
60
-
 61
61 -
 62
62 -
 63
63 -
 64
64 -
 65
65 -
 66
66 -
 67
67 -
 68
68 -
 69
69 -
 70
70 -
 71
71 -
72
-
73
-
74
-
75
-
76
-
77
-
78
-
79
-
80
-
81
-
82
-
83
-
84
-
85
-
86
-
87
-
88
-
89
-
90
-
91
-
92
-
93
-
94
-
95
-
96
-
97
-
98
-
99
-
100
-
101
-
102
-
103
-
104
-
105
-
106
-
107
-
108
-
109
-
110
-
111
-
112
-
113
-
114
-
115
-
116
-
117
-
118
-
119
-
120
-
121
-
122
-
123
-
124
-
125
-
126
-
127
-
128
-
129
-
130
-
131
-
132
-
133
-
134
-
135
-
136
-
137
-
138
-
139
-
140
-
141
-
142
-
143
-
144
-
145
-
146
-
147
-
148
-
149
-
150
-
151
-
152
-
153
-
154
-
155
-
156
-
157
-
158
 |
 |
