Epson 1520 User Manual - Page 119
Removing and Installing an Ink Cartridge
 |
UPC - 010343813328
View all Epson 1520 manuals
Add to My Manuals
Save this manual to your list of manuals |
Page 119 highlights
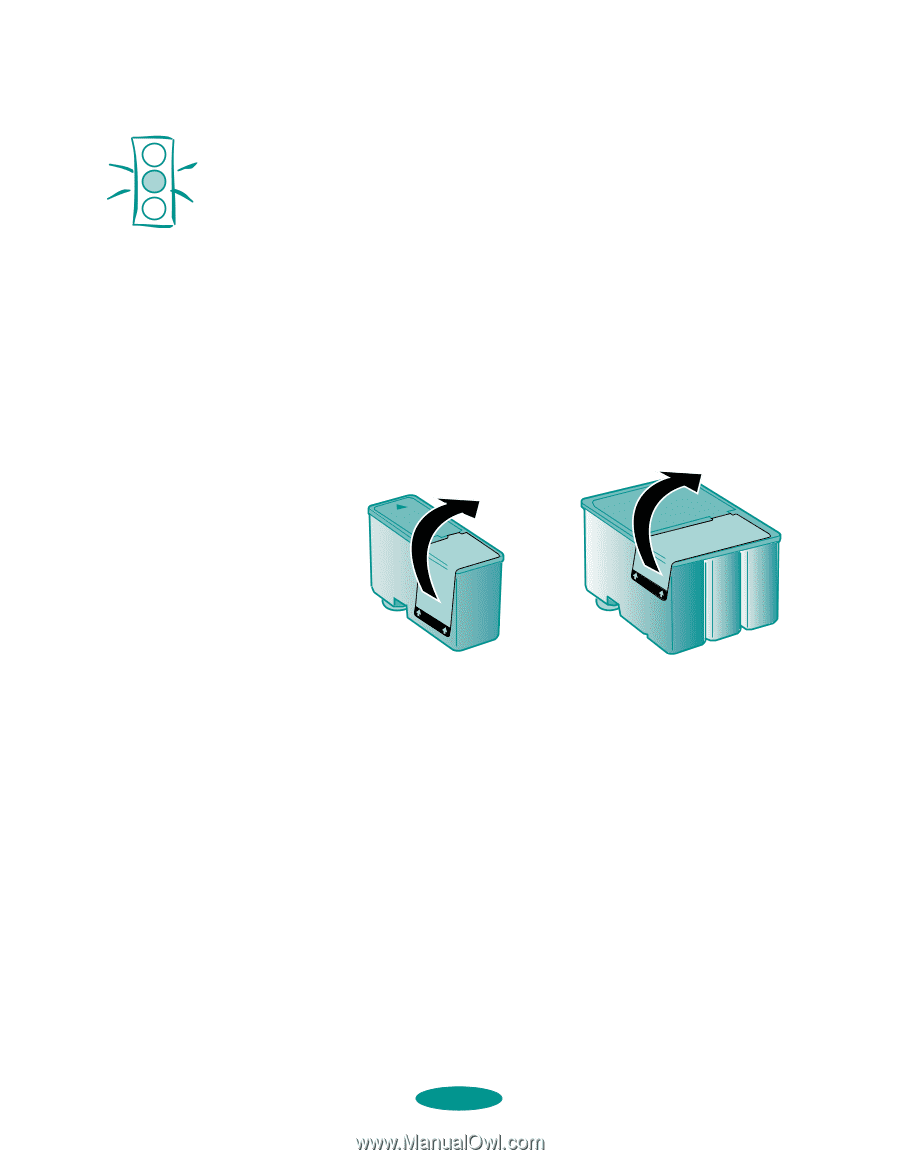
Caution: To avoid damaging the printer, never move the print heads by hand. Once you remove an ink cartridge, it becomes unusable and cannot be reinstalled. You must completely remove the yellow tape seal from the top of the cartridge; leaving any portion of it on will permanently damage the cartridge. Do not remove the clear seal from the bottom of the cartridge; ink will leak out. Maintenance and Transportation Removing and Installing an Ink Cartridge You should replace an ink cartridge only when the Ink Out B or Ink Out A light is flashing or on. However, if you need to replace an outdated cartridge, you can do so before its Ink Out light comes on. 1. Make sure the printer is turned on and not printing. 2. Open the printer cover. The Cover Open and Pause lights come on. 3. Remove the new ink cartridge from its packaging. Then completely remove the yellow portion of the tape seal as shown: black cartridge color cartridge 4. Hold down the Alt button on the printer's control panel for about three seconds. The print heads move slightly left and the Pause light begins flashing. (The print heads return to their home position if you don't proceed to step 5 within 60 seconds.) 5. Pull up the ink cartridge clamp for the cartridge you need to replace. The cartridge rises up from its holder. 6-5
-
 1
1 -
2
-
3
-
4
-
5
-
6
-
7
-
8
-
9
-
10
-
11
-
12
-
13
-
14
-
15
-
16
-
17
-
18
-
19
-
20
-
21
-
22
-
23
-
24
-
25
-
26
-
27
-
28
-
29
-
30
-
31
-
32
-
33
-
34
-
35
-
36
-
37
-
38
-
39
-
40
-
41
-
42
-
43
-
44
-
45
-
46
-
47
-
48
-
49
-
50
-
51
-
52
-
53
-
54
-
55
-
56
-
57
-
58
-
59
-
60
-
61
-
62
-
63
-
64
-
65
-
66
-
67
-
68
-
69
-
70
-
71
-
72
-
73
-
74
-
75
-
76
-
77
-
78
-
79
-
80
-
81
-
82
-
83
-
84
-
85
-
86
-
87
-
88
-
89
-
90
-
91
-
92
-
93
-
94
-
95
-
96
-
97
-
98
-
99
-
100
-
101
-
102
-
103
-
104
-
105
-
106
-
107
-
108
-
109
-
110
-
111
-
112
-
113
-
 114
114 -
 115
115 -
 116
116 -
 117
117 -
 118
118 -
 119
119 -
 120
120 -
 121
121 -
 122
122 -
 123
123 -
 124
124 -
125
-
126
-
127
-
128
-
129
-
130
-
131
-
132
-
133
-
134
-
135
-
136
-
137
-
138
-
139
-
140
-
141
-
142
-
143
-
144
-
145
-
146
-
147
-
148
-
149
-
150
-
151
-
152
-
153
-
154
-
155
-
156
-
157
-
158
-
159
-
160
-
161
-
162
-
163
-
164
-
165
-
166
-
167
 |
 |