Epson 1520 User Manual - Page 98
Changing Printer Settings with Default-Setting Mode, Entering Default-Setting Mode
 |
UPC - 010343813328
View all Epson 1520 manuals
Add to My Manuals
Save this manual to your list of manuals |
Page 98 highlights
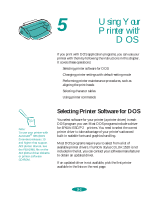
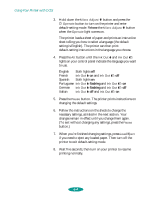
Using Your Printer with DOS Changing Printer Settings with Default-Setting Mode Your printer includes internal default settings that are active whenever you turn on the printer. These settings control functions such as the print direction and paper loading positions. Because they are preset to the most likely settings you'll want to use, you probably won't need to change them. However, you may want to change settings such as these for special projects: Turn on auto tear-off mode when you print on continuous paper or roll paper (but not when printing continuous labels) Turn on banner mode when you print on roll paper Select a slashed zero (0/) instead of a regular zero (0) when you print documents where the zero can easily be confused with a capital "O" You can check or change the default settings using the printer's control panel. Follow the steps in the next section. Note: The printer's control panel buttons perform different functions while the printer is in defaultsetting mode. Be sure to carefully follow the instructions your printer prints and don't try to perform standard control panel functions until you've exited default-setting mode. Entering Default-Setting Mode To enter default-setting mode and print an instruction sheet in your language, follow these steps: 1. Load four or more sheets of paper, at least 8.3 inches (210 mm) wide, into the built-in sheet feeder, making sure the right edge guide is positioned correctly for your paper's width and the paper release lever is set to the single sheet position. See page 3-6 for loading instructions. 2. Turn off the printer. 5-3
-
 1
1 -
2
-
3
-
4
-
5
-
6
-
7
-
8
-
9
-
10
-
11
-
12
-
13
-
14
-
15
-
16
-
17
-
18
-
19
-
20
-
21
-
22
-
23
-
24
-
25
-
26
-
27
-
28
-
29
-
30
-
31
-
32
-
33
-
34
-
35
-
36
-
37
-
38
-
39
-
40
-
41
-
42
-
43
-
44
-
45
-
46
-
47
-
48
-
49
-
50
-
51
-
52
-
53
-
54
-
55
-
56
-
57
-
58
-
59
-
60
-
61
-
62
-
63
-
64
-
65
-
66
-
67
-
68
-
69
-
70
-
71
-
72
-
73
-
74
-
75
-
76
-
77
-
78
-
79
-
80
-
81
-
82
-
83
-
84
-
85
-
86
-
87
-
88
-
89
-
90
-
91
-
92
-
 93
93 -
 94
94 -
 95
95 -
 96
96 -
 97
97 -
 98
98 -
 99
99 -
 100
100 -
 101
101 -
 102
102 -
 103
103 -
104
-
105
-
106
-
107
-
108
-
109
-
110
-
111
-
112
-
113
-
114
-
115
-
116
-
117
-
118
-
119
-
120
-
121
-
122
-
123
-
124
-
125
-
126
-
127
-
128
-
129
-
130
-
131
-
132
-
133
-
134
-
135
-
136
-
137
-
138
-
139
-
140
-
141
-
142
-
143
-
144
-
145
-
146
-
147
-
148
-
149
-
150
-
151
-
152
-
153
-
154
-
155
-
156
-
157
-
158
-
159
-
160
-
161
-
162
-
163
-
164
-
165
-
166
-
167
 |
 |
