Epson 1520 User Manual - Page 136
The Sorry, EPSON Stylus COLOR cannot be used message appears Macintosh., Your printer icon doesn't - driver stylus color
 |
UPC - 010343813328
View all Epson 1520 manuals
Add to My Manuals
Save this manual to your list of manuals |
Page 136 highlights
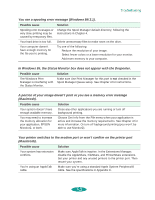
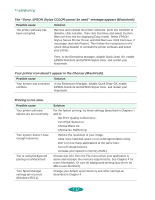
Troubleshooting The "Sorry, EPSON Stylus COLOR cannot be used" message appears (Macintosh). Possible cause The printer software has been corrupted. Solution Remove and reinstall the printer software. From the CD-ROM or diskette, click Installer. Then click Continue and select Custom Remove from the list displaying Easy Install. Select EPSON Stylus Series Printer Driver and click Remove. Click Continue, if necessary, and click Restart. Then follow the instructions in the Quick Setup booklet to reinstall the printer software and select your printer. Then, in the Extensions Manager, disable Quick Draw GX, enable EPSON Monitor2 and EPSON Stylus Color, and restart your Macintosh. Your printer icon doesn't appear in the Chooser (Macintosh). Possible cause Solution Your system has extension conflicts. In the Extensions Manager, disable Quick Draw GX, enable EPSON Monitor2 and EPSON Stylus Color, and restart your Macintosh. Printing is too slow. Possible cause Your printer software options are set incorrectly. Your system doesn't have enough resources. You're using background printing on a Macintosh. Your Spool Manager settings are incorrect (Windows 95/3.1). Solution For the fastest printing, try these settings (described in Chapters 1 and 2): Set Print Quality to Economy. Turn High Speed on. Choose Black ink. Choose No Halftoning. Reduce the resolution of your image. Clear more hard disk space or run a defragmentation utility. Don't run too many applications at the same time. Turn off virtual memory. Increase your system's memory (RAM). Choose Get Info from the File menu when your application is active and increase the memory requirements. See Chapter 4 for more information. Or turn off background printing (you won't be able to use Monitor2). Change your default spool directory and other settings as described in Chapter 4. 7-12
-
 1
1 -
2
-
3
-
4
-
5
-
6
-
7
-
8
-
9
-
10
-
11
-
12
-
13
-
14
-
15
-
16
-
17
-
18
-
19
-
20
-
21
-
22
-
23
-
24
-
25
-
26
-
27
-
28
-
29
-
30
-
31
-
32
-
33
-
34
-
35
-
36
-
37
-
38
-
39
-
40
-
41
-
42
-
43
-
44
-
45
-
46
-
47
-
48
-
49
-
50
-
51
-
52
-
53
-
54
-
55
-
56
-
57
-
58
-
59
-
60
-
61
-
62
-
63
-
64
-
65
-
66
-
67
-
68
-
69
-
70
-
71
-
72
-
73
-
74
-
75
-
76
-
77
-
78
-
79
-
80
-
81
-
82
-
83
-
84
-
85
-
86
-
87
-
88
-
89
-
90
-
91
-
92
-
93
-
94
-
95
-
96
-
97
-
98
-
99
-
100
-
101
-
102
-
103
-
104
-
105
-
106
-
107
-
108
-
109
-
110
-
111
-
112
-
113
-
114
-
115
-
116
-
117
-
118
-
119
-
120
-
121
-
122
-
123
-
124
-
125
-
126
-
127
-
128
-
129
-
130
-
 131
131 -
 132
132 -
 133
133 -
 134
134 -
 135
135 -
 136
136 -
 137
137 -
 138
138 -
 139
139 -
 140
140 -
 141
141 -
142
-
143
-
144
-
145
-
146
-
147
-
148
-
149
-
150
-
151
-
152
-
153
-
154
-
155
-
156
-
157
-
158
-
159
-
160
-
161
-
162
-
163
-
164
-
165
-
166
-
167
 |
 |