Epson FX-185 User Manual - Page 24
PROGRAMMER'S EASY LESSON, First Steps
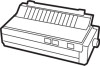 |
View all Epson FX-185 manuals
Add to My Manuals
Save this manual to your list of manuals |
Page 24 highlights
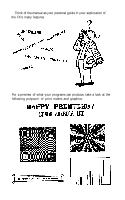
Programmer's Easy Lesson Before you start, note that we haven't claimed that one easy lesson will make you an FX maestro. It takes more than one lesson to learn the full value of the feature-packed FX printer. In fact, the more time you spend with this manual, the more your printer will cooperate with your every command. But some of you want to see something from a new printer right now-no matter what. The next few pages are especially for you. If you get stuck, the proper set-up procedures are covered in full in Chapter 1. First Steps 1. Make all connections with the power OFF! Connect your FX to your computer via the printer cable that you purchased separately. (Some computers require special printer interface boards, also purchased separately). 2. To use continuous-feed printer paper with pin-feed holes, set the friction-control lever and the paper bail toward the front of the printer. If you are using the FX-80, pull the paper under the plastic separator and through the paper path. If you are using the FX-100, you may need to first install the tractor unit, then pull the paper under it. In case the paper starts to jam on either model, refer to Chapter 1 for tips on inserting paper. As you straighten the paper, you will probably need to adjust the pin feeders. To use either a single sheet of paper or roll paper without pinfeed holes on the FX-80, first move the pin feeders out of the way. If a tractor unit is installed on your FX-100, you will need to remove it. Then, for either model, push the friction-control lever toward the rear of the printer, pull the paper bail forward, and insert the paper under the plastic separator. Use the manual-feed knob to 7
-
 1
1 -
2
-
3
-
4
-
5
-
6
-
7
-
8
-
9
-
10
-
11
-
12
-
13
-
14
-
15
-
16
-
17
-
18
-
 19
19 -
 20
20 -
 21
21 -
 22
22 -
 23
23 -
 24
24 -
 25
25 -
 26
26 -
 27
27 -
 28
28 -
 29
29 -
30
-
31
-
32
-
33
-
34
-
35
-
36
-
37
-
38
-
39
-
40
-
41
-
42
-
43
-
44
-
45
-
46
-
47
-
48
-
49
-
50
-
51
-
52
-
53
-
54
-
55
-
56
-
57
-
58
-
59
-
60
-
61
-
62
-
63
-
64
-
65
-
66
-
67
-
68
-
69
-
70
-
71
-
72
-
73
-
74
-
75
-
76
-
77
-
78
-
79
-
80
-
81
-
82
-
83
-
84
-
85
-
86
-
87
-
88
-
89
-
90
-
91
-
92
-
93
-
94
-
95
-
96
-
97
-
98
-
99
-
100
-
101
-
102
-
103
-
104
-
105
-
106
-
107
-
108
-
109
-
110
-
111
-
112
-
113
-
114
-
115
-
116
-
117
-
118
-
119
-
120
-
121
-
122
-
123
-
124
-
125
-
126
-
127
-
128
-
129
-
130
-
131
-
132
-
133
-
134
-
135
-
136
-
137
-
138
-
139
-
140
-
141
-
142
-
143
-
144
-
145
-
146
-
147
-
148
-
149
-
150
-
151
-
152
-
153
-
154
-
155
-
156
-
157
-
158
-
159
-
160
-
161
-
162
-
163
-
164
-
165
-
166
-
167
-
168
-
169
-
170
-
171
-
172
-
173
-
174
-
175
-
176
-
177
-
178
-
179
-
180
-
181
-
182
-
183
-
184
-
185
-
186
-
187
-
188
-
189
-
190
-
191
-
192
-
193
-
194
-
195
-
196
-
197
-
198
-
199
-
200
-
201
-
202
-
203
-
204
-
205
-
206
-
207
-
208
-
209
-
210
-
211
-
212
-
213
-
214
-
215
-
216
-
217
-
218
-
219
-
220
-
221
-
222
-
223
-
224
-
225
-
226
-
227
-
228
-
229
-
230
-
231
-
232
-
233
-
234
-
235
-
236
-
237
-
238
-
239
-
240
-
241
-
242
-
243
-
244
-
245
-
246
-
247
-
248
-
249
-
250
-
251
-
252
-
253
-
254
-
255
-
256
-
257
-
258
-
259
-
260
-
261
-
262
-
263
-
264
-
265
-
266
-
267
-
268
 |
 |