Epson FX-185 User Manual - Page 58
Control codes, some of them. For example, some popular systems intercept - driver
 |
View all Epson FX-185 manuals
Add to My Manuals
Save this manual to your list of manuals |
Page 58 highlights
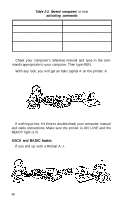
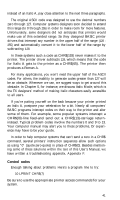
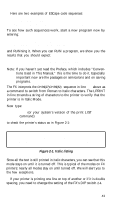
instead of an Italic A, pay close attention to the next three paragraphs. The original ASCII code was designed to use the decimal numbers zero through 127. Computer systems designers soon decided to extend this range (to 0 through 255) in order to make room for more features. Unfortunately, some designers did not anticipate that printers would make use of this extended range. So they designed BASIC printer drivers that intercept any number in the upper half of the range (128 255) and automatically convert it to the lower half of the range by subtracting 128. In these systems such a code as CHR$(193) never makes it to the printer. The printer driver subtracts 128, which means that the code for Italic A gets to the printer as a CHR$(65). The printer then produces a Roman A. For many applications, you won't need the upper half of the ASCII codes. For others, the inability to generate codes greater than 127 will be an obstacle. Whenever we can, we suggest ways to get around this obstacle. In Chapter 5, for instance, we discuss Italic Mode, which is the FX designers' method of making Italic characters easily accessible to all users. If you're patting yourself on the back because your printer printed an Italic A, postpone your celebration for a bit. Nearly all computers' BASIC programs intercept codes on their way to the printer and alter some of them. For example, some popular systems intercept a CHR$(l0)-line feed-and send out a CHR§(13)-carriage returninstead. Typical problem codes involve the numbers 0 and 9 to 13. Your computer manual may alert you to these problems, Or experience may have to be your guide. In order to help computer systems that can't send a zero in a CHR$ command, several printers' instruction sequences allow such options as using "0" (quote-zero-quote) in place of CHR$(0). Besides mentioning some of these solutions within the text of this User's Manual, we have written a troubleshooting appendix, Appendix F. Control codes Enough talking about problems. Here's a program line to try: 10 LPRINT CHR$(7) Be sure to use the appropriate printer access commands for your system. 41
-
 1
1 -
2
-
3
-
4
-
5
-
6
-
7
-
8
-
9
-
10
-
11
-
12
-
13
-
14
-
15
-
16
-
17
-
18
-
19
-
20
-
21
-
22
-
23
-
24
-
25
-
26
-
27
-
28
-
29
-
30
-
31
-
32
-
33
-
34
-
35
-
36
-
37
-
38
-
39
-
40
-
41
-
42
-
43
-
44
-
45
-
46
-
47
-
48
-
49
-
50
-
51
-
52
-
 53
53 -
 54
54 -
 55
55 -
 56
56 -
 57
57 -
 58
58 -
 59
59 -
 60
60 -
 61
61 -
 62
62 -
 63
63 -
64
-
65
-
66
-
67
-
68
-
69
-
70
-
71
-
72
-
73
-
74
-
75
-
76
-
77
-
78
-
79
-
80
-
81
-
82
-
83
-
84
-
85
-
86
-
87
-
88
-
89
-
90
-
91
-
92
-
93
-
94
-
95
-
96
-
97
-
98
-
99
-
100
-
101
-
102
-
103
-
104
-
105
-
106
-
107
-
108
-
109
-
110
-
111
-
112
-
113
-
114
-
115
-
116
-
117
-
118
-
119
-
120
-
121
-
122
-
123
-
124
-
125
-
126
-
127
-
128
-
129
-
130
-
131
-
132
-
133
-
134
-
135
-
136
-
137
-
138
-
139
-
140
-
141
-
142
-
143
-
144
-
145
-
146
-
147
-
148
-
149
-
150
-
151
-
152
-
153
-
154
-
155
-
156
-
157
-
158
-
159
-
160
-
161
-
162
-
163
-
164
-
165
-
166
-
167
-
168
-
169
-
170
-
171
-
172
-
173
-
174
-
175
-
176
-
177
-
178
-
179
-
180
-
181
-
182
-
183
-
184
-
185
-
186
-
187
-
188
-
189
-
190
-
191
-
192
-
193
-
194
-
195
-
196
-
197
-
198
-
199
-
200
-
201
-
202
-
203
-
204
-
205
-
206
-
207
-
208
-
209
-
210
-
211
-
212
-
213
-
214
-
215
-
216
-
217
-
218
-
219
-
220
-
221
-
222
-
223
-
224
-
225
-
226
-
227
-
228
-
229
-
230
-
231
-
232
-
233
-
234
-
235
-
236
-
237
-
238
-
239
-
240
-
241
-
242
-
243
-
244
-
245
-
246
-
247
-
248
-
249
-
250
-
251
-
252
-
253
-
254
-
255
-
256
-
257
-
258
-
259
-
260
-
261
-
262
-
263
-
264
-
265
-
266
-
267
-
268
 |
 |