HP 635n HP Jetdirect Print Server Administrator's Guide - Page 99
Certificate Configuration Screens continued, Install Certificate
 |
UPC - 882780301016
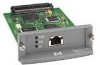
View all HP 635n manuals
Add to My Manuals
Save this manual to your list of manuals |
Page 99 highlights
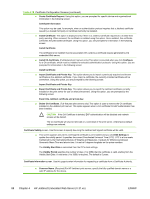
Table 4-15 Certificate Configuration Screens (continued) Examples: Domain Name: myprinter.mydepartment.mycompany.com IP address: 192.168.2.116 The Common Name will be used to uniquely identify the device. For HP Jetdirect print servers using EAP authentication, some authentication servers may need to be configured with the Common Name as specified on the certificate. If the default IP address 192.0.0.192 is configured on the Jetdirect print server, it will not likely be valid for your network. You should not use this default address to identify your device. ■ Organization. (Required) Specify the full legal name for your company. ■ Organizational Unit. (Optional) Specify your department, division, or other subgroup of your organization. ■ City/Locality. (Required) Enter the city or locality in which your organization is located. ■ State/Province. (Required for all countries/regions) Must contain at least three characters. (required) ■ Country/Region. Two-character ISO 3166 country/region code. For example, use "gb" Great Britain or "us" for USA (required). Install Certificate, or Install CA Certificate screens. Use the Install Certificate screen to install a Jetdirect certificate. Use the Install CA Certificate screen to install a trusted Certificate Authority (CA) certificate for use during EAP authentication. (Full-featured print servers only) ■ Install a PEM/Base64 (Privacy Enhanced Mail) encoded certificate. To install a certificate, specify the name and path of the file that contains the certificate. Or, click Browse to browse your system for the file. Click Finish to complete the installation. To install a certificate, it must be associated with a pending certificate request by the embedded Web server. The Install Certificate option will not be presented if there is no pending request. Import Certificate and Private Key screen. Use this screen to import a Jetdirect certificate and private key. ■ Import a Jetdirect certificate and private key. When imported, the existing certificate and private key will be overwritten. The file format must be PKCS#12 encoded (.pfx). To import a certificate and private key, specify the name and path of the file that contains the certificate and private key. Or, click Browse to browse your system for the file. Then enter the password that was used to encrypt the private key. Click Finish to complete the installation. Export the Jetdirect certificate and private key screen. Use this screen to export the installed Jetdirect certificate and private key to a file. ■ To export a certificate and private key, enter a password that will be used to encrypt the private key. You must enter the password again to confirm it. Then click Save As to save the certificate and private key in a file on your system. The file format will be PKCS#12 encoded (.pfx). ENWW Networking Tab 89
-
 1
1 -
2
-
3
-
4
-
5
-
6
-
7
-
8
-
9
-
10
-
11
-
12
-
13
-
14
-
15
-
16
-
17
-
18
-
19
-
20
-
21
-
22
-
23
-
24
-
25
-
26
-
27
-
28
-
29
-
30
-
31
-
32
-
33
-
34
-
35
-
36
-
37
-
38
-
39
-
40
-
41
-
42
-
43
-
44
-
45
-
46
-
47
-
48
-
49
-
50
-
51
-
52
-
53
-
54
-
55
-
56
-
57
-
58
-
59
-
60
-
61
-
62
-
63
-
64
-
65
-
66
-
67
-
68
-
69
-
70
-
71
-
72
-
73
-
74
-
75
-
76
-
77
-
78
-
79
-
80
-
81
-
82
-
83
-
84
-
85
-
86
-
87
-
88
-
89
-
90
-
91
-
92
-
93
-
 94
94 -
 95
95 -
 96
96 -
 97
97 -
 98
98 -
 99
99 -
 100
100 -
 101
101 -
 102
102 -
 103
103 -
 104
104 -
105
-
106
-
107
-
108
-
109
-
110
-
111
-
112
-
113
-
114
-
115
-
116
-
117
-
118
-
119
-
120
-
121
-
122
-
123
-
124
-
125
-
126
-
127
-
128
-
129
-
130
-
131
-
132
-
133
-
134
-
135
-
136
-
137
-
138
-
139
-
140
-
141
-
142
-
143
-
144
-
145
-
146
-
147
-
148
-
149
-
150
-
151
-
152
-
153
-
154
-
155
-
156
-
157
-
158
-
159
-
160
-
161
-
162
-
163
-
164
-
165
-
166
-
167
-
168
-
169
-
170
-
171
-
172
-
173
-
174
-
175
-
176
-
177
-
178
-
179
-
180
-
181
-
182
-
183
-
184
-
185
-
186
-
187
-
188
-
189
-
190
-
191
-
192
-
193
-
194
 |
 |