HP PSC 950 HP PSC 900 Series - (English) Reference Guide - Page 11
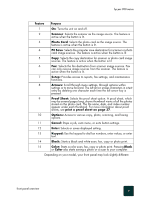
make a copy, adjust copy settings, Scanner, PC Save, Color, Black, Options, Number of Copies
 |
UPC - 725184893704
View all HP PSC 950 manuals
Add to My Manuals
Save this manual to your list of manuals |
Page 11 highlights
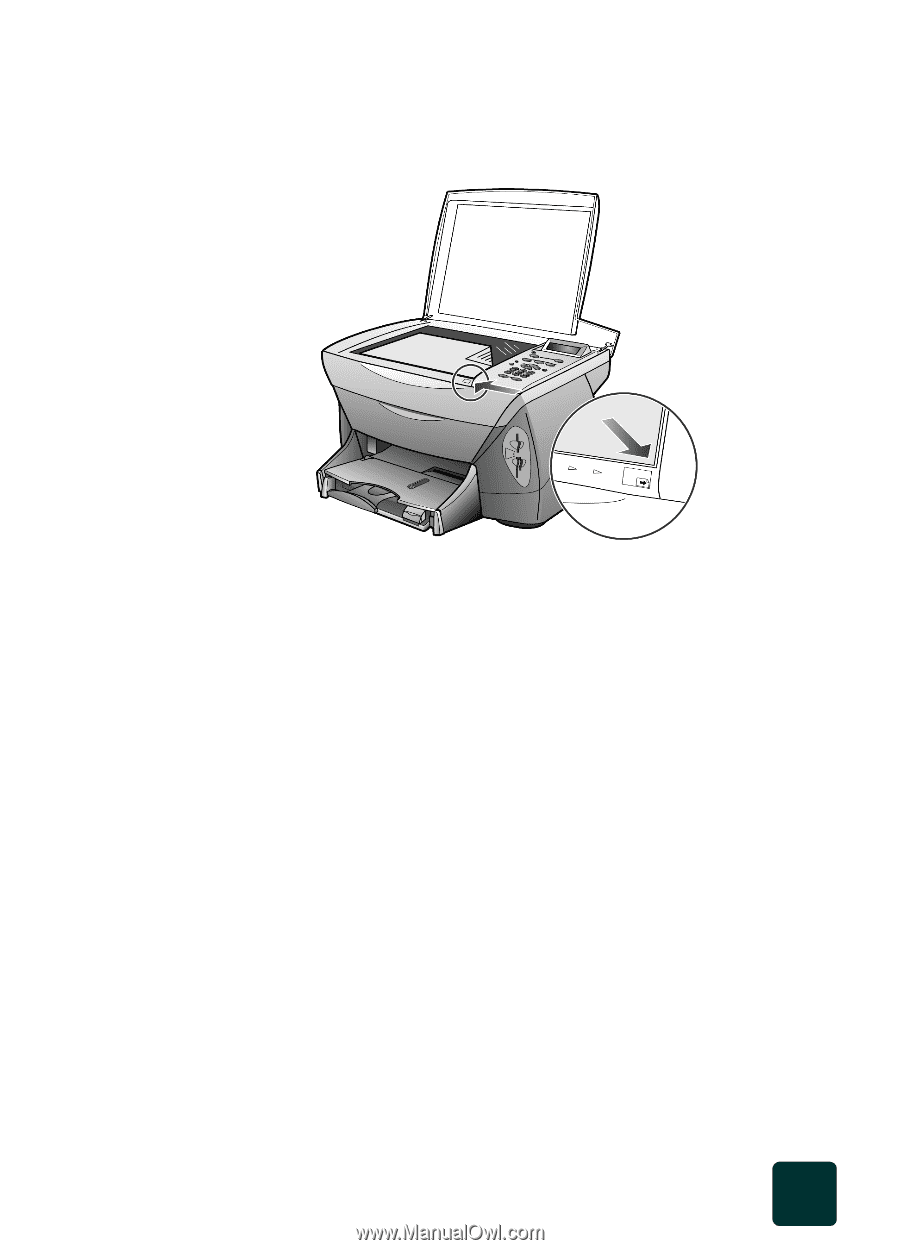
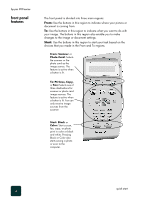
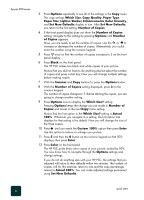
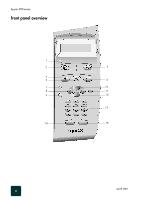
make a copy hp psc 900 series 1 Open the lid of your HP PSC and place your photo or picture face down in the front right corner of the scanner glass with the sides of the original touching the right and front edges. adjust copy settings tutorial Top edge of original Notice that the Scanner button is lit in the From region of the front panel. This indicates that the source is coming from the scanner glass. Scanner is the default, so this button is lit unless you insert a photo card into the slot. 2 Press Copy on the front panel. This indicates that you want to make a copy of the picture on the glass. Copy is also the default, so the Copy button is typically lit. If you had wanted to save the picture to the computer, you would have pressed PC Save. If you had wanted to fax the picture, you would have pressed the Fax button instead of the Copy button. For this tutorial, you will continue making a copy. 3 Press Color on the front panel. The default is a single copy. Pressing the Color button on the HP PSC automatically prints one color copy of the picture on the glass. If you had pressed the Black button, the HP PSC would have made a single grayscale copy of your color picture. 1 Place your photo or picture face down on the scanner glass in the front right corner with the sides of the originals touching the right and front edges. Now you will change some copy settings before starting the copy. 2 With the Scanner and Copy buttons lit, press Options on the front panel. The first setting in the Copy menu, Number of Copies, appears on the front panel display. 5
-
 1
1 -
2
-
3
-
4
-
5
-
 6
6 -
 7
7 -
 8
8 -
 9
9 -
 10
10 -
 11
11 -
 12
12 -
 13
13 -
 14
14 -
 15
15 -
 16
16 -
17
-
18
-
19
-
20
-
21
-
22
-
23
-
24
-
25
-
26
-
27
-
28
-
29
-
30
-
31
-
32
-
33
-
34
-
35
-
36
-
37
-
38
-
39
-
40
-
41
-
42
-
43
-
44
-
45
-
46
-
47
-
48
-
49
-
50
-
51
-
52
-
53
-
54
-
55
-
56
-
57
-
58
-
59
-
60
-
61
-
62
-
63
-
64
-
65
-
66
-
67
-
68
-
69
-
70
-
71
-
72
-
73
-
74
-
75
-
76
-
77
-
78
-
79
-
80
 |
 |