HP PSC 950 HP PSC 900 Series - (English) Reference Guide - Page 60
delete speed- dial settings, set the date and time, delete speed, dial settings
 |
UPC - 725184893704
View all HP PSC 950 manuals
Add to My Manuals
Save this manual to your list of manuals |
Page 60 highlights
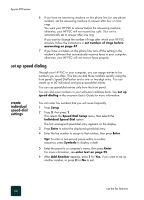
hp psc 900 series delete speeddial settings 4 Press until the group that you want to edit appears, then press Enter. The first individual speed-dial entry in that group appears. 5 For each entry in the group, press 1 to delete it or 2 to keep it. 6 After Add Another appears, choose one of the following: - If you want to add new individual entries to the group, press 1 and see create group speed-dial settings on page 53. - If you do not want to add any additional individual numbers, press 2 to edit the group name, or press Enter to save it as is. Follow these steps to delete an individual or group speed-dial entry. 1 Press Setup. 2 Press 2, then press 3. This selects the Speed Dial Setup menu, then selects the Delete Speed Dial option. 3 Press until the individual or group entry that you want to delete appears, then press Enter. Tip! Removing an individual speed-dial number will also remove the number from any speed-dial groups. set the date and time You can set the date and time from the front panel. When a fax is transmitted, the current date and time is printed along with the fax header. The date and time format is based upon the language and country setting. Normally the computer software sets the date and time automatically. 1 Press Setup. 2 Press 3, then press 1. This selects the Basic Fax Setup menu, then selects the Date and Time option. 3 Enter the month, day, and year (last two digits only) by pressing the appropriate number on the keypad. The underline cursor presented initially beneath the first digit advances automatically to each digit after, each time you press a button. The time prompt automatically appears after you enter the last digit of the date. 4 Enter the hours and minutes. The AM/PM prompt automatically appears after the last digit of the time is entered. 5 Press 1 for AM or 2 for PM. The new time and date settings appear on the front panel. use the fax features 54
-
 1
1 -
2
-
3
-
4
-
5
-
6
-
7
-
8
-
9
-
10
-
11
-
12
-
13
-
14
-
15
-
16
-
17
-
18
-
19
-
20
-
21
-
22
-
23
-
24
-
25
-
26
-
27
-
28
-
29
-
30
-
31
-
32
-
33
-
34
-
35
-
36
-
37
-
38
-
39
-
40
-
41
-
42
-
43
-
44
-
45
-
46
-
47
-
48
-
49
-
50
-
51
-
52
-
53
-
54
-
 55
55 -
 56
56 -
 57
57 -
 58
58 -
 59
59 -
 60
60 -
 61
61 -
 62
62 -
 63
63 -
 64
64 -
 65
65 -
66
-
67
-
68
-
69
-
70
-
71
-
72
-
73
-
74
-
75
-
76
-
77
-
78
-
79
-
80
 |
 |