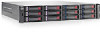
HP StorageWorks P2000 HP StorageWorks P2000 G3 MSA System SMU Reference Guide - Page 81
Verifying a vdisk, Tools > Verify Vdisk, Start Verify Utility, Tools > Media Scrub Vdisk
 |
View all HP StorageWorks P2000 manuals
Add to My Manuals
Save this manual to your list of manuals |
Page 81 highlights
Verifying a vdisk If you suspect that a redundant (mirror or parity) vdisk has a problem, you can run the Verify utility to check the vdisk's integrity. For example, if the storage system was operating outside the normal temperature range, you might want to verify its vdisks. The Verify utility checks whether the redundancy data in the vdisk is consistent with the user data in the vdisk. For RAID 3, 5, 6, and 50, the utility checks all parity blocks to find data-parity mismatches. For RAID 1 and 10, the utility compares the primary and secondary disks to find data inconsistencies. Verification can last over an hour, depending on the size of the vdisk, the utility priority, and the amount of I/O activity. When verification is complete, the number of inconsistencies found is reported with event code 21 in the event log. Such inconsistencies can indicate that a disk in the vdisk is going bad. For information about identifying a failing disk, use the SMART option (see Configuring SMART on page 48). You can use a vdisk while it is being verified. If too many utilities are running for verification to start, either wait until those utilities have completed and try again, or abort a utility to free system resources. If you abort verification, you cannot resume it; you must start it over. To verify a vdisk 1. In the Configuration View panel, right-click a redundant vdisk and select Tools > Verify Vdisk. 2. Click Start Verify Utility. A message confirms that verification has started. 3. Click OK. The panel shows the verification's progress. To abort vdisk verification 1. In the Configuration View panel, right-click a redundant vdisk and select Tools > Verify Vdisk. 2. Click Abort Verify Utility. A message confirms that verification has been aborted. 3. Click OK. Scrubbing a vdisk The system-level Background Scrub option (see Configuring background scrub on page 51) automatically checks all vdisks for disk defects. If this option is disabled, you can still perform a scrub on a selected vdisk. The scrub utility analyzes a vdisk's disks to detect, report, and store information about disk defects. Vdisk-level errors reported include: hard errors, medium errors, and bad block replacements (BBRs). Disk-level errors reported include: metadata read errors, SMART events during scrub, bad blocks during scrub, and new disk defects during scrub. For RAID 3, 5, 6, and 50, the utility checks all parity blocks to find data-parity mismatches. For RAID 1 and 10, the utility compares the primary and secondary disks to find data inconsistencies. For NRAID and RAID 0, the utility checks for media errors. This utility does not fix defects. You can use a vdisk while it is being scrubbed. A scrub can last over an hour, depending on the size of the vdisk, the utility priority, and the amount of I/O activity. However, a foreground scrub is typically faster than a background scrub. When a scrub is complete, the number of errors found is reported with event code 207 in the event log. To scrub a vdisk 1. In the Configuration View panel, right-click a vdisk and select Tools > Media Scrub Vdisk. 2. Click Start Media Scrub Utility. A message confirms that the scrub has started. 3. Click OK. The panel shows the scrub's progress. To abort a vdisk scrub 1. In the Configuration View panel, right-click a vdisk and select Tools > Media Scrub Vdisk. 2. Click Abort Media Scrub Utility. A message confirms that the scrub has been aborted. 3. Click OK. HP StorageWorks P2000 G3 MSA System SMU Reference Guide 81
-
 1
1 -
2
-
3
-
4
-
5
-
6
-
7
-
8
-
9
-
10
-
11
-
12
-
13
-
14
-
15
-
16
-
17
-
18
-
19
-
20
-
21
-
22
-
23
-
24
-
25
-
26
-
27
-
28
-
29
-
30
-
31
-
32
-
33
-
34
-
35
-
36
-
37
-
38
-
39
-
40
-
41
-
42
-
43
-
44
-
45
-
46
-
47
-
48
-
49
-
50
-
51
-
52
-
53
-
54
-
55
-
56
-
57
-
58
-
59
-
60
-
61
-
62
-
63
-
64
-
65
-
66
-
67
-
68
-
69
-
70
-
71
-
72
-
73
-
74
-
75
-
 76
76 -
 77
77 -
 78
78 -
 79
79 -
 80
80 -
 81
81 -
 82
82 -
 83
83 -
 84
84 -
 85
85 -
 86
86 -
87
-
88
-
89
-
90
-
91
-
92
-
93
-
94
-
95
-
96
-
97
-
98
-
99
-
100
-
101
-
102
-
103
-
104
-
105
-
106
-
107
-
108
-
109
-
110
-
111
-
112
-
113
-
114
-
115
-
116
-
117
-
118
-
119
-
120
-
121
-
122
-
123
-
124
-
125
-
126
-
127
-
128
-
129
-
130
-
131
-
132
-
133
-
134
-
135
-
136
-
137
-
138
-
139
-
140
-
141
-
142
 |
 |
