HP xw3400 HP xw3400 Workstation - Service and Technical Reference Guide
HP xw3400 - Workstation Manual
 |
View all HP xw3400 manuals
Add to My Manuals
Save this manual to your list of manuals |
HP xw3400 manual content summary:
- HP xw3400 | HP xw3400 Workstation - Service and Technical Reference Guide - Page 1
Service and Technical Reference Guide HP xw3400 Workstation - HP xw3400 | HP xw3400 Workstation - Service and Technical Reference Guide - Page 2
by copyright. No part of this document may be photocopied, reproduced, or translated to another language without the prior written consent of Hewlett-Packard Company. Service and Technical Reference Guide HP xw3400 Workstations First Edition (February 2007) Document Part Number: 446012-001 - HP xw3400 | HP xw3400 Workstation - Service and Technical Reference Guide - Page 3
About This Book WARNING! Text set off in this manner indicates that failure to follow directions could result in bodily harm or loss of life. CAUTION: Text set off in this manner indicates that failure to follow directions could result in damage to equipment or loss of information. NOTE: Text set - HP xw3400 | HP xw3400 Workstation - Service and Technical Reference Guide - Page 4
iv About This Book ENWW - HP xw3400 | HP xw3400 Workstation - Service and Technical Reference Guide - Page 5
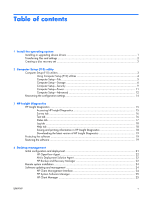
contents 1 Install the operating system Installing or upgrading device drivers 1 Transferring files and settings ...2 Creating a disc recovery in HP Insight Diagnostics 18 Downloading the latest version of HP Insight Diagnostics 19 Protecting the software ...19 Restoring the software - HP xw3400 | HP xw3400 Workstation - Service and Technical Reference Guide - Page 6
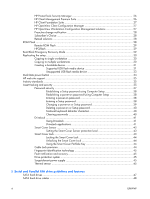
30 Copying to multiple workstations 30 Creating a bootable device 31 Supported USB flash media device 31 Unsupported USB flash media device 33 Dual-State power button ...34 HP web site support ...35 Industry standards ...35 Asset tracking and security ...35 Password security ...37 Establishing - HP xw3400 | HP xw3400 Workstation - Service and Technical Reference Guide - Page 7
55 Cleaning the workstation case 55 Cleaning the keyboard 56 Cleaning the monitor 56 Cleaning the mouse 57 Service considerations ...57 Power 62 Front drive bezels ...63 Cable management ...64 Cable connections 65 Memory ...66 Expansion cards ...67 Drives ...74 Drive positions ...74 - HP xw3400 | HP xw3400 Workstation - Service and Technical Reference Guide - Page 8
...98 Line-in audio ...98 Line-out audio ...98 External infrared specific requirements 105 Appendix C POST error messages Power-On Self-Test (POST) ...107 POST numeric codes and text messages 108 Interpreting POST diagnostic front panel LEDs and audible codes 115 Appendix D Troubleshooting - HP xw3400 | HP xw3400 Workstation - Service and Technical Reference Guide - Page 9
Solving media card reader problems 132 Solving display problems ...134 Solving audio problems ...138 Solving printer problems ...140 Solving keyboard and mouse problems 141 Solving hardware installation problems 143 Solving network problems ...145 Solving memory problems ...148 Solving processor - HP xw3400 | HP xw3400 Workstation - Service and Technical Reference Guide - Page 10
x ENWW - HP xw3400 | HP xw3400 Workstation - Service and Technical Reference Guide - Page 11
and configuring instructions, refer to drivers. Obtain the latest support software, including support software for the operating system from www.hp.com/support. Select the appropriate country and language then, select Download drivers and software, enter the model number of the workstation - HP xw3400 | HP xw3400 Workstation - Service and Technical Reference Guide - Page 12
instructions in the wizard. The HP user manual at Start > HP Backup and Recovery > HP Backup and Recovery Manager Manual. NOTE: If Create factory software recovery CDs or DVDs to recover the system is unavailable on the system, the HP Restore Plus CD set can be obtained through product support - HP xw3400 | HP xw3400 Workstation - Service and Technical Reference Guide - Page 13
for processor, graphics, memory, audio, storage, communications, POST messages, such as memory count, product name, and of the mode selected. To manually switch to Post Messages Enabled during by the company to this workstation. ● Enable the power USB, or parallel ports, audio, or embedded NIC, so - HP xw3400 | HP xw3400 Workstation - Service and Technical Reference Guide - Page 14
restoring it on one or more workstations. ● Execute self-tests on a specified ATA hard drive (when supported by drive). ● Enable or disable DriveLock security (when supported option will restore the original factory system defaults. CAUTION: Do NOT turn the workstation power OFF while the BIOS is - HP xw3400 | HP xw3400 Workstation - Service and Technical Reference Guide - Page 15
Support for specific core processors have this listed twice) ● Installed memory size/speed, number of channels (single or to select a drive containing a new BIOS. Replicated Setup Save to Removable Media Saves a diskette drive). Restore from Removable Media Restores system configuration from a - HP xw3400 | HP xw3400 Workstation - Service and Technical Reference Guide - Page 16
Support for specific Computer Setup options may vary depending on the hardware configuration. Table 2-3 Computer Setup-Storage Option Description Device Configuration Lists all installed BIOS , User, and None. CAUTION: Ordinarily, the translation mode selected automatically by the BIOS should - HP xw3400 | HP xw3400 Workstation - Service and Technical Reference Guide - Page 17
BIOS will service ATA disk read and write requests with PIO data transfers. SATA Emulation Allows you to choose how the SATA controller and devices are accessed by the operating system. The only supported option is IDE, which is the deault. NOTE: RAID is not supported on the xw3400 Workstation - HP xw3400 | HP xw3400 Workstation - Service and Technical Reference Guide - Page 18
started. Shortcut to Temporarily Override Boot Order To boot one time from a device other than the default device specified in Boot Order, restart the workstation and press F9 when the monitor light turns green. After POST is completed, a list of bootable devices is displayed. Use the arrow keys - HP xw3400 | HP xw3400 Workstation - Service and Technical Reference Guide - Page 19
NOTE: Support for specific Computer Setup user does not enter the correct power-on password, the unit will not boot. NOTE: This password does not appear on warm boots , such as Ctrl + Alt + Delete or Restart from Windows, unless enabled in Password Options, below. See the Troubleshooting Guide - HP xw3400 | HP xw3400 Workstation - Service and Technical Reference Guide - Page 20
(some models) Network Service Boot Enables/disables the workstation's ability to boot from that supports the DriveLock feature is attached to the system. See the Desktop Management Guide on may set individual items to None, indicating the user can make changes to the specified options when setup - HP xw3400 | HP xw3400 Workstation - Service and Technical Reference Guide - Page 21
NOTE: Support for specific Computer ACPI S3 Hard Disk Reset-Enabling this causes the BIOS to ensure hard disks are ready to accept commands after insertion. ● Unique Sleep Blink Rates-This feature is designed to give the user a visual indication of the sleep state the system is in. Each sleep state - HP xw3400 | HP xw3400 Workstation - Service and Technical Reference Guide - Page 22
Support for specific Computer Setup options may vary depending on the hardware configuration. Table 2-6 Computer Setup-Advanced (for advanced users Network Service Memory Test (some models) Restarts the workstation and executes the POST memory test. BIOS Power-On Allows you to set the workstation - HP xw3400 | HP xw3400 Workstation - Service and Technical Reference Guide - Page 23
the power used by the workstation in S5. ● Processor cache (enable/disable). ● Integrated Graphics Memory Size (Automatic, 32M, 64M, 128M, 256M). This allows the user to control the size of the memory used by the integrated graphics controller. Automatic allows the BIOS to choose the optimal size - HP xw3400 | HP xw3400 Workstation - Service and Technical Reference Guide - Page 24
to Removable Media command with the Computer Setup (F10) Utility before Restore is needed. (See Save to Removable Media on page 5 in Setup-File table.) NOTE: It is recommended that you save any modified workstation configuration settings to a diskette, a USB flash media device, or a diskette - HP xw3400 | HP xw3400 Workstation - Service and Technical Reference Guide - Page 25
to the Customer Support Center. NOTE: Third party devices may not be detected by HP Insight Diagnostics. Accessing HP Insight Diagnostics You must boot to the Documentation and Diagnostics CD, as described in the steps below, to access HP Insight Diagnostics. 1. While the workstation is on, insert - HP xw3400 | HP xw3400 Workstation - Service and Technical Reference Guide - Page 26
about all memory in the workstation. This includes memory slots on the system board and any memory modules installed. Miscellaneous-Shows HP Insight Diagnostics version information, workstation configuration memory (CMOS) information, system board data, and system management BIOS data. Storage - HP xw3400 | HP xw3400 Workstation - Service and Technical Reference Guide - Page 27
test progress of all devices being tested ● The test progress for each device being tested ● The elapsed test times for each device being tested ENWW HP Insight Diagnostics 17 - HP xw3400 | HP xw3400 Workstation - Service and Technical Reference Guide - Page 28
error Message and a Recommended Repair action that should help solve the problem. To find an error code description quickly, enter the code in the . 1. Insert a diskette or USB 2.0 HP Drive Key (capacity must be 64MB or higher). USB 1.0 Drive Keys are not supported. 2. Click Save in the bottom right - HP xw3400 | HP xw3400 Workstation - Service and Technical Reference Guide - Page 29
xw3400) in the text box and press the Enter key. 4. Select your specific workstation model. 5. Select your OS. 6. Click the Diagnostic link. 7. Click HP Insight Diagnostics Offline Edition. 8. Select a language and click Download. NOTE: The download includes instructions initiated manually. Recovery - HP xw3400 | HP xw3400 Workstation - Service and Technical Reference Guide - Page 30
the message "Press F11 for Emergency Recovery." NOTE: For more information on using HP Backup and Recovery Manager, refer to the HP Backup and Recovery Manager User Guide by selecting Start > HP Backup and Recovery > HP Backup and Recovery Manager Manual. 20 Chapter 3 HP Insight Diagnostics ENWW - HP xw3400 | HP xw3400 Workstation - Service and Technical Reference Guide - Page 31
Support for specific features described in this guide may vary by model or software version. Initial configuration and deployment The workstation comes environment and processes. The Workstation Deployment section of the HP Lifecycle Service Web site (http://h20219.www2.hp.com/ ENWW Initial - HP xw3400 | HP xw3400 Workstation - Service and Technical Reference Guide - Page 32
and troubleshooting, and power management. NOTE: See HP Backup and Recovery Manager on page 22 for information on creating the Restore Plus! CD. HP OpenView Agent The Radia Management Agent (RMA) used by both HP OpenView Client Configuration Manager and HP OpenView Workstation Configuration - HP xw3400 | HP xw3400 Workstation - Service and Technical Reference Guide - Page 33
Manager Manual. We suggest that you print this document for easy reference in case of future emergency. If Create factory software recovery CDs or DVDs to recover the system is unavailable on your system, the HP Restore Plus! CD set can be obtained through product support on http://welcome.hp.com - HP xw3400 | HP xw3400 Workstation - Service and Technical Reference Guide - Page 34
Installation, press F12 when the F12 = Network Service Boot message appears in the lower-right corner of the HP logo screen when the workstation is booting up. Follow the instructions on the screen to continue the process. The default boot order is a BIOS configuration setting that can be changed to - HP xw3400 | HP xw3400 Workstation - Service and Technical Reference Guide - Page 35
of HP client systems. Use HP Client Manager to: ● Get valuable hardware information such as CPU, memory, video, and security settings ● Monitor system health to fix problems before they occur ● Automatically acquire and install drivers and BIOS updates without visiting each workstation ● Remotely - HP xw3400 | HP xw3400 Workstation - Service and Technical Reference Guide - Page 36
with HP Instant Support tools reduces hardware troubleshooting time. ● Diagnostics-remotely run & view reports on HP desktop, notebook, and workstation models ● System Health Scan-check for known hardware issues in your installed base of HP client systems ● Active Chat-connect to HP customer support - HP xw3400 | HP xw3400 Workstation - Service and Technical Reference Guide - Page 37
hardware driver and BIOS updates ◦ Integration with HP ProtectTools ◦ Free add-on support for Intel Active Management Technology (AMT) For more information about the HP OpenView Client Configuration Manager, visit http://www.managementsoftware.hp.com/products/ccm/index.html. HP OpenView Workstation - HP xw3400 | HP xw3400 Workstation - Service and Technical Reference Guide - Page 38
overwritten. This is important to ensure the operating integrity of the workstation. Should you need or want to upgrade the BIOS, you may download the latest BIOS images from the HP driver and support page, http:///www.hp.com/support/files. CAUTION: For maximum ROM protection, be sure to establish - HP xw3400 | HP xw3400 Workstation - Service and Technical Reference Guide - Page 39
The HPQFlash utility is used to locally update or restore the system BIOS of individual PCs from a Windows operating system. For more information on HPQFlash, visit http://www.hp.com/support/files and enter the model number of the workstation when prompted. Boot Block Emergency Recovery Mode Boot - HP xw3400 | HP xw3400 Workstation - Service and Technical Reference Guide - Page 40
or a supported USB flash media device, such as an HP Drive Key. Copying to single workstation CAUTION: A setup configuration is model-specific. File system corruption may result if source and target workstations are not the same model. For example, do not copy the setup configuration from a xw3400 - HP xw3400 | HP xw3400 Workstation - Service and Technical Reference Guide - Page 41
USB flash media device. 8. Download a BIOS utility for replicating setup (repset.exe) and copy it onto the configuration diskette or USB flash media device. To obtain this utility, go to tap//welcome.hp.com/support/files and enter the model number of the workstation. 9. On the configuration diskette - HP xw3400 | HP xw3400 Workstation - Service and Technical Reference Guide - Page 42
can occur. Check all USB ports for additional storage devices. If any are found, remove them, reboot the workstation, and proceed from step 4. If none are found, either the system does not support the USB flash media device or the USB flash media device is defective. DO NOT proceed in attempting to - HP xw3400 | HP xw3400 Workstation - Service and Technical Reference Guide - Page 43
from a USB flash media device. If the default boot order in the Computer Setup (F10) Utility lists the USB device before the hard drive, the workstation can be booted from a USB flash media device. Otherwise, a bootable diskette must be used. 1. If there are any PCI cards in the system that have - HP xw3400 | HP xw3400 Workstation - Service and Technical Reference Guide - Page 44
will boot to the USB flash media device as drive C. NOTE: The default boot order varies from workstation to workstation, and it can be changed in the Computer Setup (F10) Utility. Refer to Section 2.2 for instructions. If you have used a DOS version from Windows 9x, you may see a brief Windows logo - HP xw3400 | HP xw3400 Workstation - Service and Technical Reference Guide - Page 45
easier. You can download the software from http://www.hp.com/support. The Web site contains the latest device drivers, utilities, and flashable ROM images needed to run the latest Microsoft Windows operating system on the HP workstation. Industry standards HP management solutions integrate with - HP xw3400 | HP xw3400 Workstation - Service and Technical Reference Guide - Page 46
the HP workstation: ● Locally, using the Computer Setup Utilities. See the Computer Setup (F10) Utility Guide on the Documentation and Diagnostics CD included with the workstation for additional information and instructions on using the Computer Setup Utilities. Some workstations also have HP BIOS - HP xw3400 | HP xw3400 Workstation - Service and Technical Reference Guide - Page 47
Network Service Boot Enables/disables the workstation's ability a master or user password for ATA hard drives. When this feature is enabled, the user is prompted to Guide on the Documentation and Diagnostics CD. Support for security features may vary depending on the specific workstation - HP xw3400 | HP xw3400 Workstation - Service and Technical Reference Guide - Page 48
If the system is equipped with an embedded security device, refer to the HP ProtectTools Security Manager Guide at www.hp.com. Establishing a setup password through Computer Setup prevents reconsideration of the workstation (use of the Computer Setup (F10) utility) until the password is entered - HP xw3400 | HP xw3400 Workstation - Service and Technical Reference Guide - Page 49
a power-on or Setup password If the system is equipped with an embedded security device, refer to the HP ProtectTools Security Manager Guide at www.hp.com. 1. Turn on or restart the workstation. If you are in Windows, click Start > Shut Down > Restart the Computer. 2. To change the Power-On password - HP xw3400 | HP xw3400 Workstation - Service and Technical Reference Guide - Page 50
refer to the HP ProtectTools Security Manager Guide at www.hp.com. 1. Turn on or restart the workstation. If you keyboard is designed to meet country-specific requirements. The syntax and keys that workstation. Refer to the Troubleshooting Guide on the Documentation and Diagnostics CD for instructions - HP xw3400 | HP xw3400 Workstation - Service and Technical Reference Guide - Page 51
Guide at www.hp.com. DriveLock DriveLock is an industry-standard security feature that prevents unauthorized access to the data on ATA hard drive. DriveLock has been implemented as an extension to Computer Setup. It is only available when hard drives that support the user will be instructed to cycle - HP xw3400 | HP xw3400 Workstation - Service and Technical Reference Guide - Page 52
with less stringent security requirements, HP does not recommend enabling DriveLock. Users in this category include personal users or users who do not maintain sensitive data on their hard drives as a common practice. For these users, the potential loss of a hard drive resulting from forgetting - HP xw3400 | HP xw3400 Workstation - Service and Technical Reference Guide - Page 53
Level 1 Notify User When the workstation is restarted, the screen displays a message indicating that the workstation cover or side The Smart Cover Lock is a software-controllable cover lock featured on some HP computers. This lock prevents unauthorized access to the internal components. Computers - HP xw3400 | HP xw3400 Workstation - Service and Technical Reference Guide - Page 54
and Diagnostics CD. Cable Lock provision The rear panel of the workstation accommodates a cable lock so that the workstation can be physically secured to a work area. For illustrated instructions, please see the Hardware Reference Guide on the Documentation and Diagnostics CD. 44 Chapter 4 Desktop - HP xw3400 | HP xw3400 Workstation - Service and Technical Reference Guide - Page 55
user passwords, HP Fingerprint Identification Technology tightens network security, simplifies the login process, and reduces the costs associated with managing corporate networks. Affordably priced, it is not just for high-tech, high-security organizations anymore. NOTE: Support the workstation is - HP xw3400 | HP xw3400 Workstation - Service and Technical Reference Guide - Page 56
46 Chapter 4 Desktop management ENWW - HP xw3400 | HP xw3400 Workstation - Service and Technical Reference Guide - Page 57
guidelines and features NOTE: Serial ATA = SATA Parallel ATA = PATA HP only supports the use of SATA hard drives on these models of workstation. The USDT model is the only product that supports a PATA optical drive. No PATA drives are supported on any other model. SATA hard drives Serial ATA Hard - HP xw3400 | HP xw3400 Workstation - Service and Technical Reference Guide - Page 58
SATA 3.0 Gb/s cable as it is fully backwards compatible with the SATA 1.5 Gb/s drives. Current HP desktop products ship with SATA 3.0 Gb/s hard drives. SATA data cables are susceptible to damage if overflexed. Never crease a SATA data cable and never bend - HP xw3400 | HP xw3400 Workstation - Service and Technical Reference Guide - Page 59
supported on any other model. ATA SMART Drives The Self Monitoring Analysis and Recording Technology (SMART) ATA drives for the HP Personal Computers have built-in drive failure prediction that warns the user hard drive or listed in the workstation specification. Drive size calculations by drive - HP xw3400 | HP xw3400 Workstation - Service and Technical Reference Guide - Page 60
50 Chapter 5 Serial and Parallel ATA drive guidelines and features ENWW - HP xw3400 | HP xw3400 Workstation - Service and Technical Reference Guide - Page 61
. Adherence to the procedures and precautions described in this chapter is essential for proper service. CAUTION: When the workstation is plugged into an AC power source, voltage is always applied to the system board. You must disconnect the power cord from the power source - HP xw3400 | HP xw3400 Workstation - Service and Technical Reference Guide - Page 62
Electrostatic discharge information A sudden discharge of static electricity from your finger or other conductor can destroy static-sensitive devices or microcircuitry. Often the spark is neither felt nor heard, but damage occurs. An electronic device exposed to electrostatic discharge (ESD) may not - HP xw3400 | HP xw3400 Workstation - Service and Technical Reference Guide - Page 63
plug connector on the grounding mat or workstation. ● Heel straps/Toe straps/Boot straps can be used at standing workstations and are compatible with most types of shoes as ordinary plastic assembly aids and Styrofoam. ● Use field service tools, such as cutters, screwdrivers, and vacuums, that are - HP xw3400 | HP xw3400 Workstation - Service and Technical Reference Guide - Page 64
● Conductive foam ● Conductive tabletop workstations with ground cord of one-megohm +/- 10% resistance ● Static-dissipative table or floor mats with hard tie to ground ● Field service kits ● Static awareness labels ● Wrist straps and footwear straps providing one-megohm +/- 10% resistance ● Material - HP xw3400 | HP xw3400 Workstation - Service and Technical Reference Guide - Page 65
each other or place computers so near each other that they are subject to each other's re-circulated or preheated air. ● If the workstation is to be operated within a separate enclosure, intake and exhaust ventilation must be provided on the enclosure, and the same operating guidelines listed above - HP xw3400 | HP xw3400 Workstation - Service and Technical Reference Guide - Page 66
on page 55 before cleaning the keyboard. To clean the tops of the keys or the keyboard body, follow the procedures described in Cleaning the workstation case on page 55. When cleaning debris from under the keys, review all rules in General cleaning safety precautions on page 55 before following - HP xw3400 | HP xw3400 Workstation - Service and Technical Reference Guide - Page 67
the power cord from the power source before opening the workstation to prevent system board or component damage. Tools and software requirements To service the workstation, you need the following: ● Torx T-15 screwdriver (HP screwdriver with bits, PN 161946-001) ● Torx T-15 screwdriver with - HP xw3400 | HP xw3400 Workstation - Service and Technical Reference Guide - Page 68
being removed or replaced. CAUTION: When servicing this workstation, ensure that cables are placed in their on in this guide for instructions on the replacement procedures. WARNING! This workstation contains a lithium return them to HP, their authorized partners, or their agents. - HP xw3400 | HP xw3400 Workstation - Service and Technical Reference Guide - Page 69
this chapter is essential for proper service. After completing all necessary removal and replacement procedures, run the Diagnostics utility to verify that all components operate properly. NOTE: Not all features listed in this guide are available on all workstations. Preparation for disassembly See - HP xw3400 | HP xw3400 Workstation - Service and Technical Reference Guide - Page 70
to a fixed object. Installing a cable lock The cable lock may be used to secure the workstation access panel to the chassis and, at the same time, secure the workstation to a fixed object. Insert the cable lock in the location shown below. Installing a padlock A padlock may be used by itself - HP xw3400 | HP xw3400 Workstation - Service and Technical Reference Guide - Page 71
is turned off and that the power cord is disconnected from the electrical outlet. 2. Loosen the captive thumbscrew (1) that secures the access panel to the workstation chassis. 3. Slide the access panel (2) back about 1.3 cm (1/2 inch ), then lift it off the unit. NOTE: You may want to lay the - HP xw3400 | HP xw3400 Workstation - Service and Technical Reference Guide - Page 72
Front bezel 1. Prepare the workstation for disassembly (Preparation for disassembly on page 59). 2. Remove the access panel (Access panel on page 61). 3. To remove the front bezel, press the green - HP xw3400 | HP xw3400 Workstation - Service and Technical Reference Guide - Page 73
Front drive bezels Follow these steps when removing or installing a front drive bezel. 1. Prepare the workstation for disassembly (Preparation for disassembly on page 59). 2. Remove the access panel (Access panel on page 61). 3. Remove the front bezel (Front bezel on page - HP xw3400 | HP xw3400 Workstation - Service and Technical Reference Guide - Page 74
Cable management Always follow good cable management practices when working inside the workstation. ● Keep cables away from major heat sources like the heatsink. ● Do not jam cables on top of expansion cards or memory modules. Printed circuit cards like these are not designed to take excessive - HP xw3400 | HP xw3400 Workstation - Service and Technical Reference Guide - Page 75
P7 P8 P9 Cable To Front power button/LED System board Speaker System board Chassis fan System board Diskette drive System board Second ODD Audio cable System board Front I/O USB System board Serial port B System board 1st SATA Hard drive System board 1st ODD or 2nd Hard drive if - HP xw3400 | HP xw3400 Workstation - Service and Technical Reference Guide - Page 76
some cases if the main power cable from the power supply to the system board is temporarily disconnected. The workstation automatically recognizes the additional memory when the workstation is turned on. 4. Push the module down into the socket, ensuring that the module is fully inserted and properly - HP xw3400 | HP xw3400 Workstation - Service and Technical Reference Guide - Page 77
the system board is parallel to the table to make it easier to work on (Access panel on page 61). 3. On the rear of the workstation, a sliding slot cover lock secures the expansion card brackets and expansion slot covers in place. Remove the captive thumbscrew that holds the slot cover lock - HP xw3400 | HP xw3400 Workstation - Service and Technical Reference Guide - Page 78
NOTE: Before removing an installed expansion card, disconnect any cables that may be attached to the expansion card. a. If you are installing an expansion card in a vacant socket, remove the appropriate expansion slot cover on the back of the chassis. Pull the slot cover straight up from the socket - HP xw3400 | HP xw3400 Workstation - Service and Technical Reference Guide - Page 79
c. Low Profile PCI Express Card with Rigid Hold-down Bracket: If your workstation is configured with a low profile PCI Express x16 card and a rigid, non-hinged hold-down bracket (as shown in the following illustration), you must first - HP xw3400 | HP xw3400 Workstation - Service and Technical Reference Guide - Page 80
d. Full Height PCI Express Card with Rigid Hold-down Bracket: If your workstation is configured with a full height PCI Express x16 card (1) and a rigid, non-hinged hold-down bracket (2), as shown below, you must first remove screws 3 and 4 - HP xw3400 | HP xw3400 Workstation - Service and Technical Reference Guide - Page 81
can be used to hold down either a low profile or full height PCI Express x16 card, depending on how the bracket is mounted in the workstation chassis. For example, if the bracket is currently configured to hold down a low profile card, you can remove the two bracket mounting screws, then use - HP xw3400 | HP xw3400 Workstation - Service and Technical Reference Guide - Page 82
f. With the hold-down bracket either removed or rotated away from the top of the card (depending on workstation configuration), pull the retention arm on the PCI Express x16 card (located on the back of the expansion socket) away from the card, and carefully - HP xw3400 | HP xw3400 Workstation - Service and Technical Reference Guide - Page 83
7. If replacing or adding a new expansion card, hold the card just above the expansion slot on the system board then move the card toward the rear of the chassis (1) so that the bracket on the card is aligned with the open slot on the rear of the chassis. Press the card straight down into the - HP xw3400 | HP xw3400 Workstation - Service and Technical Reference Guide - Page 84
workstation supports up to five drives that may be installed in various configurations. This Section describes the procedure for replacing or upgrading the storage drives. A Torx T-15 screwdriver is needed to remove and install the guide run the Restore Plus! CD to load the HP factory-installed - HP xw3400 | HP xw3400 Workstation - Service and Technical Reference Guide - Page 85
4. Remove the front bezel (Front bezel on page 62). 5. Disconnect the power and data cables from the back of the drive, as shown in the following illustrations. Disconnecting optical cables NOTE: Some products use straight cable connectors while others use right angle connectors. Disconnecting - HP xw3400 | HP xw3400 Workstation - Service and Technical Reference Guide - Page 86
operating system properly, then turn off the workstation. Do not remove a hard drive while the workstation is on or in standby mode. system does not support Parallel ATA (PATA) optical drives. 1. Install four guide screws (two on each side) into the new drive. The screws help guide the drive into - HP xw3400 | HP xw3400 Workstation - Service and Technical Reference Guide - Page 87
are used for all other drives and have a black finish. Make sure to install the appropriate guide screws into the drive. 2. Slide the drive into the drive bay, making sure to align the guide screws with the guide slots, until the drive snaps into place. 3. Reconnect the power and data cables to the - HP xw3400 | HP xw3400 Workstation - Service and Technical Reference Guide - Page 88
connect diskette drive cables. 4. Install the front bezel (Front bezel on page 62). 5. Install the access panel (Access panel on page 61). 6. Turn on the workstation. 78 Chapter 7 Removal and replacement procedures ENWW - HP xw3400 | HP xw3400 Workstation - Service and Technical Reference Guide - Page 89
or drive: If you are inserting or removing a hard drive, shut down the operating system properly, then turn off the workstation. Do not remove a hard drive while the workstation is on or in standby mode. Before handling a drive, ensure that you are discharged of static electricity. While handling - HP xw3400 | HP xw3400 Workstation - Service and Technical Reference Guide - Page 90
. 7. Release the drive by pulling the green release tab away from the drive (1) and sliding the drive out of the bay (2). 8. Remove the four guide screws (two on each side) from the old drive. You will need these screws to install a new drive. 80 Chapter 7 Removal and replacement procedures ENWW - HP xw3400 | HP xw3400 Workstation - Service and Technical Reference Guide - Page 91
the front bezel. NOTE: There are a total of eight extra guide screws on the front of the chassis. Four have 6-32 standard sure to install the appropriate guide screws into the drive. 10. Slide the drive into the drive bay, making sure to align the guide scews with the guide slots, ubtil the drive - HP xw3400 | HP xw3400 Workstation - Service and Technical Reference Guide - Page 92
blue connector labeled SATA0 to avoid any hard drive performance problems. If you are adding a second hard drive, connect the workstation. NOTE: If you replaced the primary hard drive, use the Restore Plus! CD set that was created when starting the workstation for the first time. When the restore - HP xw3400 | HP xw3400 Workstation - Service and Technical Reference Guide - Page 93
for disassembly (Preparation for disassembly on page 59). 2. Remove the access panel and rotate the workstation so the system board is parallel to the table to make it easier to work on (Access panel on page 61). 3. Disconnect the power cable - HP xw3400 | HP xw3400 Workstation - Service and Technical Reference Guide - Page 94
disassembly (Preparation for disassembly on page 59). 2. Remove the access panel and rotate the workstation so the system board is parallel to the table to make it easier to work on (Access panel on page 61). 3. Remove the hard drive - HP xw3400 | HP xw3400 Workstation - Service and Technical Reference Guide - Page 95
page 59). 2. Remove the access panel and rotate the workstation so the system board is parallel to the table to page 84). 5. Disconnect the power switch/LED cable, the front USB cable, and the front audio cable from the system board. 6. Remove the single screw that secure the housing to the chassis - HP xw3400 | HP xw3400 Workstation - Service and Technical Reference Guide - Page 96
for disassembly (Preparation for disassembly on page 59). 2. Remove the access panel and rotate the workstation so the system board is parallel to the table to make it easier to work on (Access panel on page 61). 3. Disconnect the heatsink fan - HP xw3400 | HP xw3400 Workstation - Service and Technical Reference Guide - Page 97
Processor 1. Prepare the workstation for disassembly (Preparation for disassembly on page 59). 2. Remove the access panel (Access panel on page 61). 3. Disconnect the heatsink control cable from the system - HP xw3400 | HP xw3400 Workstation - Service and Technical Reference Guide - Page 98
a new processor onto the system board, always update the system ROM to ensure that the latest version of the BIOS is being used on the workstation. The latest system BIOS can be found on the Web at: http://h18000.www1.hp.com/support/files. 88 Chapter 7 Removal and replacement procedures ENWW - HP xw3400 | HP xw3400 Workstation - Service and Technical Reference Guide - Page 99
disassembly (Preparation for disassembly on page 59). 2. Remove the access panel and rotate the workstation so the system board is parallel to the table to make it easier to work on (Access panel on page 61). 3. Remove the hard drive - HP xw3400 | HP xw3400 Workstation - Service and Technical Reference Guide - Page 100
To avoid possible personal injury and damage to the equipment the power cord should be disconnected from the workstation and/or the AC outlet before opening the workstation. 1. Prepare the workstation for disassembly (Preparation for disassembly on page 59). 2. Remove the access panel and rotate the - HP xw3400 | HP xw3400 Workstation - Service and Technical Reference Guide - Page 101
for disassembly (Preparation for disassembly on page 59). 2. Remove the access panel and rotate the workstation so the system board is parallel to the table to make it easier to work on (Access panel on page 61). 3. Remove all PCI expansion - HP xw3400 | HP xw3400 Workstation - Service and Technical Reference Guide - Page 102
the battery only with the HP spare designated for this product. CAUTION: Before replacing the battery, it is important to back up the workstation CMOS settings. When the system board, complete the following instructions to replace the battery: 92 Chapter 7 Removal and replacement procedures ENWW - HP xw3400 | HP xw3400 Workstation - Service and Technical Reference Guide - Page 103
up. 3. The battery holder automatically secures the battery in the proper position. 4. Replace the workstation access panel (Access panel on page 61). 5. Plug in the workstation and turn on power to the workstation. 6. Reset the date and time, your passwords, and any special system setups, using - HP xw3400 | HP xw3400 Workstation - Service and Technical Reference Guide - Page 104
battery (2). 2. Insert the new battery and position the clip back in place. 3. Replace the workstation access panel (Access panel on page 61). 4. Plug in the workstation and turn on power to the workstation. 5. Reset the date and time, your passwords, and any special system setups, using Computer - HP xw3400 | HP xw3400 Workstation - Service and Technical Reference Guide - Page 105
Connector pin assignments This appendix contains the pin assignments for many computer and workstation connectors. Some of these connectors may not be used on the product being serviced. Keyboard Connector and Icon Pin Signal 1 Data 2 Unused 3 Ground 4 +5 VDC 5 Clock 6 Unused Mouse - HP xw3400 | HP xw3400 Workstation - Service and Technical Reference Guide - Page 106
Ethernet RJ-45 Connector and Icon Ethernet AUI Connector and Icon Pin Signal 1 Ground 2 Negative AUI Differential Collision 3 Positive AUI Differential Collision 4 Negative AUI Differential Transmit 5 Positive AUI Differential Transmit 6 Ground 7 Ground 8 Negative AUI Differential - HP xw3400 | HP xw3400 Workstation - Service and Technical Reference Guide - Page 107
Parallel interface Connector and Icon Pin Signal 1 Strobe 2 Data Bit 0 3 Data Bit 1 4 Data Bit 2 5 Data Bit 3 6 Data Bit 4 7 Data Bit 5 8 Data Bit 6 9 Data Bit 7 Pin Signal 10 Acknowledge 11 Busy 12 Paper End 13 Select 14 Auto Linefeed 15 Error 16 Initialize Printer - HP xw3400 | HP xw3400 Workstation - Service and Technical Reference Guide - Page 108
and Icon Microphone Connector and Icon (1/8" miniphone) 1 23 Headphone Connector and Icon (1/8" miniphone) 1 23 Line-in audio Connector and Icon (1/8" miniphone) 1 23 Line-out audio Connector and Icon (1/8" miniphone) 1 23 98 Appendix A Connector pin assignments Pin Signal 1 +5 VDC 2 - Data - HP xw3400 | HP xw3400 Workstation - Service and Technical Reference Guide - Page 109
External infrared transceiver Connector and Icon Pin 1 2 3 4 5 6 7 8 Monitor Connector and Icon Signal Transmit Receive Ground 5V Mode Not Used Not Used Not Used Pin Signal 1 Red Analog 2 Green Analog 3 Blue Analog 4 Not used 5 Ground 6 Ground 7 Ground 8 Ground Pin - HP xw3400 | HP xw3400 Workstation - Service and Technical Reference Guide - Page 110
ATA/ATAPI (IDE) Standard drive cable Connector Pin Signal 1 Reset 2 Ground 3 DD7 4 DD8 5 DD6 6 DD9 7 DD5 8 DD10 9 DD4 10 DD11 11 DD3 12 DD12 13 DD2 14 DD13 Pin Signal 15 DD1 16 DD14 17 DD0 18 DD15 19 Ground 20 (Key) 21 DMARQ 22 Ground 23 DIOW 24 - HP xw3400 | HP xw3400 Workstation - Service and Technical Reference Guide - Page 111
4-Pin Power (for CPU) Connector and Icon SATA data and power Drive Connector Pin Signal 1 GND 2 GND 3 +12V CPU 4 -12V CPU Pin Signal S1 Ground S5 BP1 Ground P5 BP9 V 5 P13 V 12 *S = Data, P = Power Pin Signal S2 A+ S6 B+ P2 V 3.3 P6 Ground P10 Ground P14 V12 PCI Express x1, x4, x8, and - HP xw3400 | HP xw3400 Workstation - Service and Technical Reference Guide - Page 112
4 GND 9 +3.3V 5 JTAG2 10 +3.3V 26 PERn(2) 31 GND 27 GND 32 RSVD 28 GND 33 RSVD 29 PERp3 34 GND 30 PERn3 35 PERp4 51 GND 56 PERp9 52 PERp8 57 PERn9 53 PERN8 58 GND 54 GND 59 GND 55 GND 60 PERp10 76 PERp14 81 PERn15 77 PERn14 82 GND 78 GND 79 GND 80 PERp15 Pin B - HP xw3400 | HP xw3400 Workstation - Service and Technical Reference Guide - Page 113
3 RSVD 8 +3.3 V 4 GND 9 JTAG1 5 SMCLK 10 3.3vAux 26 GND 31 PRSNT2# 27 PETp3 32 GND 28 PETn3 33 PETp4 29 GND 34 PETn4 30 RSVD 35 GND 51 PETn8 56 GND 52 GND 57 GND 53 GND 58 PETp10 54 PETp9 59 PETn10 55 PETn9 60 GND 76 GND 81 PRSNT2# 77 GND 82 RSVD 78 PETp15 79 PETn15 - HP xw3400 | HP xw3400 Workstation - Service and Technical Reference Guide - Page 114
5 T.M.D.S. Data4+ 6 DDC Clock 7 DDC Data 8 No Connect 9 T.M.D.S. Data1- 10 T.M.D.S. Data1+ 11 T.M.D.S. Data1/3 Shield 12 T.M.D.S. Data3- 17 T.M.D.S. Data0- 18 T.M.D.S. Data0+ 19 T.M.D.S. Data0/5 Shield 20 T.M.D.S. Data5- 21 T.M.D.S. Data5+ 22 T.M.D.S. Data Shield 23 - HP xw3400 | HP xw3400 Workstation - Service and Technical Reference Guide - Page 115
switch to the proper voltage. The power cord set received with the workstation meets the requirements for use in the country where you purchased the equipment this product on any other products. Country-specific requirements Additional requirements specific to a country are shown in parentheses and - HP xw3400 | HP xw3400 Workstation - Service and Technical Reference Guide - Page 116
Australia (1) EANSW Italy (1) IMQ Austria (1) OVE Japan (3) METI Belgium (1) CEBC Norway (1) NEMKO Canada (2) CSA Sweden (1) SEMKO Denmark (1) DEMKO Switzerland (1) SEV Finland (1) SETI United Kingdom (1) BSI France (1) UTE United States (2) UL Germany (1) VDE 1. The - HP xw3400 | HP xw3400 Workstation - Service and Technical Reference Guide - Page 117
(F10) Utility Guide on the Documentation and Diagnostics CD. Power-On Self-Test (POST) POST is a series of diagnostic tests that runs automatically when the system is turned on. POST checks the following items to ensure that the workstation system is functioning properly: ● Keyboard ● Memory modules - HP xw3400 | HP xw3400 Workstation - Service and Technical Reference Guide - Page 118
in Advanced > Onboard Devices. Reset the date and time under Control Panel. If the problem persists, replace the RTC battery. See the Hardware Reference Guide on the Documentation and Diagnostics CD for instructions on installing a new battery, or contact an authorized dealer or reseller for RTC - HP xw3400 | HP xw3400 Workstation - Service and Technical Reference Guide - Page 119
added memory module(s) support ECC memory error correction. 1. If additional memory was recently added, remove it to see if the problem remains. 2. Check product documentation for memory support information. 301-Keyboard Error Keyboard failure. 1. Reconnect keyboard with workstation turned - HP xw3400 | HP xw3400 Workstation - Service and Technical Reference Guide - Page 120
failure. 1. Reconnect the keyboard with workstation turned off. 2. Ensure that none of and/or run Computer Setup. 410-Audio Interrupt Conflict IRQ address conflicts with another image has errors. Reflash the system ROM with the latest BIOS image. 511-CPU, CPUA, or CPUB Fan not Detected - HP xw3400 | HP xw3400 Workstation - Service and Technical Reference Guide - Page 121
Has Been Removed Since Last System Startup Workstation cover was removed since last system startup. No action required. 917-Front Audio Not Connected Front audio harness has been detached or unseated from motherboard. Reconnect or replace front audio harness. 918-Front USB Not Connected Front - HP xw3400 | HP xw3400 Workstation - Service and Technical Reference Guide - Page 122
Download Memory error during POST execution of the Management Engine (ME) BIOS Extensions option ROM 1. Reboot the workstation. 2. Unplug the power cord, re-seat the memory modules, and reboot the workstation. 3. If the memory configuration was recently changed, unplug the workstation, restore - HP xw3400 | HP xw3400 Workstation - Service and Technical Reference Guide - Page 123
the Management Engine (ME) BIOS Extensions option ROM 1. Reboot the workstation. 2. Unplug the power cord, re-seat the memory modules, and reboot the workstation. 3. If the memory configuration was recently changed, unplug the power cord, restore the original memory configuration, and reboot the - HP xw3400 | HP xw3400 Workstation - Service and Technical Reference Guide - Page 124
Description Recommended action Parity Check 2 System will not boot without fan Parity RAM failure. Run Computer Setup and Diagnostic utilities. CPU fan not installed or disconnected in VSFF 1. chassis. Remove the workstation cover, press the power button, and see if the processor fan spins - HP xw3400 | HP xw3400 Workstation - Service and Technical Reference Guide - Page 125
Power LED flashes three 3 times, once every second, followed by a two second pause. Beeps stop after fifth iteration but LEDs continue until problem is solved. Workstation in Suspend to RAM mode (some models only) or normal Suspend mode. None required. Press any key or move the mouse to wake the - HP xw3400 | HP xw3400 Workstation - Service and Technical Reference Guide - Page 126
a two second pause. Beeps stop after fifth iteration but LEDs continue until problem is solved. Pre-video memory error. CAUTION: To avoid damage to the DIMMs or the system board, you must unplug the workstation power cord before attempting to reseat, install, or remove a DIMM module. 1. Reseat - HP xw3400 | HP xw3400 Workstation - Service and Technical Reference Guide - Page 127
a two second pause. Beeps stop after fifth iteration but LEDs continue until problem is solved. System powers on but is unable to boot. 1. Check If it is turned on, then replace the power button harness. If the problem persists, replace the system board. 5. If the 5V_aux light on the system - HP xw3400 | HP xw3400 Workstation - Service and Technical Reference Guide - Page 128
118 Appendix C POST error messages ENWW - HP xw3400 | HP xw3400 Workstation - Service and Technical Reference Guide - Page 129
diskette drive, hard drive, optical drive, graphics, audio, memory, and software problems. If you encounter problems with the workstation, refer to the tables in this chapter for probable causes and recommended solutions. NOTE: For information on specific error messages that may appear on the screen - HP xw3400 | HP xw3400 Workstation - Service and Technical Reference Guide - Page 130
refer to the HP Backup and Recovery Manager User Guide by selecting Start > HP Backup and Recovery > HP Backup and Recovery Manager Manual. CAUTION: Running the Restore Plus! CD will erase all data on the hard drive. Helpful hints If you encounter problems with the workstation, monitor, or software - HP xw3400 | HP xw3400 Workstation - Service and Technical Reference Guide - Page 131
the power button to start the workstation. ● Reconfigure the workstation after installing a non-plug and play expansion board or other option. See Solving hardware installation problems on page 143 for instructions. ● Be sure that all the needed device drivers have been installed. For example, if - HP xw3400 | HP xw3400 Workstation - Service and Technical Reference Guide - Page 132
Otherwise, the workstation will shut down and you will lose any unsaved data. Restart workstation. Workstation date and time problem persists, replace the RTC battery. See the Hardware Reference Guide on the Documentation and Diagnostics CD for instructions Troubleshooting without diagnostics ENWW - HP xw3400 | HP xw3400 Workstation - Service and Technical Reference Guide - Page 133
Table D-1 Solving General Problems (continued) There is no sound or sound volume is too low. Cause Solution System volume may be set low or muted. 1. Check the F10 BIOS settings to make sure the internal system speaker is not muted (this setting does not affect the external speakers). 2. Make - HP xw3400 | HP xw3400 Workstation - Service and Technical Reference Guide - Page 134
Table D-1 Solving General Problems (continued) Poor performance is the application. 2. Add more memory. 3. Upgrade the graphics solution. Cause unknown. Restart the workstation. Workstation powered off automatically and the system board. 124 Appendix D Troubleshooting without diagnostics ENWW - HP xw3400 | HP xw3400 Workstation - Service and Technical Reference Guide - Page 135
Table D-1 Solving General Problems (continued) System does not power on and the LEDs on the front of the workstation are not flashing. Cause Solution 4. Check to see if the 5V_aux light on the is off, then replace the power supply. 6. Replace the system board. ENWW Solving general problems 125 - HP xw3400 | HP xw3400 Workstation - Service and Technical Reference Guide - Page 136
following table. Table D-2 Solving Power Problems Power supply shuts down intermittently. Cause Solution Voltage selector switch on rear of workstation chassis (some Select the proper AC the power supply. 5. Replace the system board. 126 Appendix D Troubleshooting without diagnostics ENWW - HP xw3400 | HP xw3400 Workstation - Service and Technical Reference Guide - Page 137
table. NOTE: You may need to reconfigure the workstation when you add or remove hardware, such as an additional diskette drive. See Solving hardware installation problems on page 143 for instructions. Table D-3 Solving Diskette Problems Diskette drive light stays on. Cause Solution Diskette is - HP xw3400 | HP xw3400 Workstation - Service and Technical Reference Guide - Page 138
problem has occurred with a disk transaction. Cause Solution The directory structure is bad, or there is a problem workstation has been inserted in the drive. Spacebar. The workstation should start up. Diskette error has occurred. Restart the workstation Troubleshooting without diagnostics ENWW - HP xw3400 | HP xw3400 Workstation - Service and Technical Reference Guide - Page 139
Table D-3 Solving Diskette Problems (continued) Cannot Boot to Diskette. Cause Solution NOTE: Both steps should be used as the Removable Media Boot enabled in Computer Setup. Run Computer Setup and disable Network Server Mode in Security > Password Options. ENWW Solving diskette problems 129 - HP xw3400 | HP xw3400 Workstation - Service and Technical Reference Guide - Page 140
problems Table D-4 Solving Hard Drive Problems problem. Cause Solution Either the directory structure is bad or there is a problem hardware installation problems on driver problem. If it is not listed, the probable cause is a hardware problem. have been damaged. the workstation. 2. Check the hard - HP xw3400 | HP xw3400 Workstation - Service and Technical Reference Guide - Page 141
hard drive cannot be accessed. 3. Install system files for the appropriate operating system. 4. Restore the system to a recovery point in HP Backup and Recovery Manager. Refer to the HP Backup and Recovery Manager User Guide in the Windows Start menu for more information. Hard drive boot has been - HP xw3400 | HP xw3400 Workstation - Service and Technical Reference Guide - Page 142
is a safety feature that prevents writing to and deleting from an SD/Memory Stick/ PRO card. If using an SD card, make sure that the supported. on the correct side. The green LED will light if inserted properly. Do not know how to remove a media card correctly. Cause Solution The workstation - HP xw3400 | HP xw3400 Workstation - Service and Technical Reference Guide - Page 143
Problems (continued) After installing the media card reader and booting to Windows, the reader and the inserted cards are not recognized by the workstation to the workstation via the PCI card, which is not supported on the HP Desktop BIOS. The bootable USB device will have boot support if you - HP xw3400 | HP xw3400 Workstation - Service and Technical Reference Guide - Page 144
Table D-6 Solving Display Problems Blank screen (no video). Cause Solution Monitor is BIOS image. See the "Boot Block Emergency Recovery Mode" section of the Desktop Management Guide than four seconds. Otherwise, the workstation will shut down and you will Troubleshooting without diagnostics ENWW - HP xw3400 | HP xw3400 Workstation - Service and Technical Reference Guide - Page 145
D-6 Solving Display Problems (continued) Blank screen and the power LED flashes Red five times, once every second, followed by a two second pause, and the workstation beeps five times. (Beeps stop after fifth iteration but LEDs continue flashing.) Cause Solution Pre-video memory error. 1. Reseat - HP xw3400 | HP xw3400 Workstation - Service and Technical Reference Guide - Page 146
Solution Video resolution and refresh rate are set higher than what the monitor supports. Restart the workstation and enter Safe Mode. Change the settings to a supported setting then restart the workstation so that the new settings take effect. 136 Appendix D Troubleshooting without diagnostics - HP xw3400 | HP xw3400 Workstation - Service and Technical Reference Guide - Page 147
Display Problems ( Manually synchronize the Clock and Clock Phase on- screen display functions. To download a SoftPaq that will assist you with the synchronization, go to the following Web site, select the appropriate monitor, and download either SP32347 or SP32202: http://www.hp.com/ support - HP xw3400 | HP xw3400 Workstation - Service and Technical Reference Guide - Page 148
Solving audio problems If the workstation has audio features and you encounter audio problems, see the common causes and solutions listed in the following table. Table D-7 Solving Audio Problems Sound cuts in and out. Cause Solution Processor resources are being used by other open applications. - HP xw3400 | HP xw3400 Workstation - Service and Technical Reference Guide - Page 149
Sound, Speech and Audio Devices, then click Sounds and Audio Devices. 2. Click the Mute check box to remove the check mark from the box. Workstation Solution Jacks have been reconfigured in the audio driver or application In the audio driver or application software, reconfigure the jacks software - HP xw3400 | HP xw3400 Workstation - Service and Technical Reference Guide - Page 150
and solutions listed in the following table. Table D-8 Solving Printer Problems Printer will not print. Cause Solution Printer is not turned on may not be connected properly. Printer memory may be overloaded. Solution Install the correct printer driver for the application. Reconnect all cables - HP xw3400 | HP xw3400 Workstation - Service and Technical Reference Guide - Page 151
equipment and to the common causes and solutions listed in the following table. Table D-9 Solving Keyboard Problems Keyboard commands and typing are not recognized by the workstation. Cause Solution Keyboard connector is not properly connected. 1. On the Windows Desktop, click Start. 2. Click - HP xw3400 | HP xw3400 Workstation - Service and Technical Reference Guide - Page 152
ball are dirty. Remove roller ball cover from the bottom of the mouse and clean the internal components with a mouse cleaning kit available from most workstation stores. 142 Appendix D Troubleshooting without diagnostics ENWW - HP xw3400 | HP xw3400 Workstation - Service and Technical Reference Guide - Page 153
you are using the correct memory modules and to verify the proper installation. 2. Observe the beeps and LED lights on the front of the workstation. Beeps and flashing LEDs are codes for specific problems. 3. If you still cannot resolve the issue, contact Customer Support. ENWW Solving hardware - HP xw3400 | HP xw3400 Workstation - Service and Technical Reference Guide - Page 154
3. Replace third-party memory with HP memory. 4. Replace the system board. Power LED flashes Red six times, once every second, followed by a two second pause, and the workstation beeps six times. option card. 3. Replace the system board. 144 Appendix D Troubleshooting without diagnostics ENWW - HP xw3400 | HP xw3400 Workstation - Service and Technical Reference Guide - Page 155
process of debugging the network cabling. Table D-12 Solving Network Problems Wake-on-LAN feature is not functioning. Cause Solution Wake-on workstation out of standby. Network driver does not detect network controller. Cause Solution Network controller is disabled. Incorrect network driver - HP xw3400 | HP xw3400 Workstation - Service and Technical Reference Guide - Page 156
Problems (continued) Network status link light never flashes. NOTE: The network status light is supposed to flash when there is network activity. Cause Solution Network driver is not properly loaded. Reinstall network drivers. See the Network & Internet Communications Guide the workstation. - HP xw3400 | HP xw3400 Workstation - Service and Technical Reference Guide - Page 157
Problems (continued) Network controller stops working without apparent cause. Cause Solution The files containing the network drivers are corrupted. Download the network drivers from http://www.hp standard NIC, or change the boot standard specifications. sequence to boot from another source. - HP xw3400 | HP xw3400 Workstation - Service and Technical Reference Guide - Page 158
to reseat, install, or remove a DIMM module. For those systems that support ECC memory, HP does not support mixing ECC and non-ECC memory. Otherwise, the workstation will not boot the operating system. Table D-13 Solving Memory Problems System will not boot or does not function properly after - HP xw3400 | HP xw3400 Workstation - Service and Technical Reference Guide - Page 159
Table D-13 Solving Memory Problems (continued) Power LED flashes Red five times, once every second, followed by a two second pause, and the workstation beeps five times. (Beeps stop after fifth iteration but LEDs continue flashing.) Cause Solution Memory is installed incorrectly or is bad. 1. - HP xw3400 | HP xw3400 Workstation - Service and Technical Reference Guide - Page 160
table. Table D-14 Solving Processor Problems Poor performance is experienced. Cause Solution Processor is hot. 1. Make sure the airflow to the workstation is not blocked. 2. Make sure processor is present. 2. Reseat the processor. 150 Appendix D Troubleshooting without diagnostics ENWW - HP xw3400 | HP xw3400 Workstation - Service and Technical Reference Guide - Page 161
, check to see if the device is listed within Computer Setup. If it is listed, the probable cause is a driver problem. If it is not listed, the probable cause is a hardware problem. If this is a newly installed drive, run the Computer Setup utility and try adding a POST delay under Advanced > Power - HP xw3400 | HP xw3400 Workstation - Service and Technical Reference Guide - Page 162
DVD Problems ( determine the type of media played, such as audio or video. CD or DVD disc is dirty. Windows does workstation stores. 1. Use Device Manager to remove or uninstall the device. 2. Restart the workstation and let Windows detect the CD or DVD driver Troubleshooting without diagnostics ENWW - HP xw3400 | HP xw3400 Workstation - Service and Technical Reference Guide - Page 163
USDT workstation boots too slow after removing a CD-ROM or DVD drive. Cause Solution The system is searching for the drive during boot because the Disconnect the drive cable from the system board. drive cable is still attached to the system board. ENWW Solving CD-ROM and DVD problems 153 - HP xw3400 | HP xw3400 Workstation - Service and Technical Reference Guide - Page 164
Drive Key Problems USB Supported USB Flash Media Device" section of the Service Reference Guide. The workstation boots to DOS after making a bootable Drive Key. Cause Solution Drive Key is bootable. Install the Drive Key only after the operating system boots. 154 Appendix D Troubleshooting - HP xw3400 | HP xw3400 Workstation - Service and Technical Reference Guide - Page 165
is not properly connected. 1. Turn off the workstation. 2. Reconnect the device to the front of the workstation and restart the workstation. The device does not have power. The correct device driver is not installed. The cable from the device to the workstation does not work. The device is not - HP xw3400 | HP xw3400 Workstation - Service and Technical Reference Guide - Page 166
Problems Unable to connect to the Internet. Cause Solution Internet Service modem. Cable/DSL service is not available or the cable/DSL service is connected, the workstations's RJ-45 connector. (If the connection is good, the "workstation some specific information too long to download Web sites. - HP xw3400 | HP xw3400 Workstation - Service and Technical Reference Guide - Page 167
Table D-18 Solving Internet Access Problems (continued) Internet takes too long to download Web sites. Cause Solution 4. In the Device Manager modem is enabled. 9. If there are further problems, click the Troubleshoot button and follow the on-screen instructions. ENWW Solving internet access - HP xw3400 | HP xw3400 Workstation - Service and Technical Reference Guide - Page 168
to restore the system to its factory configuration. Refer to Creating a disc recovery set on page 2 for more information. If you encounter software problems, see the applicable solutions listed in the following table. Table D-19 Solving Software Problems Workstation will not continue and no HP logo - HP xw3400 | HP xw3400 Workstation - Service and Technical Reference Guide - Page 169
E System board and riser board reference designators These reference designators are used on most but not all HP system and riser boards. Designator BAT CR1 CR2 CR3 CR4 CR35 E14 E15 E16 E25 E49/JP49 E50 J7 J9 J10 J11 J12 J13 J14 - HP xw3400 | HP xw3400 Workstation - Service and Technical Reference Guide - Page 170
Parallel port over single Serial Port Parallel port over Serial Port and Video Port Parallel port over dual VGA ports DVI connector Keyboard connector, double-stack USB, Top = Port 4, Bottom = Port 3 Triple-stacked audio jack (line in, line out/headphone, microphone) Security board connector - for - HP xw3400 | HP xw3400 Workstation - Service and Technical Reference Guide - Page 171
Header for NEWCARD Header for front panel audio Header for front panel USB Internal USB connector 1 Internal USB connector 2 MultiBay header SCSI LED connector PCI extender slot (female) Blade workstation graphics connector (outboard) Blade workstation graphics connector (inboard) Second serial port - HP xw3400 | HP xw3400 Workstation - Service and Technical Reference Guide - Page 172
P54 P55 P58 P60 P61 P62 P63 P64 P65 P66 P67 P68 P69 P70 P71 P80 P81 P82 P83 P84 P85 P86 P87 P101 P106 P124 P125 P126 P150 P216 SW2 SW50 U2 U3 Primary serial port Double stack serial port, Top = Serial B, Bottom = Serial A Riser edge connector (male-mates with J30) PrimarySerial ATA (SATA) connector - HP xw3400 | HP xw3400 Workstation - Service and Technical Reference Guide - Page 173
Super I/O Clock chip 64 bit Bridge LOM1 LOM1 EEPROM LOM1 PHY Audio Codec Audio amplifier LOM2 LOM2 EEPROM LOM2 PHY SPI ROM - SOIC-8 footprint rear port power switch Battery retainer Memory slot. DIMM1 or RIMM1 populated and tested Following memory slots Primary processor socket Secondary processor - HP xw3400 | HP xw3400 Workstation - Service and Technical Reference Guide - Page 174
Y4 Y5/H5 Secondary NIC clock crystal RTC clock crystal/tie-down 164 Appendix E System board and riser board reference designators ENWW - HP xw3400 | HP xw3400 Workstation - Service and Technical Reference Guide - Page 175
CAS latency 4 and 5 for DDR2/667 MHz ● contain the mandatory JEDEC SPD information In addition, the workstation supports: ● 256Mbit, 512Mbit, and 1Gbit non-ECC memory technologies ● single-sided and double-sided DIMMs ● DIMMs constructed with x8 and x16 DDR devices; DIMMs constructed with x4 SDRAM - HP xw3400 | HP xw3400 Workstation - Service and Technical Reference Guide - Page 176
DIMM would not be the same size because they have different numbers of memory chips on them. ● The system will operate in single channel mode if the DIMMs are populated in any other supported configuration. Supported configurations consist of any combination of one, two, three, or four DIMMs as - HP xw3400 | HP xw3400 Workstation - Service and Technical Reference Guide - Page 177
● If a single DIMM is installed, it must be installed in the XMM3 socket. ● In either mode, the maximum operational speed is determined by the slowest DIMM in the system. ENWW Populating DIMM sockets 167 - HP xw3400 | HP xw3400 Workstation - Service and Technical Reference Guide - Page 178
168 Appendix F Memory ENWW - HP xw3400 | HP xw3400 Workstation - Service and Technical Reference Guide - Page 179
101 A access panel removal and replacement 61 access to workstation, controlling 35 adding devices 1 Altiris AClient 22 Deployment Solution Agent 22 asset tracking 35 ATA/ATAPI (IDE) drive cable pin assignments 100 audible codes 115 audio problems 138 B Backup and Recovery Manager 2, 19, 22 battery - HP xw3400 | HP xw3400 Workstation - Service and Technical Reference Guide - Page 180
115 blinking PS/2 keyboard 115 line-in audio pin assignments 98 line-out audio pin assignments 98 locking Smart Cover Lock 44 M Media Card Reader problems 132 memory populating sockets 166 removal and replacement 66 specifications 165 memory problems 148 microphone pin assignments 98 monitor pin - HP xw3400 | HP xw3400 Workstation - Service and Technical Reference Guide - Page 181
country specific 105 power problems 126 power problems audio 138 CD-ROM or DVD 151 diskette 127 Drive Key 154 front panel 155 general 122 hard drive 130 hardware installation 143 Internet access 156 keyboard 141 Media Card Reader 132 memory speaker 89 system board 91 Restore Plus! CD 2 retired - HP xw3400 | HP xw3400 Workstation - Service and Technical Reference Guide - Page 182
21 problems 158 recovery 21 Remote System Installation 24 Restore Plus! 22 Restore Plus! CD 2 restoring 19 servicing workstation 57 updating and management tools 24 spare part number tamper-resistent wrench 57 Torx T-15 screwdriver 57 speaker removal and replacement 89 specifications memory 165
-
 1
1 -
 2
2 -
 3
3 -
 4
4 -
 5
5 -
 6
6 -
 7
7 -
8
-
9
-
10
-
11
-
12
-
13
-
14
-
15
-
16
-
17
-
18
-
19
-
20
-
21
-
22
-
23
-
24
-
25
-
26
-
27
-
28
-
29
-
30
-
31
-
32
-
33
-
34
-
35
-
36
-
37
-
38
-
39
-
40
-
41
-
42
-
43
-
44
-
45
-
46
-
47
-
48
-
49
-
50
-
51
-
52
-
53
-
54
-
55
-
56
-
57
-
58
-
59
-
60
-
61
-
62
-
63
-
64
-
65
-
66
-
67
-
68
-
69
-
70
-
71
-
72
-
73
-
74
-
75
-
76
-
77
-
78
-
79
-
80
-
81
-
82
-
83
-
84
-
85
-
86
-
87
-
88
-
89
-
90
-
91
-
92
-
93
-
94
-
95
-
96
-
97
-
98
-
99
-
100
-
101
-
102
-
103
-
104
-
105
-
106
-
107
-
108
-
109
-
110
-
111
-
112
-
113
-
114
-
115
-
116
-
117
-
118
-
119
-
120
-
121
-
122
-
123
-
124
-
125
-
126
-
127
-
128
-
129
-
130
-
131
-
132
-
133
-
134
-
135
-
136
-
137
-
138
-
139
-
140
-
141
-
142
-
143
-
144
-
145
-
146
-
147
-
148
-
149
-
150
-
151
-
152
-
153
-
154
-
155
-
156
-
157
-
158
-
159
-
160
-
161
-
162
-
163
-
164
-
165
-
166
-
167
-
168
-
169
-
170
-
171
-
172
-
173
-
174
-
175
-
176
-
177
-
178
-
179
-
180
-
181
-
182
 |
 |

Service and Technical Reference Guide
HP xw3400 Workstation