HP xw3400 HP xw3400 Workstation - Service and Technical Reference Guide - Page 90
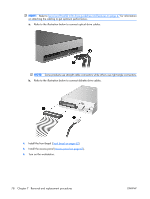
install a new drive., Removal and replacement procedures
 |
View all HP xw3400 manuals
Add to My Manuals
Save this manual to your list of manuals |
Page 90 highlights
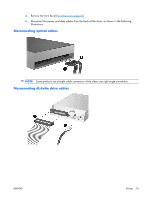
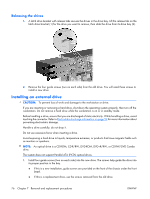
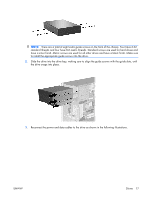
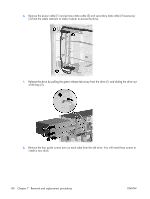
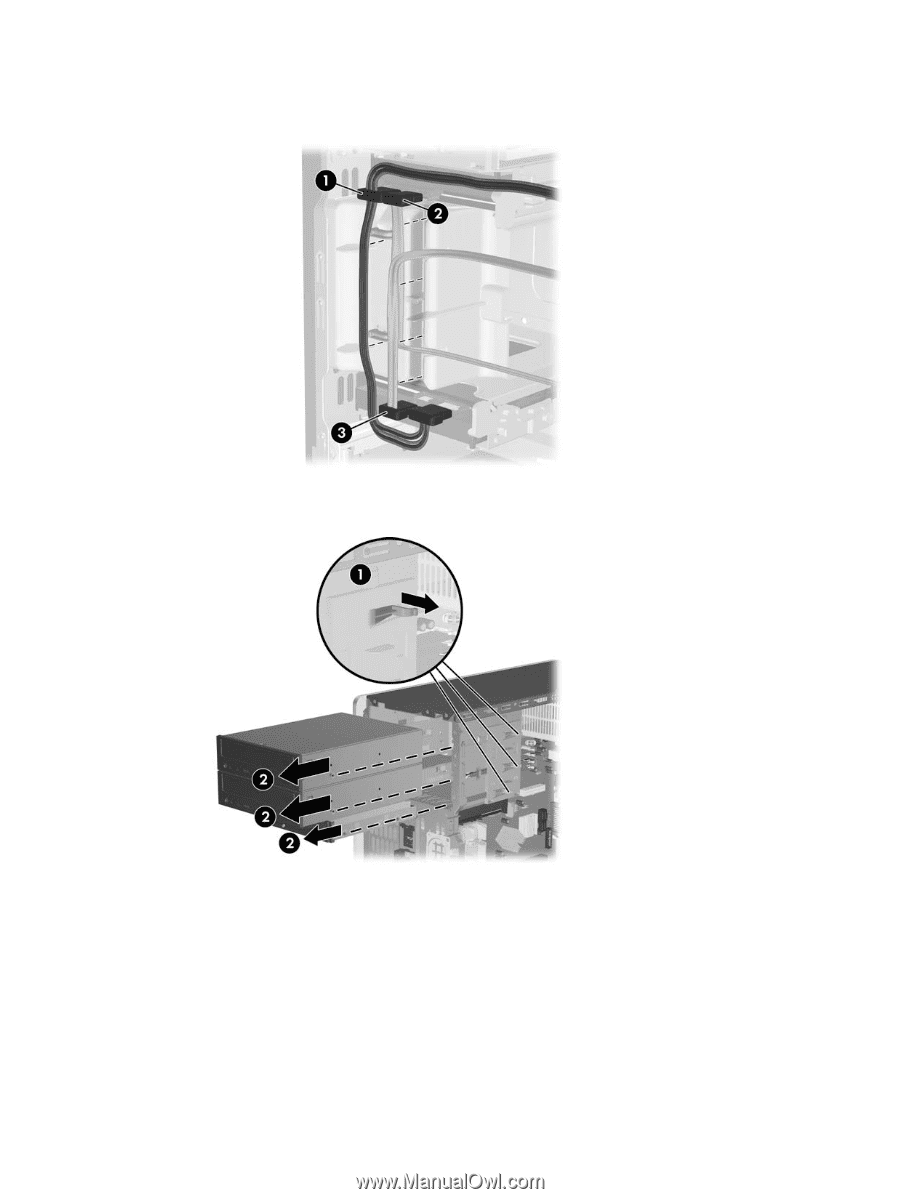
6. Remove the power cable (1) and primary data cable (2) and secondary data cable (if necessary) (3) from the cable retainers to make it easier to access the drive. 7. Release the drive by pulling the green release tab away from the drive (1) and sliding the drive out of the bay (2). 8. Remove the four guide screws (two on each side) from the old drive. You will need these screws to install a new drive. 80 Chapter 7 Removal and replacement procedures ENWW
-
 1
1 -
2
-
3
-
4
-
5
-
6
-
7
-
8
-
9
-
10
-
11
-
12
-
13
-
14
-
15
-
16
-
17
-
18
-
19
-
20
-
21
-
22
-
23
-
24
-
25
-
26
-
27
-
28
-
29
-
30
-
31
-
32
-
33
-
34
-
35
-
36
-
37
-
38
-
39
-
40
-
41
-
42
-
43
-
44
-
45
-
46
-
47
-
48
-
49
-
50
-
51
-
52
-
53
-
54
-
55
-
56
-
57
-
58
-
59
-
60
-
61
-
62
-
63
-
64
-
65
-
66
-
67
-
68
-
69
-
70
-
71
-
72
-
73
-
74
-
75
-
76
-
77
-
78
-
79
-
80
-
81
-
82
-
83
-
84
-
 85
85 -
 86
86 -
 87
87 -
 88
88 -
 89
89 -
 90
90 -
 91
91 -
 92
92 -
 93
93 -
 94
94 -
 95
95 -
96
-
97
-
98
-
99
-
100
-
101
-
102
-
103
-
104
-
105
-
106
-
107
-
108
-
109
-
110
-
111
-
112
-
113
-
114
-
115
-
116
-
117
-
118
-
119
-
120
-
121
-
122
-
123
-
124
-
125
-
126
-
127
-
128
-
129
-
130
-
131
-
132
-
133
-
134
-
135
-
136
-
137
-
138
-
139
-
140
-
141
-
142
-
143
-
144
-
145
-
146
-
147
-
148
-
149
-
150
-
151
-
152
-
153
-
154
-
155
-
156
-
157
-
158
-
159
-
160
-
161
-
162
-
163
-
164
-
165
-
166
-
167
-
168
-
169
-
170
-
171
-
172
-
173
-
174
-
175
-
176
-
177
-
178
-
179
-
180
-
181
-
182
 |
 |
6
.
Remove the power cable (1) and primary data cable (2) and secondary data cable (if necessary)
(3) from the cable retainers to make it easier to access the drive.
7
.
Release the drive by pulling the green release tab away from the drive (1) and sliding the drive out
of the bay (2).
8
.
Remove the four guide screws (two on each side) from the old drive. You will need these screws to
install a new drive.
80
Chapter
7
Removal and replacement procedures
ENWW