HP xw3400 HP xw3400 Workstation - Service and Technical Reference Guide - Page 69
Removal and replacement procedures, Preparation for disassembly
 |
View all HP xw3400 manuals
Add to My Manuals
Save this manual to your list of manuals |
Page 69 highlights
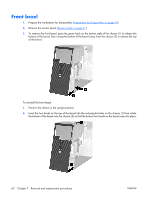
7 Removal and replacement procedures Adherence to the procedures and precautions described in this chapter is essential for proper service. After completing all necessary removal and replacement procedures, run the Diagnostics utility to verify that all components operate properly. NOTE: Not all features listed in this guide are available on all workstations. Preparation for disassembly See Identifying routine care and disassembly preparation on page 51 for initial safety procedures. 1. Remove/disengage any security devices that prohibit opening the workstation (External security devices on page 60). 2. Close any open software applications. 3. Exit the operating system. 4. Remove any diskette or compact disc from the workstation. 5. Turn off the workstation and any peripheral devices that are connected to it. CAUTION: Turn off the workstation before disconnecting any cables. Regardless of the power-on state, voltage is always present on the system board as long as the system is plugged into an active AC outlet. In some systems the cooling fan is on even when the workstation is in the "Standby," or "Suspend" modes. The power cord should always be disconnected before servicing a unit. 6. Disconnect the power cord from the electrical outlet and then from the workstation. 7. Disconnect all peripheral device cables from the workstation. NOTE: During disassembly, label each cable as you remove it, noting its position and routing. Keep all screws with the units removed. CAUTION: The screws used in the workstation are of different thread sizes and lengths; using the wrong screw in an application may damage the unit. ENWW Preparation for disassembly 59
-
 1
1 -
2
-
3
-
4
-
5
-
6
-
7
-
8
-
9
-
10
-
11
-
12
-
13
-
14
-
15
-
16
-
17
-
18
-
19
-
20
-
21
-
22
-
23
-
24
-
25
-
26
-
27
-
28
-
29
-
30
-
31
-
32
-
33
-
34
-
35
-
36
-
37
-
38
-
39
-
40
-
41
-
42
-
43
-
44
-
45
-
46
-
47
-
48
-
49
-
50
-
51
-
52
-
53
-
54
-
55
-
56
-
57
-
58
-
59
-
60
-
61
-
62
-
63
-
 64
64 -
 65
65 -
 66
66 -
 67
67 -
 68
68 -
 69
69 -
 70
70 -
 71
71 -
 72
72 -
 73
73 -
 74
74 -
75
-
76
-
77
-
78
-
79
-
80
-
81
-
82
-
83
-
84
-
85
-
86
-
87
-
88
-
89
-
90
-
91
-
92
-
93
-
94
-
95
-
96
-
97
-
98
-
99
-
100
-
101
-
102
-
103
-
104
-
105
-
106
-
107
-
108
-
109
-
110
-
111
-
112
-
113
-
114
-
115
-
116
-
117
-
118
-
119
-
120
-
121
-
122
-
123
-
124
-
125
-
126
-
127
-
128
-
129
-
130
-
131
-
132
-
133
-
134
-
135
-
136
-
137
-
138
-
139
-
140
-
141
-
142
-
143
-
144
-
145
-
146
-
147
-
148
-
149
-
150
-
151
-
152
-
153
-
154
-
155
-
156
-
157
-
158
-
159
-
160
-
161
-
162
-
163
-
164
-
165
-
166
-
167
-
168
-
169
-
170
-
171
-
172
-
173
-
174
-
175
-
176
-
177
-
178
-
179
-
180
-
181
-
182
 |
 |