Kyocera FS-4200DN FS-2100DN/4100DN/4200DN/4300DN Operation Guide - Page 177
Login/Logout, Authenticat Type Authenticat type setting, Login
 |
View all Kyocera FS-4200DN manuals
Add to My Manuals
Save this manual to your list of manuals |
Page 177 highlights
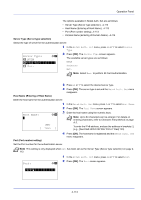
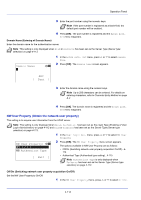
Off/On: a b 1 Off *2**O*n 2 Press [OK]. The Off/On screen appears. Operation Panel 3 Press or to select On or Off. 4 Press [OK]. The NW User Property menu reappears. Authenticat Type (Authenticat type setting) Set the authentication method. Authenticat Type: a b *1**S*i**m*p*l*e***********2 SASL 1 In the NW User Property menu, press or to select Authenticat Type. 2 Press [OK]. The Authenticat Type screen appears. 3 Press or to select Simple or SASL. 4 Press [OK]. The NW User Property menu reappears. Login/Logout Once you enable user login administration, a login user name and password entry screen appears each time you use this machine. Enter the user information registered on the network authentication server as the login user name and password. Register new users from the KYOCERA Net Policy Manager. For details, refer to the KYOCERA Net Policy Manager User Guide. Note To carry out operations restricted in the mode selection menu operation and Lock Operation Panel settings, it is necessary to log in as a user with administrator authority. For the administrator settings, refer to Administrator on page 4-117. For Lock Operation Panel, refer to Lock Operation Panel on page 2-19. Login Use the procedure below to login. Login User Name: O b Login Password: 1 With the Login User Name entry field selected, press [OK]. The Login User Name entry screen is displayed. [ Menu ] [ Login ] 4-115
-
 1
1 -
2
-
3
-
4
-
5
-
6
-
7
-
8
-
9
-
10
-
11
-
12
-
13
-
14
-
15
-
16
-
17
-
18
-
19
-
20
-
21
-
22
-
23
-
24
-
25
-
26
-
27
-
28
-
29
-
30
-
31
-
32
-
33
-
34
-
35
-
36
-
37
-
38
-
39
-
40
-
41
-
42
-
43
-
44
-
45
-
46
-
47
-
48
-
49
-
50
-
51
-
52
-
53
-
54
-
55
-
56
-
57
-
58
-
59
-
60
-
61
-
62
-
63
-
64
-
65
-
66
-
67
-
68
-
69
-
70
-
71
-
72
-
73
-
74
-
75
-
76
-
77
-
78
-
79
-
80
-
81
-
82
-
83
-
84
-
85
-
86
-
87
-
88
-
89
-
90
-
91
-
92
-
93
-
94
-
95
-
96
-
97
-
98
-
99
-
100
-
101
-
102
-
103
-
104
-
105
-
106
-
107
-
108
-
109
-
110
-
111
-
112
-
113
-
114
-
115
-
116
-
117
-
118
-
119
-
120
-
121
-
122
-
123
-
124
-
125
-
126
-
127
-
128
-
129
-
130
-
131
-
132
-
133
-
134
-
135
-
136
-
137
-
138
-
139
-
140
-
141
-
142
-
143
-
144
-
145
-
146
-
147
-
148
-
149
-
150
-
151
-
152
-
153
-
154
-
155
-
156
-
157
-
158
-
159
-
160
-
161
-
162
-
163
-
164
-
165
-
166
-
167
-
168
-
169
-
170
-
171
-
 172
172 -
 173
173 -
 174
174 -
 175
175 -
 176
176 -
 177
177 -
 178
178 -
 179
179 -
 180
180 -
 181
181 -
 182
182 -
183
-
184
-
185
-
186
-
187
-
188
-
189
-
190
-
191
-
192
-
193
-
194
-
195
-
196
-
197
-
198
-
199
-
200
-
201
-
202
-
203
-
204
-
205
-
206
-
207
-
208
-
209
-
210
-
211
-
212
-
213
-
214
-
215
-
216
-
217
-
218
-
219
-
220
-
221
-
222
-
223
-
224
-
225
-
226
-
227
-
228
-
229
-
230
-
231
-
232
-
233
-
234
-
235
-
236
-
237
-
238
-
239
-
240
-
241
-
242
-
243
-
244
-
245
-
246
-
247
-
248
-
249
-
250
-
251
-
252
-
253
-
254
-
255
-
256
-
257
-
258
-
259
-
260
-
261
-
262
-
263
-
264
-
265
-
266
-
267
-
268
-
269
-
270
-
271
-
272
-
273
-
274
-
275
-
276
-
277
-
278
-
279
-
280
-
281
-
282
-
283
-
284
-
285
-
286
-
287
-
288
-
289
-
290
-
291
-
292
-
293
-
294
-
295
-
296
-
297
-
298
-
299
-
300
-
301
-
302
-
303
-
304
-
305
-
306
-
307
-
308
-
309
-
310
-
311
-
312
-
313
-
314
-
315
-
316
 |
 |
