Pioneer AVIC U310BT Owner's Manual
Pioneer AVIC U310BT - Navigation System With CD player Manual
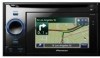 |
UPC - 012562956299
View all Pioneer AVIC U310BT manuals
Add to My Manuals
Save this manual to your list of manuals |
Pioneer AVIC U310BT manual content summary:
- Pioneer AVIC U310BT | Owner's Manual - Page 1
Information for the user" includes the important information that you must understand before using this navigation system. This software requires that the navigation system is properly connected to your vehicle's parking brake and depending on your vehicle, additional installation may be required - Pioneer AVIC U310BT | Owner's Manual - Page 2
device 15 - Attaching the detachable device 15 Installing the battery 16 Disposing of the battery 16 Turning on the detachable device 17 Charging the battery of detachable device 17 Monitoring the battery status 17 Turning off the navigation system automatically 17 Connecting with your PC 18 How - Pioneer AVIC U310BT | Owner's Manual - Page 3
destination from "Favorites" 40 Searching for POIs by using the data on the SD memory card 40 Selecting a location you searched for recently 40 Searching for a location by coordinates 41 Searching for a location by scrolling the map 41 Registering and editing locations Registering a location - Pioneer AVIC U310BT | Owner's Manual - Page 4
Notes for hands-free phoning 57 Updating the Bluetooth wireless technology software 58 Modifying the general settings for navigation functions Setting the volume for navigation system 59 Customizing the regional settings 59 - Selecting the language 59 - Installing additional files for voice guidance - Pioneer AVIC U310BT | Owner's Manual - Page 5
tracks 84 Playback and Pause 84 Using advanced sound retriever 84 Playing music files on USB Reading the screen 86 Operating by hardware buttons 86 Playback and Pause 91 Using advanced sound retriever 91 Operating this navigation system's iPod function from your iPod 91 Playing songs in random order - Pioneer AVIC U310BT | Owner's Manual - Page 6
Navigation System to the Default or Factory Settings Setting items to be deleted 111 Appendix Troubleshooting 113 Messages and how to react to them 116 Messages for audio functions 117 Positioning technology 119 - Positioning by GPS 119 6 En - Map compatibility chart 126 Bluetooth 128 SD and SDHC - Pioneer AVIC U310BT | Owner's Manual - Page 7
" The term for USB memory only is "USB storage device". "SD memory card" The SD memory card and SDHC memory card are collectively referred to as the "SD memory card". Notice regarding MP3 file usage Supply of this navigation system conveys only a license for private, non-commercial use and does not - Pioneer AVIC U310BT | Owner's Manual - Page 8
as iPod. p When you use this navigation system with a Pioneer USB interface cable for iPod (CDIU50) (sold separately), you can control an iPod compatible with this navigation system. p To obtain maximum performance, we recommend that you use the latest software for the iPod. p Operation methods may - Pioneer AVIC U310BT | Owner's Manual - Page 9
Introduction % Press the RESET button with a pen tip or other pointed implement. RESET button p If you have connected other equipment to this navigation system with IP-BUS, be sure to reset that equipment too. Introduction Chapter 01 En 9 - Pioneer AVIC U310BT | Owner's Manual - Page 10
map screen and the audio operation screen. ! Press to display the map screen while the screen of navigation function is displayed. 5 MULTI-CONTROL MULTI-CONTROL ; operates track search controls. ! Keep moving MULTI-CONTROL to the left or right; Allows you to perform manual seek tuning, fast forward - Pioneer AVIC U310BT | Owner's Manual - Page 11
navigation system while data is being transferred. ! If data loss or corruption occurs on the storage device for any reason, it is usually not possible to recover the data. Pioneer accepts no liability for damages, costs or expenses arising from data loss or corruption. Inserting an SD memory card - Pioneer AVIC U310BT | Owner's Manual - Page 12
with some SD memory cards. p Do not insert anything other than SD memory cards or dummy SD cards into the SD card slot. p When you insert the SD memory card which contains your customized POI data, the navigation system restarts. Ejecting an SD memory card 1 Display the "Navigation Menu" screen - Pioneer AVIC U310BT | Owner's Manual - Page 13
to the sto- rage device, never remove it from this navigation system while data is being transferred. ! If data loss or corruption occurs on the storage device for any reason, it is usually not possible to recover the data. Pioneer accepts no liability for damages, costs or expenses arising from - Pioneer AVIC U310BT | Owner's Manual - Page 14
Selection" screen appears. The map screen appears. Regular startup % Start the engine to boot up the system. p The screen shown will differ depending on the previous conditions. p When there is no route, the disclaimer appears after the navigation system reboots. Read the disclaimer carefully - Pioneer AVIC U310BT | Owner's Manual - Page 15
detachable device 1 turns the audio source off and switches to display the map screen. 1 Press DETACH button to release the detachable device. 2 Gently device on and off. 3 SD card slot = For more detailed information, refer to Inserting and ejecting an SD memory card on page 11. Removing and - Pioneer AVIC U310BT | Owner's Manual - Page 16
detachable device forcedly. 3 Remove the battery. Installing the battery CAUTION ! Do not under any circumstances attempt to change the battery yourself. ! The battery should only be changed by Pioneer service personnel. Disposing of the battery WARNING ! Keep the battery pack out of the reach of - Pioneer AVIC U310BT | Owner's Manual - Page 17
is removed from the head unit, the navigation system switches to "Detach mode". p The following functions are not available in "Detach mode". - Voice guidance - Auto reroute function - Map matching - Hands-free phoning - Audio functions p When the battery of the detachable device is completely run - Pioneer AVIC U310BT | Owner's Manual - Page 18
Chapter 03 How to use the detachable device 1 A message appears when the remaining battery life is getting low. 2 When the battery nearly runs out, the navigation system automatically turns off after a message appears. Connecting with your PC It is available to connect the detachable device and your - Pioneer AVIC U310BT | Owner's Manual - Page 19
How to use the detachable device Chapter 03 How to use the detachable device En 19 - Pioneer AVIC U310BT | Owner's Manual - Page 20
you can do on each menu 1 Map screen Press the MODE button to display the navigation map screen. 2 "Navigation Menu" screen You can search for free phoning to see call histories and change the settings on the Bluetooth wireless technology connection. 5 Audio operation screen When you play the audio - Pioneer AVIC U310BT | Owner's Manual - Page 21
on-screen keyboard 1 6 How to use the navigation menu screens 2 3 1 Screen title 2 Shows If there is no text in the box, an informative guide with text appears. 2 Keyboard Touch the keys to enter proceed to the next step. 6: Deletes the input text one letter at a time, beginning at the end of - Pioneer AVIC U310BT | Owner's Manual - Page 22
Most of the information provided by your navigation system can be seen on the map. You need to become familiar with how the information appears on the map. How to read the map screen This example shows an example of a 2D map screen. 1 c b 2 a 3 9 8 45 6 7 p Information with the mark - Pioneer AVIC U310BT | Owner's Manual - Page 23
your destination (next waypoint, or cursor) is indicated with a straight line. a Current route* The route currently set is highlighted in bright color on the map. If a waypoint is set on the route, the route after the next waypoint is highlighted in another color. b Multi-Info window Each touch of - Pioneer AVIC U310BT | Owner's Manual - Page 24
freeway, freeway exit numbers and freeway signs may be displayed when in the vicinity of interchanges and exits. 3 Touch or to change the map scale. p If you do not operate the function for a few seconds, the display is automatically re- turned. 1 Lane information 2 Freeway exit information - Pioneer AVIC U310BT | Owner's Manual - Page 25
POI on the map on the next page. = For details, refer to Dialing from the map on page 53. Customizing the map screen settings The general settings related with a map screen can be customized. To customize the map screen, display the "Map" screen. 1 Touch [Menu] on the map screen. The "Navigation - Pioneer AVIC U310BT | Owner's Manual - Page 26
FEEDS" which is available separately, on your PC. ("AVIC FEEDS" will be available on our website.) Store the customized POI into the SD memory card properly, and then insert it to the SD card slot. By selecting the POI icon, the system displays it on the map screen. 5 Touch the category you want to - Pioneer AVIC U310BT | Owner's Manual - Page 27
[OK]. Returns previous screen. 8 To finish the selection, touch [OK]. Switching the map between 2D and 3D Various types of screen displays can be selected for navigation guidance. 2D map screen 3D map screen 1 Display the "Map" screen. 2 Touch [View Mode]. Each time you touch the key changes that - Pioneer AVIC U310BT | Owner's Manual - Page 28
Day]: The map is always displayed with daytime colors. p To use this function with [Automatic], the Orange/white lead of the navigation system must be intersection while displaying a screen other than navigation. 1 Display the "Map" screen. 2 Touch [AV Guide Mode]. Each time you touch the key - Pioneer AVIC U310BT | Owner's Manual - Page 29
traffic regulations when driving. 8 Your navigation system sets the route to your destination, and the map of your surroundings appears. 9 After releasing the parking brake, drive in accordance with navigation guidance. Checking the location on the map After searching for the destination, the - Pioneer AVIC U310BT | Owner's Manual - Page 30
refer to Inputting the fuel consumption map users can operate Settings marked with an asterisk (*) show that these are default or factory settings. Route Condition This setting controls system may calculate a route that in- cludes toll road even if [On] is selected. Avoid Ferry This setting controls - Pioneer AVIC U310BT | Owner's Manual - Page 31
system may calculate a route that in- cludes freeway even if [On] is selected. Time restrictions This setting controls route is calculated, your navigation system may not be able to can be sorted automatically or manually. p When you set waypoints Add]. The "Select Search method" screen appears. En 31 - Pioneer AVIC U310BT | Owner's Manual - Page 32
Chapter 06 Setting a route to your destination 3 Search for a location. After searching for a point, display it on a map, then touch [OK] to add to the "Waypoints List" screen. = For details, refer to Searching for and selecting a location on page 36. 4 Touch [OK] on the "Waypoints List" screen. " - Pioneer AVIC U310BT | Owner's Manual - Page 33
and final destination can be sorted automatically or manually. 1 Display the "Waypoints List" screen. 2 Touch [Add]. The "Select Search method" screen appears. Checking and modifying the current route p When a long distance route is calculated, your navigation system may not be able to list all - Pioneer AVIC U310BT | Owner's Manual - Page 34
screen" appears. 5 Touch [OK]. The route is recalculated and the map of the current position appears. Deleting a waypoint You can delete waypoints from [Automatic]. You can sort the destination and waypoints automatically. The system will show the nearest waypoint (distance in a straight line) from - Pioneer AVIC U310BT | Owner's Manual - Page 35
the "Navigation Menu" screen. 2 Touch [Settings]. The "Settings Menu" screen appears. 3 Touch [Yes]. The current route is deleted, and a map of the route. 3 Touch [Demo Mode]. Each time you touch the key changes that setting. ! [On]: Repeat demo drive. ! [Off] (default): Demo Mode is set off. - Pioneer AVIC U310BT | Owner's Manual - Page 36
a safe place and put on the parking brake before setting your route. p Some information , some steps may be skipped. 1 Display the "Navigation Menu" screen. 2 Touch [Address]. The "Address . The representative location of the city appears on the map screen. 5 Touch the desired city name. The "Enter - Pioneer AVIC U310BT | Owner's Manual - Page 37
number and then touch [OK]. The "Selected House Number" screen appears. 9 Touch the desired house number range. The searched location appears on the map screen. Searching for a name by entering multiple keywords You can search for a name (such as a city name or a street name) by entering multiple - Pioneer AVIC U310BT | Owner's Manual - Page 38
about various facilities (Points Of Interest - POI), such as gas stations, parking lots or restaurants, is available. You can search for a POI by selecting the category (or entering the POI Name). 1 Display the "Navigation Menu" screen. 2 Touch [POI]. The "POI Search" screen appears. 3 Touch [Zone - Pioneer AVIC U310BT | Owner's Manual - Page 39
the selected category, repeat this step as many times as necessary. 4 Touch the POI you want. The searched location appears on the map screen. Searching for POIs around the city You can search for POIs around a specified city. 3 Touch [Zone]. The "State/Province Selection" screen appears. If the - Pioneer AVIC U310BT | Owner's Manual - Page 40
POI properly and inserting the SD memory card enables the system to use the data for searches. 1 Insert an SD memory card into the SD card slot. = For more details of the operation, refer to Inserting and ejecting an SD memory card on page 11. 2 Display the "Navigation Menu" screen. 3 Touch [AVIC - Pioneer AVIC U310BT | Owner's Manual - Page 41
entry you want. The searched location appears on the map screen. Searching for a location by coordinates Entering a latitude and longitude pinpoints the location. 1 Display the "Navigation Menu" screen. 2 Touch [Coordinate]. The "Coordinate Input Menu" screen appears. 3 Touch [Longitude]. The "Enter - Pioneer AVIC U310BT | Owner's Manual - Page 42
Navigation Menu" screen. 2 Touch [Favorites]. The "Select Favorite" screen appears. 3 Touch [Add]. can enter the desired name. p Up to 17 characters can be input for the name. # Touch [Phone #]. You can edit the registered on the map and "Favorites". # Touch [Modify Location]. You can - Pioneer AVIC U310BT | Owner's Manual - Page 43
locations. 5 Touch [Delete]. A message will appear asking you to confirm the deletion. Deleting the entry in "Favorites" 1 Display the "Navigation Menu" screen. 2 Touch [Favorites]. The "Select Favorite" screen appears. 3 Touch [Delete]. The "Delete from Favorites" screen appears. 6 Touch [Yes - Pioneer AVIC U310BT | Owner's Manual - Page 44
[OK]. The registration is completed. Editing your home 1 Display the "Navigation Menu" screen. 2 Touch [Favorites]. The "Select Favorite" screen appears [Modify Location]. You can change the registered location by scrolling the map. 4 Touch [OK]. The registration is completed. Deleting an entry in - Pioneer AVIC U310BT | Owner's Manual - Page 45
Registering and editing locations # Touch [All]. Selects all entries. # Touch [None]. Displayed when all locations are selected. Cancels all selected locations. 5 Touch [Delete]. A message will appear asking you to confirm the deletion. 6 Touch [Yes]. The data you selected is deleted. # Touch [No]. - Pioneer AVIC U310BT | Owner's Manual - Page 46
When the navigation system is turned off, the Bluetooth connection is also disconnected. When the system restarts, the system automatically attempts up to 3 cellular phones to this navigation system. p The default device name displayed on the cellular phone is "PIONEER NAVI". The PIN code is "1111 - Pioneer AVIC U310BT | Owner's Manual - Page 47
the navigation system, displays them in a list, and registers them for connection. 1 Activate the Bluetooth wireless technology on your cellular phone. For some cellular phones, no specific action is necessary to activate Bluetooth wireless technology. For details, refer to the instruction manual of - Pioneer AVIC U310BT | Owner's Manual - Page 48
details, refer to the instruction manual of your cellular phone. 2 Touch [Settings] on the "Phone Menu" screen. The "Bluetooth Settings" screen appears. 3 Touch [Connections]. The "Connection List" screen appears. 4 Touch [Add], and then [Pair from the mobile phone]. The navigation system waits for - Pioneer AVIC U310BT | Owner's Manual - Page 49
reason. If you start connection manually, carry out the following procedure. You can also connect the phone by having the navigation system detect it automatically. = For details, refer to Setting automatic connection on page 56. 1 Activate the Bluetooth wireless technology on your cellular phone - Pioneer AVIC U310BT | Owner's Manual - Page 50
2 Touch [Settings]. The "Bluetooth Settings" screen appears. 3 Touch input number is deleted a digit at a time from the end of the number. Continuing to press this deletes all of the digits. # Touch . Return to the previous screen. 4 Touch to make a call. p To cancel the call after the system - Pioneer AVIC U310BT | Owner's Manual - Page 51
an entry on the list. Dialing starts. p To cancel the call after the system starts dialing, touch . # Touch [Detail]. The "Detail Information" screen appears call may apply. You can dial GOOG-411 to dial the free business listing service of Googleä with one touch. 1 Display the "Phone Menu" screen. 2 - Pioneer AVIC U310BT | Owner's Manual - Page 52
entry on the list. Dialing starts. p To cancel the call after the system starts dialing, touch . # Touch [Detail]. The "Detail Information" screen a call to the entry registered in the "Favorites". 1 Display the "Navigation Menu" screen. 2 Touch [Favorites]. The "Select Favorite" screen appears. - Pioneer AVIC U310BT | Owner's Manual - Page 53
POIs that have no phone number data. 1 Display the "Navigation Menu" screen. 2 Touch [POI]. The "POI Search" screen appears. 3 Search for the POI. The "POI manually. Answering is available if any screen is displayed, such as the map screen or the setting screen. p You can set this navigation system - Pioneer AVIC U310BT | Owner's Manual - Page 54
the cellular phone that is connected to this navigation system via Bluetooth technology, this navigation system may not be able to display the phone user phone's address book into the Contacts. p Depending on the cellular phone, "Phone Book" may be called a name such as "Contacts", "Business card - Pioneer AVIC U310BT | Owner's Manual - Page 55
Data on the selected item is cleared from this navigation system's memory. p If you do not want to clear ] on the "Phone Menu" screen. The "Bluetooth Settings" screen appears. 2 Touch [Clear Memory This setting controls the incoming ring tone volume. [Phone Voice]: This setting controls the incoming - Pioneer AVIC U310BT | Owner's Manual - Page 56
[Off]. 1 Touch [Settings] on the "Phone Menu" screen. The "Bluetooth Settings" screen appears. 2 Touch [Bluetooth On/Off]. Touching [Bluetooth On/Off] switching between [On] and [Off]. Answering a call automatically The navigation system automatically answers incoming calls to the cellular phone, so - Pioneer AVIC U310BT | Owner's Manual - Page 57
on the type of cellular phone. Refer to the instruction manual that came with your cellular phone for detailed instructions. ! With cellular phones, phone book transfer may not work even though your phone is paired with the navigation system. In that case, disconnect your phone, perform pairing - Pioneer AVIC U310BT | Owner's Manual - Page 58
phone book in the navigation system. ! You cannot make a call to the entry of an unknown user (no phone number) install the update, read through the instructions on the website. Follow the instructions on the website for steps until [Update] becomes active. 1 Insert an SD memory card into the SD card - Pioneer AVIC U310BT | Owner's Manual - Page 59
on the "Region" screen. The navigation system restarts. Installing additional files for voice guidance (TTS navigation system. If the latest TTS file is available, you can replace the current TTS file with the latest one. 1 Copy the "Voice" folder onto the topmost directory of the SD memory card - Pioneer AVIC U310BT | Owner's Manual - Page 60
navigation functions 2 Insert an SD memory card into the SD card slot. = For more details of the operation, refer to Inserting and ejecting an SD memory card between km and miles This setting controls the unit of distance and speed displayed on your navigation system. 1 Display the "Region" screen - Pioneer AVIC U310BT | Owner's Manual - Page 61
(default): ! [QWERTZ]: Replicating the settings You can import settings you have made on the utility program "AVIC FEEDS" which is available separately to the navigation system. 1 Insert an SD memory card into the SD card slot. = For more details of the operation, refer to Inserting and ejecting an - Pioneer AVIC U310BT | Owner's Manual - Page 62
the general settings for navigation functions Inputting the fuel consumption information for calculating the fuel cost You can estimate the fuel cost to your destination by entering the fuel consumption information in the navigation system. 1 Display the "Navigation Menu" screen. 2 Touch [Gas - Pioneer AVIC U310BT | Owner's Manual - Page 63
status of the GPS antenna, the reception sensitivity and from how many satellites the signal is received. Color Orange Yellow Signal communication Yes Yes Used in positioning Yes No 2 Hand Brake When the parking brake is applied, [On] is displayed. When the parking brake is released, [Off - Pioneer AVIC U310BT | Owner's Manual - Page 64
it back on. Restoring the default setting Resets various settings registered to the navigation system and restores user information]. Touching [Clear user information] displays the confirmation message for clearing the memory. # Touch [Reset]. Various settings registered to the navigation system - Pioneer AVIC U310BT | Owner's Manual - Page 65
appears. 5 Touch [OK]. The "Gas Price Calculation" screen appears. And then touch [OK] to display the "Gas Mileage" screen. Exporting the data of "Gas Mileage" Exporting the "Gas Mileage" data to an SD memory card is possible. p The data stored in this navigation system will be cleared as exporting - Pioneer AVIC U310BT | Owner's Manual - Page 66
Chapter 12 Other functions 1 Insert an SD memory card into the SD card slot. = For more details of the operation, refer to Inserting and ejecting an SD memory card on page 11. 2 Display the "Navigation Menu" screen. 3 Touch [Gas Mileage]. The "Gas Mileage" screen appears. 4 Touch [Export]. After a - Pioneer AVIC U310BT | Owner's Manual - Page 67
[Data In/Out]. The "Export/Import Menu" screen appears. 1 Insert an SD memory card into the SD card slot. = For more details of the operation, refer to Inserting and ejecting an SD memory card on page 11. 2 Display the "Navigation Menu" screen. 3 Touch [Data In/Out]. The "Export/Import Menu" screen - Pioneer AVIC U310BT | Owner's Manual - Page 68
device from your PC. 2 Touch [End]. "PC Mode" is canceled, and then the system restarts. 5 Touch [OK]. The "Navigation Menu" screen appears. "PC Mode" function When you connect a detachable device containing an SD memory card to your PC, "PC Mode" enables your PC to identify the detachable device - Pioneer AVIC U310BT | Owner's Manual - Page 69
the navigation system. ! XM (XM tuner) ! SIRIUS (SIRIUS tuner) ! HD Radio (HD Radio tuner) ! TUNER (FM, AM) ! CD ! ROM (MP3, AAC, WAV, WMA) ! USB ! iPod ! EXT1 (external unit1) ! EXT2 (external unit2) ! AUX (auxiliary device) Switching the audio operation screen 1 Press MODE button when the map of - Pioneer AVIC U310BT | Owner's Manual - Page 70
Chapter 13 Basic flow of operation Screen switching overview : Press : Press and hold for a few seconds : Press the center of MULTI-CONTROL 70 En : Turn and press the center of MULTI-CONTROL Pressing LIST or EJECT button enables you to perform the equivalent operation. - Pioneer AVIC U310BT | Owner's Manual - Page 71
available with the audio source according to your sound requests. 5 Source off screen 6 "Initial Setting" screen You can access the screen that lets you perform system set up of different settings for this navigation system. Basic flow of operation Chapter 13 En 71 - Pioneer AVIC U310BT | Owner's Manual - Page 72
radio (FM) You can listen to the radio by using the navigation system. This section describes operations for radio (FM). % Press SRC/OFF You can cancel seek tuning by pressing MULTI-CONTROL left or right. Pressing the center of MULTI-CONTROL The function select screen appears. Storing and recalling - Pioneer AVIC U310BT | Owner's Manual - Page 73
. When this is complete, BSM stops flashing. p To cancel the storage process, press the center of MULTI-CONTROL again. p Storing broadcast frequencies with BSM may replace broadcast frequencies you have already saved by using to . FM: Level1 - Level2 - Level3 - Level4 p The level "4" setting - Pioneer AVIC U310BT | Owner's Manual - Page 74
the radio (AM) You can listen to the radio using this navigation system. This section describes operations for radio (AM). 1 Press SRC/ p You can cancel seek tuning by pressing MULTI-CONTROL left or right. Pressing the center of MULTI-CONTROL The function select screen appears. 1 Source icon Shows - Pioneer AVIC U310BT | Owner's Manual - Page 75
strength. When this is complete, BSM stops flashing. p To cancel the storage process, press the center of MULTI-CONTROL again. p Storing broadcast frequencies with BSM may replace broadcast frequencies you have already saved by using to . AM: Level1 - Level2 p The level "2" setting allows reception - Pioneer AVIC U310BT | Owner's Manual - Page 76
the navigation system. This section describes operations for HD Radioä. p For details concerning operation, refer to the HD Radio tuner's operation manual. % AM. Pressing MULTI-CONTROL up or down You can recall radio stations assigned to preset tuning keys to . Pressing MULTI-CONTROL left or right - Pioneer AVIC U310BT | Owner's Manual - Page 77
strength. When this is complete, BSM stops flashing. p To cancel the storage process, press the center of MULTI-CONTROL again. p Storing broadcast frequencies with BSM may replace broadcast frequencies you have already saved by using to . Tuning in strong signals Local seek tuning allows you to tune - Pioneer AVIC U310BT | Owner's Manual - Page 78
Display the "Function Menu" screen. = For details, refer to Screen switching overview on page 70. 2 Turn MULTI-CONTROL to display "Blending". 3 Press the center of MULTI-CONTROL to switch between "On" and "Off". ! "Off": Receives analog broadcasting only. ! "On": Automatically switches to the analog - Pioneer AVIC U310BT | Owner's Manual - Page 79
audio CDs You can play a normal music CD using the built-in drive of the navigation system. This section describes how. % Insert Pressing MULTI-CONTROL right Skips to the start of the next track. Pressing and holding MULTI-CONTROL right Performs fast forward. Pressing MULTI-CONTROL left Skips - Pioneer AVIC U310BT | Owner's Manual - Page 80
of the first track on the disc. Pressing the center of MULTI-CONTROL The function select screen appears. Pressing LIST button Shows the list to track titles on a CD-TEXT disc and select one of them to play back. Setting a repeat play range % Touch repeatedly until the desired repeat range appears - Pioneer AVIC U310BT | Owner's Manual - Page 81
Playing audio CDs p If you touch during scan play, the scan play is automatically canceled and playback of the current track will be repeated. p If you touch during scan play, the scan play is automatically canceled and tracks will be played in random order. Playback and Pause % Touch . Playback of - Pioneer AVIC U310BT | Owner's Manual - Page 82
Chapter 18 Playing music files on ROM You can play a disc that contains compressed audio files using the built-in drive of the navigation system. This section describes these operations. p In the following description, the MP3, WMA, AAC, WAV files are collectively referred to as "Compressed audio - Pioneer AVIC U310BT | Owner's Manual - Page 83
files on ROM Chapter 18 Playing music files on ROM 6 Advanced sound retriever indicator = For on the disc. Pressing and holding BAND/ESC button Playback returns to the root folder. Pressing MULTI-CONTROL up or down Selects the previous or next folder and plays the first track on the folder. p - Pioneer AVIC U310BT | Owner's Manual - Page 84
18 Playing music files on ROM When a folder is selected, it plays the first track in the selected folder. ! Pressing MULTI-CONTROL left When folder is listed, this operation is not available. ! Pressing and holding MULTI-CONTROL left Displays the content of the root folder. p If the root folder is - Pioneer AVIC U310BT | Owner's Manual - Page 85
Playing music files on ROM % Touch [S.Rtrv] repeatedly to select the desired setting. Each touch of [S.Rtrv] changes the settings as follows: !: Sets to S.Rtrv1. !: Sets to S.Rtrv2. ! No indicator: Sets to off. p S.Rtrv2 is more effective than S.Rtrv1. Chapter 18 Playing music files on ROM En 85 - Pioneer AVIC U310BT | Owner's Manual - Page 86
Chapter 19 Playing music files on USB Reading the screen 1 Source icon Shows which source has by hardware buttons Pressing and holding BAND/ESC button Playback returns to the root folder. Pressing MULTI-CONTROL up or down Plays the first playable file on the previous or next folder. p The folders - Pioneer AVIC U310BT | Owner's Manual - Page 87
files on USB Chapter 19 Playing music files on USB Pressing MULTI-CONTROL left Skips to the start of the current file. Pressing it twice continuously will skip to the previous file. Pressing and holding MULTI-CONTROL left Performs fast reverse. p There is no sound on fast reverse or for- ward - Pioneer AVIC U310BT | Owner's Manual - Page 88
Chapter 19 Playing music files on USB % Touch . Random play begins. p When you turn random play on, appears. p To turn random play off, touch again. p If you touch while - Pioneer AVIC U310BT | Owner's Manual - Page 89
the USB interface cable for iPod enables you to connect your iPod to the navigation system. p A USB interface cable for iPod (CD-IU50) (sold separately) is song on page 92. 6 iPod control mode indicator = For details, refer to Operating this navi- gation system's iPod function from your iPod on - Pioneer AVIC U310BT | Owner's Manual - Page 90
items are listed, this operation is not available. ! Pressing and holding MULTI-CONTROL left When the lower tier of items are listed, it returns to the find a song you want to listen to. # Pressing the center of MULTI-CONTROL Plays the selected song (or episode). Setting a repeat play range 1 Display - Pioneer AVIC U310BT | Owner's Manual - Page 91
the ignition key is turned off, the iPod will not be turned off. To turn off power, operate the iPod. 1 Touch Ctrl to switch the control mode. Each touch of Ctrl changes the settings as follows: !: This navigation system's iPod function can be operated from the connected iPod. ! No indicator: This - Pioneer AVIC U310BT | Owner's Manual - Page 92
if the control mode is set to , following functions are available from this navigation system. - CONTROL to display "Shuffle Mode". 3 Press the center of MULTI-CONTROL to set. Each press of MULTI-CONTROL changes the settings as follows: ! "Shuffle Off": Does not shuffle. ! "Shuffle Songs": Plays back - Pioneer AVIC U310BT | Owner's Manual - Page 93
"the" p If alphabet search is aborted, Not Found is displayed. 7 On the song (or episode) list, turn MULTI-CONTROL to select the song you want to play. 8 Press the center of MULTI-CONTROL to set. Setting the audiobook play speed While listening to an audiobook on iPod, playback speed can be changed - Pioneer AVIC U310BT | Owner's Manual - Page 94
XM tuner You can use the navigation system to control an XM satellite digital tuner, which is sold separately. For details concerning operation, refer to the XM tuner's operation manuals. This section provides information on XM operations with the navigation system which differs from that described - Pioneer AVIC U310BT | Owner's Manual - Page 95
buttons Pressing BAND/ESC button Band can be selected from among XM 1, XM 2, or XM 3. This is useful for switching the preset item. Pressing MULTI-CONTROL up or down During Channel mode: You can recall radio stations assigned to preset tuning keys to . During Category mode: The categories move up or - Pioneer AVIC U310BT | Owner's Manual - Page 96
You can use the navigation system to control a Pioneer Sirius satellite digital tuner, which is sold separately. For details concerning operation, refer to the SIRIUS tuner's operation manuals. This section provides information on SIRIUS operations with navigation system which differs from that - Pioneer AVIC U310BT | Owner's Manual - Page 97
buttons Pressing BAND/ESC button Band can be selected from among SR1, SR2, or SR3. This is useful for switching the preset item. Pressing MULTI-CONTROL up or down During Channel mode: You can recall radio stations assigned to preset tuning keys to . During Category mode: The categories move up or - Pioneer AVIC U310BT | Owner's Manual - Page 98
program. Pressing again will skip back to the previous song or program. # Pressing and holding MULTI-CONTROL left Performs fast reverse. # Using the Game Alert function Selecting teams for Game Alert This navigation system can alert you when games involving your favorite sports teams are about - Pioneer AVIC U310BT | Owner's Manual - Page 99
or when the power of this navigation system turns on, an alert is displayed. Press and hold the center of MULTI-CONTROL to switch to that station, and 3 Press MULTI-CONTROL up or down to select a game. p The game score will be updated automatically. 4 Press the center of MULTI-CONTROL to switch to - Pioneer AVIC U310BT | Owner's Manual - Page 100
not fully controlled by the navigation system. Two external units can be controlled by this navigation system. When two external units are connected, the navigation system allocates them as external unit 1 or external unit 2. For details of the connection method, refer to "Installation Manual". For - Pioneer AVIC U310BT | Owner's Manual - Page 101
"Function Menu" screen. = For details, refer to Screen switching overview on page 70. 2 Turn MULTI-CONTROL until the desired setting appears in the display. 3 Press the center of MULTI-CONTROL to set. p The operating commands set to Function1 - Function4 vary depending on the external unit. p Some - Pioneer AVIC U310BT | Owner's Manual - Page 102
lets you connect your navigation system to auxiliary equipment. For more details, refer to the stereo mini plug cable owner's manual. Reading the screen 1 Source icon Shows which source has been selected. Switching the auxiliary setting 1 Turn MULTI-CONTROL to select "AUX" in the "Initial Setting - Pioneer AVIC U310BT | Owner's Manual - Page 103
Turning the source off % Press SRC/OFF and hold until the audio source turns off. = For details, refer to Switching the audio operation screen on page 69. p To return to the display of each source, press SRC/OFF button. Turning the source off Chapter 25 En 103 - Pioneer AVIC U310BT | Owner's Manual - Page 104
to Displaying the "Initial Setting" screen on this page. 2 Turn MULTI-CONTROL to select "AUX". 3 Press the center of MULTI-CONTROL to switch between "On" and "Off". Setting the rear output and subwoofer controller The navigation system's rear output can be used for a full-range speaker or subwoofer - Pioneer AVIC U310BT | Owner's Manual - Page 105
" screen on the previous page. 2 Turn MULTI-CONTROL to select "S/W Control". 3 Press the center of MULTI-CONTROL to switch between "Rear SP:F.Range" and "Rear is output. p When you use a cellular phone connected with Bluetooth technology (dialing, talking, incoming call), the audio source volume is - Pioneer AVIC U310BT | Owner's Manual - Page 106
front/rear speaker balance moves from front to rear. Setting "Front" and "Rear" to "0" is correct when using a two speaker system. When "Rear SP:S/W" is selected in "S/W Control", front/rear speaker balance cannot be adjusted. = Refer to Setting the rear output on the previous page. 4 Press MULTI - Pioneer AVIC U310BT | Owner's Manual - Page 107
100 Hz - 160 Hz Mid: 200 Hz - 500 Hz - 1 kHz - 2 kHz High: 3 kHz - 8 kHz - 10 kHz - 12 kHz 7 Press MULTI-CONTROL up or down to select the desired Q factor. Press MULTI-CONTROL up or down until the desired Q factor appears in the display. 2W - 1W - 1N - 2N Adjusting loudness Loudness compensates for - Pioneer AVIC U310BT | Owner's Manual - Page 108
left or right to select a desired level. Each time MULTI-CONTROL is pressed left or right, level is selected in the following order: Low - Mid - High Using subwoofer output The navigation system is equipped with a subwoofer output mechanism, which can be turned on or off. 1 Display the "Audio - Pioneer AVIC U310BT | Owner's Manual - Page 109
noise. 1 Display the "Audio Menu" screen. = For details, refer to Displaying the "Audio Menu" screen on page 106. 2 Turn MULTI-CONTROL to select "Bass". 3 Press MULTI-CONTROL up or down to select a desired level. "0" to "+6" is displayed as the level is increased or decreased. Chapter 27 En 109 - Pioneer AVIC U310BT | Owner's Manual - Page 110
64. ! Method 3: Touch [Reset] on the "Date/ Setting Clear" screen ! Method 4: Touch [Clear user information] on the "Date/Setting Clear" screen Clears some items in the "Settings Menu" and "Phone" menu. = For details, refer to Returning the navigation system to the initial state on page 64. 110 En - Pioneer AVIC U310BT | Owner's Manual - Page 111
Clear user information], all the settings related to the navigation Demo Mode] - [Brightness] - Other settings - Method 2 1 1 1 - 1 - 1 - - - 1 1 - - - 1 - 1 Method 3 1 1 1 1 1 1 1 1 1 1 1 1 1 1 - 1 1 1 Method 4 1 1 1 1 1 1 1 1 1 1 1 1 1 1 1 1 1 1 Chapter 28 Returning the Navigation System - Pioneer AVIC U310BT | Owner's Manual - Page 112
Chapter 28 Returning the Navigation System to the Default or Factory Settings [Phone Menu] menu [Contacts] [Volume] [Settings] Call histories - 1 1 1 - 1 1 1 - 1 1 1 - 1 1 1 Audio functions Volume Initial Settings All settings Audio Menu All settings - Pioneer AVIC U310BT | Owner's Manual - Page 113
cannot be found here, contact your dealer or the nearest authorized Pioneer service facility. Problems with the navigation screen Symptom Cause Action (Reference) The power doesn't turn on. The navigation system doesn't operate. Leads and connectors are incorrectly connected. The fuse (in - Pioneer AVIC U310BT | Owner's Manual - Page 114
map for some reason. Problems in the audio screen Replace the disc. back. The loaded disc is a type this system Check what type of disc it is. (For more cau- cannot play. tions about handling each type of media, refer to Page 124.) The navigation system is not firmly Secure the navigation system - Pioneer AVIC U310BT | Owner's Manual - Page 115
your vehicle in a safe place, and apply the parking brake. Turn the power off and then turn the power on. If this does not solve the problem, press RESET button on the navigation system. ! Update the iPod software version. Problems with the phone screen Symptom Cause Action (Reference) Dialing - Pioneer AVIC U310BT | Owner's Manual - Page 116
message is displayed if the re- maining battery power of the de- tachable device is low. ! Wait until the message "Ready to start up system." appears. After the message is displayed, the navigation system restarts. ! Consult the nearest authorized Pioneer service station if this message persists - Pioneer AVIC U310BT | Owner's Manual - Page 117
can be played back. TRK Skipped The inserted disc contains files that Replace the disc. are protected by DRM. Protect All the files on the inserted disc are Replace the disc. secured by DRM. Heat The temperature of the navigation Wait until the unit's temperature returns to system is outside - Pioneer AVIC U310BT | Owner's Manual - Page 118
switch OFF and back ON, or switch to a different source, then back to the USB navigation system. Old version of iPod Update the iPod version. The USB storage device connected Connect a USB storage device that is USB to is not supported by this naviga- Mass Storage Class compliant. tion system - Pioneer AVIC U310BT | Owner's Manual - Page 119
errors are somewhat greater. Map matching As mentioned, the positioning systems used by this navigation system are susceptible to certain errors map matching. With map matching Without map matching Handling large errors Positioning errors are kept to a minimum by combining GPS and map matching - Pioneer AVIC U310BT | Owner's Manual - Page 120
. In this case, it is impossible for the system to use GPS positioning. your vehicle may differ from the position displayed on the map screen. ! If you make a shallow turn. ! If there is a parallel road. In tunnels or enclosed parking garages Under elevated roads or similar structures ! If - Pioneer AVIC U310BT | Owner's Manual - Page 121
hairpin bends. Appendix ! If you enter or exit a multi-storey parking lot or similar structure using a spiral ramp. Appendix ! If there structure. ! If you take a ferry. ! If trees or other obstacles block the GPS signals for a considerable period. ! If you are driving on a long, straight road - Pioneer AVIC U310BT | Owner's Manual - Page 122
navigation system sets a route to your destination by applying certain built-in rules to the map guidance may direct you off a freeway and then back on again. ! In some cases, the route to your current heading. In such cases, you are instructed to turn around, so please turn around safely by - Pioneer AVIC U310BT | Owner's Manual - Page 123
Appendix Appendix Appendix Built-in drive and care ! Use only conventional, fully circular discs. Do not use shaped discs. ! Do not use cracked, chipped, warped, or otherwise damaged discs as they may damage the built-in drive. ! Do not touch the recorded surface of the discs. ! Store discs in - Pioneer AVIC U310BT | Owner's Manual - Page 124
environment, storage conditions, and so on. Common notes about the SD memory card ! Depending on the kind of the SD memory card you use, this navigation system may not recognize the storage device or files may not be played back properly. USB storage device compatibility = For more details about USB - Pioneer AVIC U310BT | Owner's Manual - Page 125
more details about SD memory card compatibility with this navigation system, refer to Specifications on page 135. ! This system is not compatible with Multi Media Card (MMC). Handling guidelines and supplemental information ! Copyright protected files cannot be played back. Appendix Appendix En - Pioneer AVIC U310BT | Owner's Manual - Page 126
ID3 tag ID3 Tag Ver. 1.0, 1.1, 2.2, 2.3, 2.4 Notes: ! Ver. 2.x of ID3 Tag is given priority when both Ver. 1.x and Ver. 2.x exist. ! The navigation system is not compatible with the following: MP3i (MP3 interactive), mp3 PRO, m3u playlist WMA compatibility Media CD-R/-RW, USB storage device - Pioneer AVIC U310BT | Owner's Manual - Page 127
kHz to 48 kHz Notes: ! The navigation system plays back AAC files encoded by iTunes. ! The navigation system is not compatible with the following: Apple other operations may be altered, depending on the encoding or writing software. ! Regardless of the length of blank section between the songs - Pioneer AVIC U310BT | Owner's Manual - Page 128
gistered trademarks owned by Bluetooth SIG, Inc. and any use of such marks by Pioneer Corporation is under license. Other trademarks and trade names are those of their respective owners. SD and SDHC logo The Windows Mediaä logo printed on the box indicates that this unit can play back WMA data. WMA - Pioneer AVIC U310BT | Owner's Manual - Page 129
! Pioneer accepts no responsibility for data lost from an iPod, even if that data is lost while using the navigation system. ! the floor, where it may become jammed under the brake or gas pedal. For details, refer to the iPod's manuals. iPod iPhone "Works with iPhone" means that an electronic - Pioneer AVIC U310BT | Owner's Manual - Page 130
the LCD screen. When not using this navigation system, avoid exposing it to direct sunlight the antenna of the cellular phone away from the LCD screen to prevent disruption of the video in At low temperatures, using the LED back- light may increase image lag and PIONEER Service Station. 130 En - Pioneer AVIC U310BT | Owner's Manual - Page 131
km / mile] [Speed] [Keyboard] [Map] [Overlay POI] [View Mode] [Show Manuever] [AV Guide Mode] [Day/Night Display] [Road Color] [Close Up View] [Favorites Icon] [Current Street] [Backlight Timeout] [Calibrate] [Set Home] [Location] [Connection] [Service Info] [Drive Log] [Demo Mode] Page 59 59 59 60 - Pioneer AVIC U310BT | Owner's Manual - Page 132
[GOOG-411] [Dialed] [Missed] [Transfer] [Volume] [Phone Ringtone] [Phone Voice] [Settings] [Connections] [Bluetooth On/Off] [Auto Answer Preference] [Refuse All Calls] [Echo Cancel] [Auto Connect] [Edit Name] [Clear Memory] [Bluetooth Software Update] Page 50 50 50 51 51 52 52 54 55 55 49 56 56 56 - Pioneer AVIC U310BT | Owner's Manual - Page 133
frequently visited location (such as your workplace or a relative's home) that you can register to allow easy routing. GPS Global Positioning System. A network of satellites that provides navigation signals for a variety of purposes. Guidance mode The mode in which guidance is given as you drive to - Pioneer AVIC U310BT | Owner's Manual - Page 134
video image card" or something else. Point of Interest (POI) Point Of Interest; any of a range of locations stored in the data, such as railway stations, shops, restaurants, and amusement parks system to your destination. It is highlighted in bright color on the map. Track log Your navigation system - Pioneer AVIC U310BT | Owner's Manual - Page 135
GB Navigation GPS Receiver: System L1, C/Acode GPS SPS (Standard Positioning Service) Reception system .......... 20-channel multi-channel reception system Reception frequency .... 1 575.42 MHz Sensitivity 140 dBm (typ) Position update frequency Approx. once per second GPS antenna: Antenna Micro - Pioneer AVIC U310BT | Owner's Manual - Page 136
device USB standard spec. ..... USB 2.0 High Speed Max current supply ....... 500 mA File system FAT16, FAT32 USB class Mass storage class SD Compatible physical format Version 2.00 Max memory capacity 16 GB File system FAT16, FAT32 Bluetooth Version Bluetooth 1.2 certified Output power - Pioneer AVIC U310BT | Owner's Manual - Page 137
ELECTRONICS OF CANADA, INC. 300 Allstate Parkway, Markham, Ontario L3R 0P2, Canada TEL: 1-877-283-5901 TEL: 905-479-4411 PIONEER ELECTRONICS DE MEXICO, S.A. de C.V. Blvd.Manuel Avila Camacho 138 10 piso Col.Lomas de Chapultepec, Mexico, D.F. 11000 TEL: 55-9178-4270 44號13 02) 2521-
-
 1
1 -
 2
2 -
 3
3 -
 4
4 -
 5
5 -
 6
6 -
 7
7 -
8
-
9
-
10
-
11
-
12
-
13
-
14
-
15
-
16
-
17
-
18
-
19
-
20
-
21
-
22
-
23
-
24
-
25
-
26
-
27
-
28
-
29
-
30
-
31
-
32
-
33
-
34
-
35
-
36
-
37
-
38
-
39
-
40
-
41
-
42
-
43
-
44
-
45
-
46
-
47
-
48
-
49
-
50
-
51
-
52
-
53
-
54
-
55
-
56
-
57
-
58
-
59
-
60
-
61
-
62
-
63
-
64
-
65
-
66
-
67
-
68
-
69
-
70
-
71
-
72
-
73
-
74
-
75
-
76
-
77
-
78
-
79
-
80
-
81
-
82
-
83
-
84
-
85
-
86
-
87
-
88
-
89
-
90
-
91
-
92
-
93
-
94
-
95
-
96
-
97
-
98
-
99
-
100
-
101
-
102
-
103
-
104
-
105
-
106
-
107
-
108
-
109
-
110
-
111
-
112
-
113
-
114
-
115
-
116
-
117
-
118
-
119
-
120
-
121
-
122
-
123
-
124
-
125
-
126
-
127
-
128
-
129
-
130
-
131
-
132
-
133
-
134
-
135
-
136
-
137
 |
 |

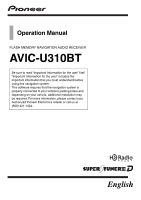
Operation Manual
FLASH MEMORY NAVIGATION AUDIO RECEIVER
AVIC-U310BT
Be sure to read
“
Important Information for the user
”
first!
“
Important Information for the user
”
includes the
important information that you must understand before
using this navigation system.
This software requires that the navigation system is
properly connected to your vehicle
’
s parking brake and
depending on your vehicle, additional installation may
be required. For more information, please contact your
Authorized Pioneer Electronics retailer or call us at
(800) 421-1404.
English