Pioneer AVIC U310BT Owner's Manual - Page 107
Adjusting loudness, Audio adjustments
 |
UPC - 012562956299
View all Pioneer AVIC U310BT manuals
Add to My Manuals
Save this manual to your list of manuals |
Page 107 highlights
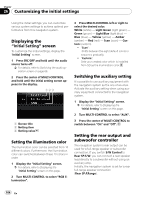
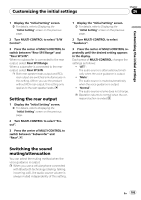
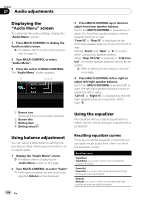
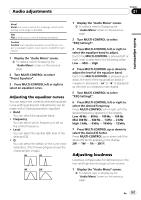
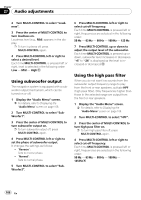
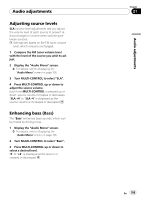
Audio adjustments Chapter 27 Audio adjustments Vocal Vocal is a curve in which the midrange, which is the human vocal range, is boosted. Flat Flat is a flat curve in which nothing is boosted. Custom Custom is an adjusted equalizer curve that you create. A separate custom curve can be created for each source. 1 Display the "Audio Menu" screen. = For details, refer to Displaying the "Audio Menu" screen on the previous page. 2 Turn MULTI-CONTROL to select "Preset Equalizer". 3 Press MULTI-CONTROL left or right to select an equalizer curve. Adjusting the equalizer curves You can adjust the currently selected equalizer curve setting as desired. Adjustments can be made with a 3-band parametric equalizer. ! Band: You can select the equalizer band. ! Frequency: You can select which frequency to set as the center frequency. ! Level: You can select the decibel (dB) level of the selected EQ. ! Q: You can select the details of the curve characteristics. (The following figure shows the characteristic image.) 1 Display the "Audio Menu" screen. = For details, refer to Displaying the "Audio Menu" screen on the previous page. 2 Turn MULTI-CONTROL to select "P.EQ Setting1". 3 Press MULTI-CONTROL left or right to select the equalizer band to adjust. Each time MULTI-CONTROL is pressed left or right, level is selected in the following order: Low - Mid - High 4 Press MULTI-CONTROL up or down to adjust the level of the equalizer band. Each time MULTI-CONTROL is pressed up or down, the level of the equalization band increases or decreases. "+6" to "-6" is displayed as the level is increased or decreased. 5 Turn MULTI-CONTROL to select "P.EQ Setting2". 6 Press MULTI-CONTROL left or right to select the desired frequency. Press MULTI-CONTROL left or right until the desired frequency appears in the display. Low: 40 Hz - 80 Hz - 100 Hz - 160 Hz Mid: 200 Hz - 500 Hz - 1 kHz - 2 kHz High: 3 kHz - 8 kHz - 10 kHz - 12 kHz 7 Press MULTI-CONTROL up or down to select the desired Q factor. Press MULTI-CONTROL up or down until the desired Q factor appears in the display. 2W - 1W - 1N - 2N Adjusting loudness Loudness compensates for deficiencies in the low- and high-sound ranges at low volume. 1 Display the "Audio Menu" screen. = For details, refer to Displaying the "Audio Menu" screen on the previous page. En 107
-
 1
1 -
2
-
3
-
4
-
5
-
6
-
7
-
8
-
9
-
10
-
11
-
12
-
13
-
14
-
15
-
16
-
17
-
18
-
19
-
20
-
21
-
22
-
23
-
24
-
25
-
26
-
27
-
28
-
29
-
30
-
31
-
32
-
33
-
34
-
35
-
36
-
37
-
38
-
39
-
40
-
41
-
42
-
43
-
44
-
45
-
46
-
47
-
48
-
49
-
50
-
51
-
52
-
53
-
54
-
55
-
56
-
57
-
58
-
59
-
60
-
61
-
62
-
63
-
64
-
65
-
66
-
67
-
68
-
69
-
70
-
71
-
72
-
73
-
74
-
75
-
76
-
77
-
78
-
79
-
80
-
81
-
82
-
83
-
84
-
85
-
86
-
87
-
88
-
89
-
90
-
91
-
92
-
93
-
94
-
95
-
96
-
97
-
98
-
99
-
100
-
101
-
 102
102 -
 103
103 -
 104
104 -
 105
105 -
 106
106 -
 107
107 -
 108
108 -
 109
109 -
 110
110 -
 111
111 -
 112
112 -
113
-
114
-
115
-
116
-
117
-
118
-
119
-
120
-
121
-
122
-
123
-
124
-
125
-
126
-
127
-
128
-
129
-
130
-
131
-
132
-
133
-
134
-
135
-
136
-
137
 |
 |