Ricoh Aficio SP C320DN Manuals - Page 186
cables that were removed.
 |
View all Ricoh Aficio SP C320DN manuals
Add to My Manuals
Save this manual to your list of manuals |
Page 186 highlights
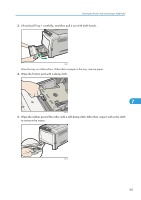
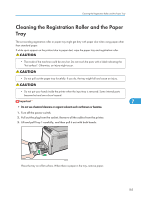
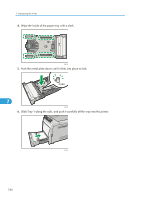
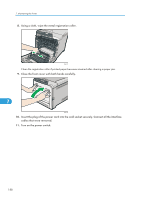
7. Maintaining the Printer 6. Push the metal plate down until it clicks into place to lock. CBK036 7. Slide Tray 1 along the rails, and push it carefully all the way into the printer. 7 CBK045 Do not slide the paper tray in with force. If you do, the front and side guides might move. 8. Insert the plug of the power cord into the wall socket securely. Connect all the interface cables that were removed. 9. Turn the power switch on. • If misfeeds or multi-feeds of paper occur after cleaning the friction pad, contact your sales or service representative. • If the optional paper feed unit is installed, clean its friction pad and paper feed roller in the same way as those of the main paper feed unit. 184
-
 1
1 -
2
-
3
-
4
-
5
-
6
-
7
-
8
-
9
-
10
-
11
-
12
-
13
-
14
-
15
-
16
-
17
-
18
-
19
-
20
-
21
-
22
-
23
-
24
-
25
-
26
-
27
-
28
-
29
-
30
-
31
-
32
-
33
-
34
-
35
-
36
-
37
-
38
-
39
-
40
-
41
-
42
-
43
-
44
-
45
-
46
-
47
-
48
-
49
-
50
-
51
-
52
-
53
-
54
-
55
-
56
-
57
-
58
-
59
-
60
-
61
-
62
-
63
-
64
-
65
-
66
-
67
-
68
-
69
-
70
-
71
-
72
-
73
-
74
-
75
-
76
-
77
-
78
-
79
-
80
-
81
-
82
-
83
-
84
-
85
-
86
-
87
-
88
-
89
-
90
-
91
-
92
-
93
-
94
-
95
-
96
-
97
-
98
-
99
-
100
-
101
-
102
-
103
-
104
-
105
-
106
-
107
-
108
-
109
-
110
-
111
-
112
-
113
-
114
-
115
-
116
-
117
-
118
-
119
-
120
-
121
-
122
-
123
-
124
-
125
-
126
-
127
-
128
-
129
-
130
-
131
-
132
-
133
-
134
-
135
-
136
-
137
-
138
-
139
-
140
-
141
-
142
-
143
-
144
-
145
-
146
-
147
-
148
-
149
-
150
-
151
-
152
-
153
-
154
-
155
-
156
-
157
-
158
-
159
-
160
-
161
-
162
-
163
-
164
-
165
-
166
-
167
-
168
-
169
-
170
-
171
-
172
-
173
-
174
-
175
-
176
-
177
-
178
-
179
-
180
-
 181
181 -
 182
182 -
 183
183 -
 184
184 -
 185
185 -
 186
186 -
 187
187 -
 188
188 -
 189
189 -
 190
190 -
 191
191 -
192
-
193
-
194
-
195
-
196
-
197
-
198
-
199
-
200
-
201
-
202
-
203
-
204
-
205
-
206
-
207
-
208
-
209
-
210
-
211
-
212
-
213
-
214
-
215
-
216
-
217
-
218
-
219
-
220
-
221
-
222
-
223
-
224
-
225
-
226
-
227
-
228
-
229
-
230
-
231
-
232
-
233
-
234
-
235
-
236
-
237
-
238
-
239
-
240
-
241
-
242
-
243
-
244
-
245
-
246
-
247
-
248
-
249
-
250
-
251
-
252
-
253
-
254
-
255
-
256
-
257
-
258
-
259
-
260
 |
 |
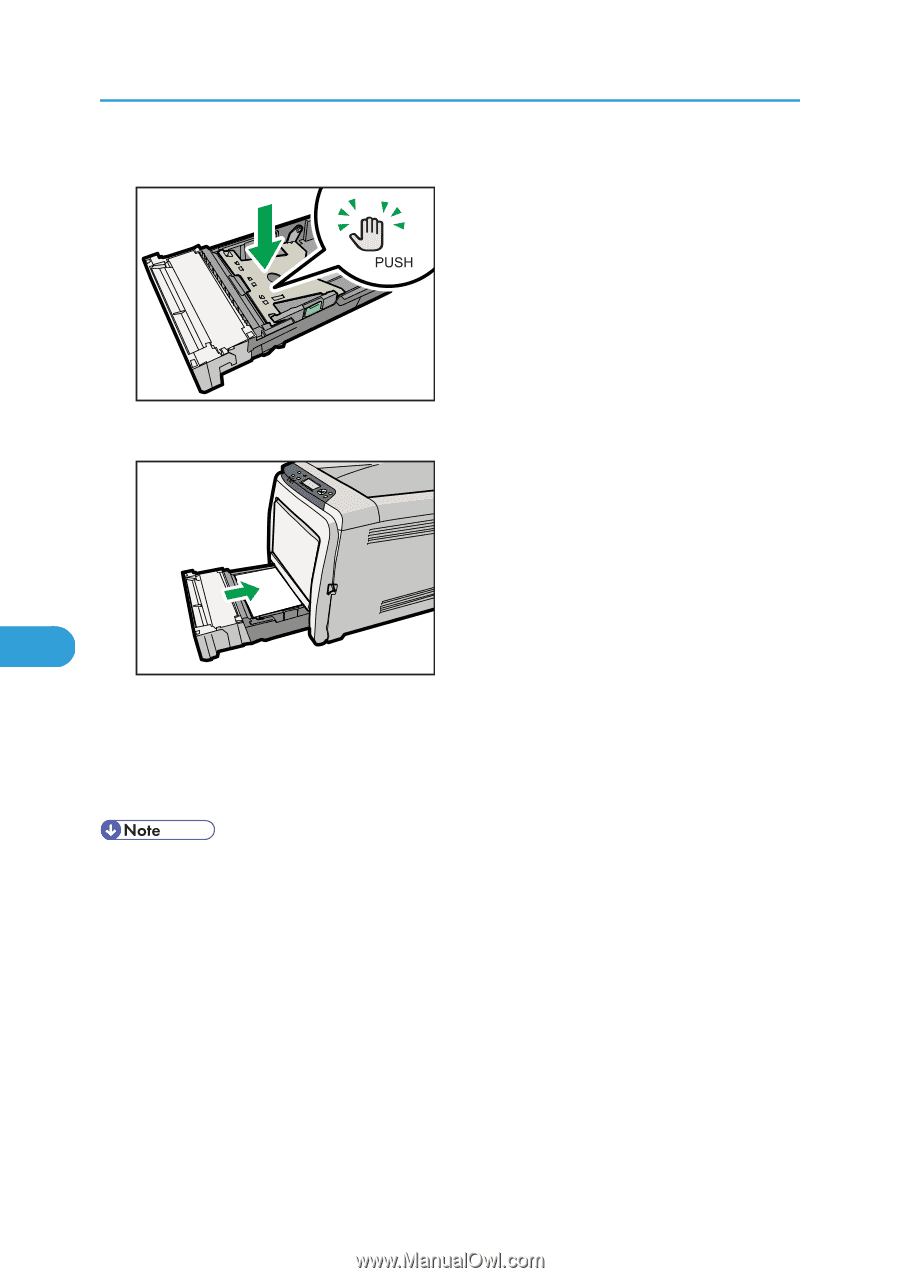
6.
Push the metal plate down until it clicks into place to lock.
CBK036
7.
Slide Tray 1 along the rails, and push it carefully all the way into the printer.
CBK045
Do not slide the paper tray in with force. If you do, the front and side guides might move.
8.
Insert the plug of the power cord into the wall socket securely. Connect all the interface
cables that were removed.
9.
Turn the power switch on.
•
If misfeeds or multi-feeds of paper occur after cleaning the friction pad, contact your sales or service
representative.
•
If the optional paper feed unit is installed, clean its friction pad and paper feed roller in the same way
as those of the main paper feed unit.
7. Maintaining the Printer
184
7