Samsung SCH-R740C User Manual - Page 39
Adding Contacts, Phonetic Name
 |
View all Samsung SCH-R740C manuals
Add to My Manuals
Save this manual to your list of manuals |
Page 39 highlights
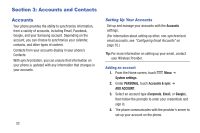
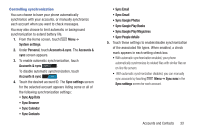
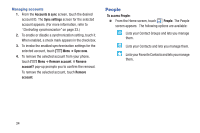
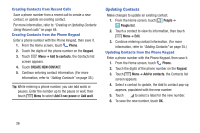
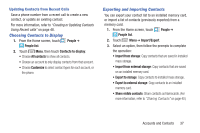
Adding Contacts 1. From the Home screen, touch People ➔ People list ➔ Add a contact. • If you have defined accounts (Google, Samsung, and so on), the Save contact to pop-up appears. Select Phone or the account to receive the new Contact entry. • If you have not defined any accounts, the Save contact pop-up appears. The following options are available: - Keep local: Saves your contacts in "my device contacts". - Add account: Lets you define an account to which your device will save your contacts. The Add new account screen appears. (For more information, refer to "Setting Up Your Accounts" on page 32.) 2. Touch contact fields to select or enter information: • Touch Photo ID to choose a picture to identify the contact. • Touch Name to enter a name for the contact. Touch to enter Name prefix, First name, Middle name, Last name, or Name suffix. • Touch Add organization to enter a Company name and Title for this contact. • Touch Phone to enter a phone number, then touch to choose a label: MOBILE, HOME, WORK, WORK FAX, HOME FAX, PAGER, OTHER, CUSTOM, CALLBACK, CAR, COMPANY MAIN, ISDN, MAIN, OTHER FAX, RADIO, TELEX, TTY TDD, WORK MOBILE, WORK PAGER, ASSISTANT, or MMS. To add another number, touch Add new. • Touch Email to enter an address, then touch to choose a label: HOME, WORK, OTHER, MOBILE, or CUSTOM. To add another number, touch Add new. • Touch Address to enter an email address, then touch to choose a label: HOME, WORK, OTHER, MOBILE, or CUSTOM. To add another number, touch Add new. • Touch Date to enter an event, then touch to choose a label: BIRTHDAY, ANNIVERSARY, OTHER, or CUSTOM. To add another number, touch Add new. • Touch Group name to assign the contact to a group. (For more information about Groups, see "Groups" on page 41.) • Touch Add another field to add more fields, including Phonetic Name, IM, Notes, Nickname, Website, Internet call, or Relationship. 3. When you finish selecting and entering information, touch DONE. Accounts and Contacts 35
-
 1
1 -
2
-
3
-
4
-
5
-
6
-
7
-
8
-
9
-
10
-
11
-
12
-
13
-
14
-
15
-
16
-
17
-
18
-
19
-
20
-
21
-
22
-
23
-
24
-
25
-
26
-
27
-
28
-
29
-
30
-
31
-
32
-
33
-
 34
34 -
 35
35 -
 36
36 -
 37
37 -
 38
38 -
 39
39 -
 40
40 -
 41
41 -
 42
42 -
 43
43 -
 44
44 -
45
-
46
-
47
-
48
-
49
-
50
-
51
-
52
-
53
-
54
-
55
-
56
-
57
-
58
-
59
-
60
-
61
-
62
-
63
-
64
-
65
-
66
-
67
-
68
-
69
-
70
-
71
-
72
-
73
-
74
-
75
-
76
-
77
-
78
-
79
-
80
-
81
-
82
-
83
-
84
-
85
-
86
-
87
-
88
-
89
-
90
-
91
-
92
-
93
-
94
-
95
-
96
-
97
-
98
-
99
-
100
-
101
-
102
-
103
-
104
-
105
-
106
-
107
-
108
-
109
-
110
-
111
-
112
-
113
-
114
-
115
-
116
-
117
-
118
-
119
-
120
-
121
-
122
-
123
-
124
-
125
-
126
-
127
-
128
-
129
-
130
-
131
-
132
-
133
-
134
-
135
-
136
-
137
-
138
-
139
-
140
-
141
-
142
-
143
-
144
-
145
-
146
-
147
-
148
-
149
-
150
-
151
-
152
-
153
-
154
-
155
-
156
-
157
-
158
-
159
-
160
-
161
-
162
-
163
-
164
-
165
-
166
-
167
 |
 |