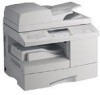
Samsung SCX 6320F User Manual (ENGLISH) - Page 285
Storing Documents in the Mailbox, Deleting the Mailbox
 |
UPC - 807027532442
View all Samsung SCX 6320F manuals
Add to My Manuals
Save this manual to your list of manuals |
Page 285 highlights
Deleting the Mailbox 1 Press Menu until "Sys. Admin Tools" displays on the top line. 2 Press the scroll buttons until "Mailbox Setup" displays on the bottom line and then press Enter. 3 Press the scroll buttons until "Delete" displays on the bottom line and then press Enter. 4 Enter the box number you want to delete and the passcode. 5 When a confirming message appears, select "Yes." Storing Documents in the Mailbox Use the following procedure to store a document in a mailbox. 1 Load the document you want to send in the Duplex Automatic Document Feeder (DADF) or on the scanner glass. See "Loading Document(s) for Faxing" on page 2.3. 2 Make sure that the machine is in the fax idle mode. If necessary, press Fax to enter the fax idle mode. 3 Press Menu until "Mail Box" displays on the top line. 4 Press the scroll buttons until "Store" displays on the bottom 6 line and then press Enter. 5 Enter the box number you want to store the document in and press Enter. 6 The document scanned into memory. For documents that are scanned from the document glass, the display asks if you want to store another page. Change the page and select "Yes" or "No". If "Yes" is selected, the next page is scanned. Repeat this until all pages are scanned then select "No". 7 The display shows the total number of document be stored. ADDITIONAL FEATURES 6.3
-
 1
1 -
2
-
3
-
4
-
5
-
6
-
7
-
8
-
9
-
10
-
11
-
12
-
13
-
14
-
15
-
16
-
17
-
18
-
19
-
20
-
21
-
22
-
23
-
24
-
25
-
26
-
27
-
28
-
29
-
30
-
31
-
32
-
33
-
34
-
35
-
36
-
37
-
38
-
39
-
40
-
41
-
42
-
43
-
44
-
45
-
46
-
47
-
48
-
49
-
50
-
51
-
52
-
53
-
54
-
55
-
56
-
57
-
58
-
59
-
60
-
61
-
62
-
63
-
64
-
65
-
66
-
67
-
68
-
69
-
70
-
71
-
72
-
73
-
74
-
75
-
76
-
77
-
78
-
79
-
80
-
81
-
82
-
83
-
84
-
85
-
86
-
87
-
88
-
89
-
90
-
91
-
92
-
93
-
94
-
95
-
96
-
97
-
98
-
99
-
100
-
101
-
102
-
103
-
104
-
105
-
106
-
107
-
108
-
109
-
110
-
111
-
112
-
113
-
114
-
115
-
116
-
117
-
118
-
119
-
120
-
121
-
122
-
123
-
124
-
125
-
126
-
127
-
128
-
129
-
130
-
131
-
132
-
133
-
134
-
135
-
136
-
137
-
138
-
139
-
140
-
141
-
142
-
143
-
144
-
145
-
146
-
147
-
148
-
149
-
150
-
151
-
152
-
153
-
154
-
155
-
156
-
157
-
158
-
159
-
160
-
161
-
162
-
163
-
164
-
165
-
166
-
167
-
168
-
169
-
170
-
171
-
172
-
173
-
174
-
175
-
176
-
177
-
178
-
179
-
180
-
181
-
182
-
183
-
184
-
185
-
186
-
187
-
188
-
189
-
190
-
191
-
192
-
193
-
194
-
195
-
196
-
197
-
198
-
199
-
200
-
201
-
202
-
203
-
204
-
205
-
206
-
207
-
208
-
209
-
210
-
211
-
212
-
213
-
214
-
215
-
216
-
217
-
218
-
219
-
220
-
221
-
222
-
223
-
224
-
225
-
226
-
227
-
228
-
229
-
230
-
231
-
232
-
233
-
234
-
235
-
236
-
237
-
238
-
239
-
240
-
241
-
242
-
243
-
244
-
245
-
246
-
247
-
248
-
249
-
250
-
251
-
252
-
253
-
254
-
255
-
256
-
257
-
258
-
259
-
260
-
261
-
262
-
263
-
264
-
265
-
266
-
267
-
268
-
269
-
270
-
271
-
272
-
273
-
274
-
275
-
276
-
277
-
278
-
279
-
 280
280 -
 281
281 -
 282
282 -
 283
283 -
 284
284 -
 285
285 -
 286
286 -
 287
287 -
 288
288 -
 289
289 -
 290
290 -
291
-
292
-
293
-
294
-
295
-
296
-
297
-
298
-
299
-
300
-
301
-
302
-
303
-
304
-
305
-
306
-
307
-
308
-
309
-
310
-
311
-
312
-
313
-
314
-
315
-
316
-
317
-
318
-
319
-
320
-
321
-
322
-
323
-
324
-
325
-
326
-
327
-
328
-
329
-
330
 |
 |