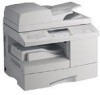
Samsung SCX 6320F User Manual (ENGLISH) - Page 305
Original Type, Text/Photo, Photo, Color, Duplex, Enter, Clear, Delete, Backspace, Enable, Address
 |
UPC - 807027532442
View all Samsung SCX 6320F manuals
Add to My Manuals
Save this manual to your list of manuals |
Page 305 highlights
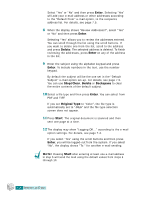
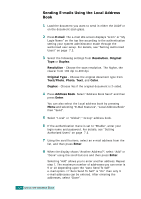
Original Type - Choose the original document type from Text/Photo, Photo, Text, and Color. Duplex - Choose Yes if the original document is 2-sided. 4 On the e-mail idle screen, enter the sender's e-mail ID using the alphabet keypad, and then press Enter. By default the "From" will be the one set in the "Default From" option. For details, see page 7.5. You can use Stop/ Clear, Delete or Backspace to clear the entire contents of the default from. If the authentication menu is set to Enable, enter your login name and password. For details, see "Setting Authorized Users" on page 7.3 5 Enter the recipient's e-mail address and then press Enter. You can directly enter an e-mail address using the alphabet keypad. You can include numbers in the e-mail address by using the number keypad. You can also retrieve an e-mail address from the local or global addressbook by pressing Address Book. Select "Local" or "Global" according to the addressbook type. The local addressbook contains e-mail addresses stored in your machine. The global addressbook shows the addresses retrieved from the configured LDAP server. For details about the addressbook, see page 9.2 and page 9.7. When a set of characters or numbers is entered, the user can press Address Book and select "Local" or "Global". The closest matching entries are shown. 6 When the display shows "Another Address?", select "Add" or "Done" using the scroll buttons and then press Enter. Selecting "Add" allows you to enter another address. Repeat step 5. The maximum number of addresses you can enter is 9 or 10 depending upon "Auto Send To Self" e-mail option. If "Auto Send To Self" is "On" then only 9 e-mail addresses can be entered. 8 After entering the addresses, select "Done". 7 The display may show "Auto Send To Self" according to the e-mail option settings. For details, see page 7.5. SENDING AN E-MAIL 8.3
-
 1
1 -
2
-
3
-
4
-
5
-
6
-
7
-
8
-
9
-
10
-
11
-
12
-
13
-
14
-
15
-
16
-
17
-
18
-
19
-
20
-
21
-
22
-
23
-
24
-
25
-
26
-
27
-
28
-
29
-
30
-
31
-
32
-
33
-
34
-
35
-
36
-
37
-
38
-
39
-
40
-
41
-
42
-
43
-
44
-
45
-
46
-
47
-
48
-
49
-
50
-
51
-
52
-
53
-
54
-
55
-
56
-
57
-
58
-
59
-
60
-
61
-
62
-
63
-
64
-
65
-
66
-
67
-
68
-
69
-
70
-
71
-
72
-
73
-
74
-
75
-
76
-
77
-
78
-
79
-
80
-
81
-
82
-
83
-
84
-
85
-
86
-
87
-
88
-
89
-
90
-
91
-
92
-
93
-
94
-
95
-
96
-
97
-
98
-
99
-
100
-
101
-
102
-
103
-
104
-
105
-
106
-
107
-
108
-
109
-
110
-
111
-
112
-
113
-
114
-
115
-
116
-
117
-
118
-
119
-
120
-
121
-
122
-
123
-
124
-
125
-
126
-
127
-
128
-
129
-
130
-
131
-
132
-
133
-
134
-
135
-
136
-
137
-
138
-
139
-
140
-
141
-
142
-
143
-
144
-
145
-
146
-
147
-
148
-
149
-
150
-
151
-
152
-
153
-
154
-
155
-
156
-
157
-
158
-
159
-
160
-
161
-
162
-
163
-
164
-
165
-
166
-
167
-
168
-
169
-
170
-
171
-
172
-
173
-
174
-
175
-
176
-
177
-
178
-
179
-
180
-
181
-
182
-
183
-
184
-
185
-
186
-
187
-
188
-
189
-
190
-
191
-
192
-
193
-
194
-
195
-
196
-
197
-
198
-
199
-
200
-
201
-
202
-
203
-
204
-
205
-
206
-
207
-
208
-
209
-
210
-
211
-
212
-
213
-
214
-
215
-
216
-
217
-
218
-
219
-
220
-
221
-
222
-
223
-
224
-
225
-
226
-
227
-
228
-
229
-
230
-
231
-
232
-
233
-
234
-
235
-
236
-
237
-
238
-
239
-
240
-
241
-
242
-
243
-
244
-
245
-
246
-
247
-
248
-
249
-
250
-
251
-
252
-
253
-
254
-
255
-
256
-
257
-
258
-
259
-
260
-
261
-
262
-
263
-
264
-
265
-
266
-
267
-
268
-
269
-
270
-
271
-
272
-
273
-
274
-
275
-
276
-
277
-
278
-
279
-
280
-
281
-
282
-
283
-
284
-
285
-
286
-
287
-
288
-
289
-
290
-
291
-
292
-
293
-
294
-
295
-
296
-
297
-
298
-
299
-
 300
300 -
 301
301 -
 302
302 -
 303
303 -
 304
304 -
 305
305 -
 306
306 -
 307
307 -
 308
308 -
 309
309 -
 310
310 -
311
-
312
-
313
-
314
-
315
-
316
-
317
-
318
-
319
-
320
-
321
-
322
-
323
-
324
-
325
-
326
-
327
-
328
-
329
-
330
 |
 |