Samsung SCX 6320F User Manual (ENGLISH) - Page 311
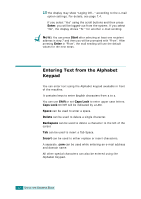
Enter, Clear, Delete, Backspace, Stop/Clear, Original Type, Start
 |
UPC - 807027532442
View all Samsung SCX 6320F manuals
Add to My Manuals
Save this manual to your list of manuals |
Page 311 highlights
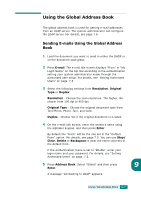
9 Enter the sender's e-mail ID using the alphabet keypad, and then press Enter. By default the "From" will be the one set in the "Default From" option. For details, see page 7.5. You can use Stop/ Clear, Delete or Backspace to clear the entire contents of the default from. If the authentication menu set to Enable, "From" will be taken directly from the "Default From" option and this menu is not shown. 10 The display may show "Auto Send To Self" according to the "Auto Send To Self" e-mail option settings. For details, see page 7.5. Select "Yes" or "No" and then press Enter. Selecting "Yes" will add your e-mail address or other addresses according to the "Default From" e-mail option to the recipients address list. For details, see page 7.6. 11 When the display shows "Review Addresses?", select "Yes" or "No" and then press Enter. Selecting "Yes" allows you to review the addresses entered. You can scroll through the list using the scroll buttons. If you want to delete one from the list, scroll to the address and press Delete. The selected address is deleted. To finish reviewing the addresses, press Enter on any of the address in the list. 12 Enter the subject using the alphabet keypad and press Enter. To include numbers in the text, use the number keypad. By default the subject will be the one set in the "Default Subject" e-mail option set-up. For details, see page 7.5. You can use Stop/Clear, Delete or Backspace to clear the entire contents of the default subject. 13 Select a file type and then press Enter. You can select from PDF and TIFF type using the scroll buttons. If you set Original Type to "Color", the file type is automatically set to "JPEG" and the file type selection screen does not appear. 9 14 Press Start. The original document is scanned and then sent one page at a time. USING THE ADDRESS BOOK 9.5
-
 1
1 -
2
-
3
-
4
-
5
-
6
-
7
-
8
-
9
-
10
-
11
-
12
-
13
-
14
-
15
-
16
-
17
-
18
-
19
-
20
-
21
-
22
-
23
-
24
-
25
-
26
-
27
-
28
-
29
-
30
-
31
-
32
-
33
-
34
-
35
-
36
-
37
-
38
-
39
-
40
-
41
-
42
-
43
-
44
-
45
-
46
-
47
-
48
-
49
-
50
-
51
-
52
-
53
-
54
-
55
-
56
-
57
-
58
-
59
-
60
-
61
-
62
-
63
-
64
-
65
-
66
-
67
-
68
-
69
-
70
-
71
-
72
-
73
-
74
-
75
-
76
-
77
-
78
-
79
-
80
-
81
-
82
-
83
-
84
-
85
-
86
-
87
-
88
-
89
-
90
-
91
-
92
-
93
-
94
-
95
-
96
-
97
-
98
-
99
-
100
-
101
-
102
-
103
-
104
-
105
-
106
-
107
-
108
-
109
-
110
-
111
-
112
-
113
-
114
-
115
-
116
-
117
-
118
-
119
-
120
-
121
-
122
-
123
-
124
-
125
-
126
-
127
-
128
-
129
-
130
-
131
-
132
-
133
-
134
-
135
-
136
-
137
-
138
-
139
-
140
-
141
-
142
-
143
-
144
-
145
-
146
-
147
-
148
-
149
-
150
-
151
-
152
-
153
-
154
-
155
-
156
-
157
-
158
-
159
-
160
-
161
-
162
-
163
-
164
-
165
-
166
-
167
-
168
-
169
-
170
-
171
-
172
-
173
-
174
-
175
-
176
-
177
-
178
-
179
-
180
-
181
-
182
-
183
-
184
-
185
-
186
-
187
-
188
-
189
-
190
-
191
-
192
-
193
-
194
-
195
-
196
-
197
-
198
-
199
-
200
-
201
-
202
-
203
-
204
-
205
-
206
-
207
-
208
-
209
-
210
-
211
-
212
-
213
-
214
-
215
-
216
-
217
-
218
-
219
-
220
-
221
-
222
-
223
-
224
-
225
-
226
-
227
-
228
-
229
-
230
-
231
-
232
-
233
-
234
-
235
-
236
-
237
-
238
-
239
-
240
-
241
-
242
-
243
-
244
-
245
-
246
-
247
-
248
-
249
-
250
-
251
-
252
-
253
-
254
-
255
-
256
-
257
-
258
-
259
-
260
-
261
-
262
-
263
-
264
-
265
-
266
-
267
-
268
-
269
-
270
-
271
-
272
-
273
-
274
-
275
-
276
-
277
-
278
-
279
-
280
-
281
-
282
-
283
-
284
-
285
-
286
-
287
-
288
-
289
-
290
-
291
-
292
-
293
-
294
-
295
-
296
-
297
-
298
-
299
-
300
-
301
-
302
-
303
-
304
-
305
-
 306
306 -
 307
307 -
 308
308 -
 309
309 -
 310
310 -
 311
311 -
 312
312 -
 313
313 -
 314
314 -
 315
315 -
 316
316 -
317
-
318
-
319
-
320
-
321
-
322
-
323
-
324
-
325
-
326
-
327
-
328
-
329
-
330
 |
 |