Toshiba M200-ST2002 Maintenance Manual - Page 223
System board, Removing the system board
 |
View all Toshiba M200-ST2002 manuals
Add to My Manuals
Save this manual to your list of manuals |
Page 223 highlights
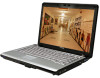
4 Replacement Procedures 4.15 System board 4.15 System board Removing the system board The following describes the procedure for removing the system board. (See Figure 4-24.) NOTE: When removing/installing the system board, be careful not to scratch the cables. 1. Remove the following screws securing the system board and remove the system board. • M2.5×4B FLAT BIND screw x6 2. Remove the sound JACK cover from the system board. 3. Remove the FIR cover ASSY from the base assembly. M2.5x4B FLAT BIND System board Sound JACK cover FIR cover ASSY Figure 4-24 Removing the system board 4 -3 4 Portege M200 Maintenance Manual(960 -457)
-
 1
1 -
2
-
3
-
4
-
5
-
6
-
7
-
8
-
9
-
10
-
11
-
12
-
13
-
14
-
15
-
16
-
17
-
18
-
19
-
20
-
21
-
22
-
23
-
24
-
25
-
26
-
27
-
28
-
29
-
30
-
31
-
32
-
33
-
34
-
35
-
36
-
37
-
38
-
39
-
40
-
41
-
42
-
43
-
44
-
45
-
46
-
47
-
48
-
49
-
50
-
51
-
52
-
53
-
54
-
55
-
56
-
57
-
58
-
59
-
60
-
61
-
62
-
63
-
64
-
65
-
66
-
67
-
68
-
69
-
70
-
71
-
72
-
73
-
74
-
75
-
76
-
77
-
78
-
79
-
80
-
81
-
82
-
83
-
84
-
85
-
86
-
87
-
88
-
89
-
90
-
91
-
92
-
93
-
94
-
95
-
96
-
97
-
98
-
99
-
100
-
101
-
102
-
103
-
104
-
105
-
106
-
107
-
108
-
109
-
110
-
111
-
112
-
113
-
114
-
115
-
116
-
117
-
118
-
119
-
120
-
121
-
122
-
123
-
124
-
125
-
126
-
127
-
128
-
129
-
130
-
131
-
132
-
133
-
134
-
135
-
136
-
137
-
138
-
139
-
140
-
141
-
142
-
143
-
144
-
145
-
146
-
147
-
148
-
149
-
150
-
151
-
152
-
153
-
154
-
155
-
156
-
157
-
158
-
159
-
160
-
161
-
162
-
163
-
164
-
165
-
166
-
167
-
168
-
169
-
170
-
171
-
172
-
173
-
174
-
175
-
176
-
177
-
178
-
179
-
180
-
181
-
182
-
183
-
184
-
185
-
186
-
187
-
188
-
189
-
190
-
191
-
192
-
193
-
194
-
195
-
196
-
197
-
198
-
199
-
200
-
201
-
202
-
203
-
204
-
205
-
206
-
207
-
208
-
209
-
210
-
211
-
212
-
213
-
214
-
215
-
216
-
217
-
 218
218 -
 219
219 -
 220
220 -
 221
221 -
 222
222 -
 223
223 -
 224
224 -
 225
225 -
 226
226 -
 227
227 -
 228
228 -
229
-
230
-
231
-
232
-
233
-
234
-
235
-
236
-
237
-
238
-
239
-
240
-
241
-
242
-
243
-
244
-
245
-
246
-
247
-
248
-
249
-
250
-
251
-
252
-
253
-
254
-
255
-
256
-
257
-
258
-
259
-
260
-
261
-
262
-
263
-
264
-
265
-
266
-
267
-
268
-
269
-
270
-
271
-
272
-
273
-
274
-
275
-
276
-
277
-
278
-
279
-
280
-
281
-
282
-
283
-
284
-
285
-
286
-
287
-
288
-
289
-
290
-
291
-
292
-
293
-
294
-
295
-
296
-
297
-
298
-
299
-
300
-
301
-
302
-
303
-
304
-
305
-
306
-
307
-
308
-
309
-
310
-
311
-
312
-
313
-
314
-
315
-
316
-
317
-
318
-
319
-
320
-
321
-
322
-
323
-
324
-
325
 |
 |

4
Replacement Procedures
4.15
System board
4-34
Portege M200 Maintenance Manual (960 -457)
4.15 System board
Removing the system board
The following describes the procedure for removing the system board. (See Figure 4-24.)
NOTE
: When removing/installing the system board, be careful not to scratch the
cables.
1.
Remove the following screws securing the system board and remove the system
board.
•
M2.5
×
4B FLAT BIND screw
x6
2.
Remove the sound JACK cover from the system board.
3.
Remove the FIR cover ASSY from the base assembly.
M2.5x4B
FLAT BIND
FIR cover ASSY
Sound JACK cover
System board
Figure 4-24
Removing the system board