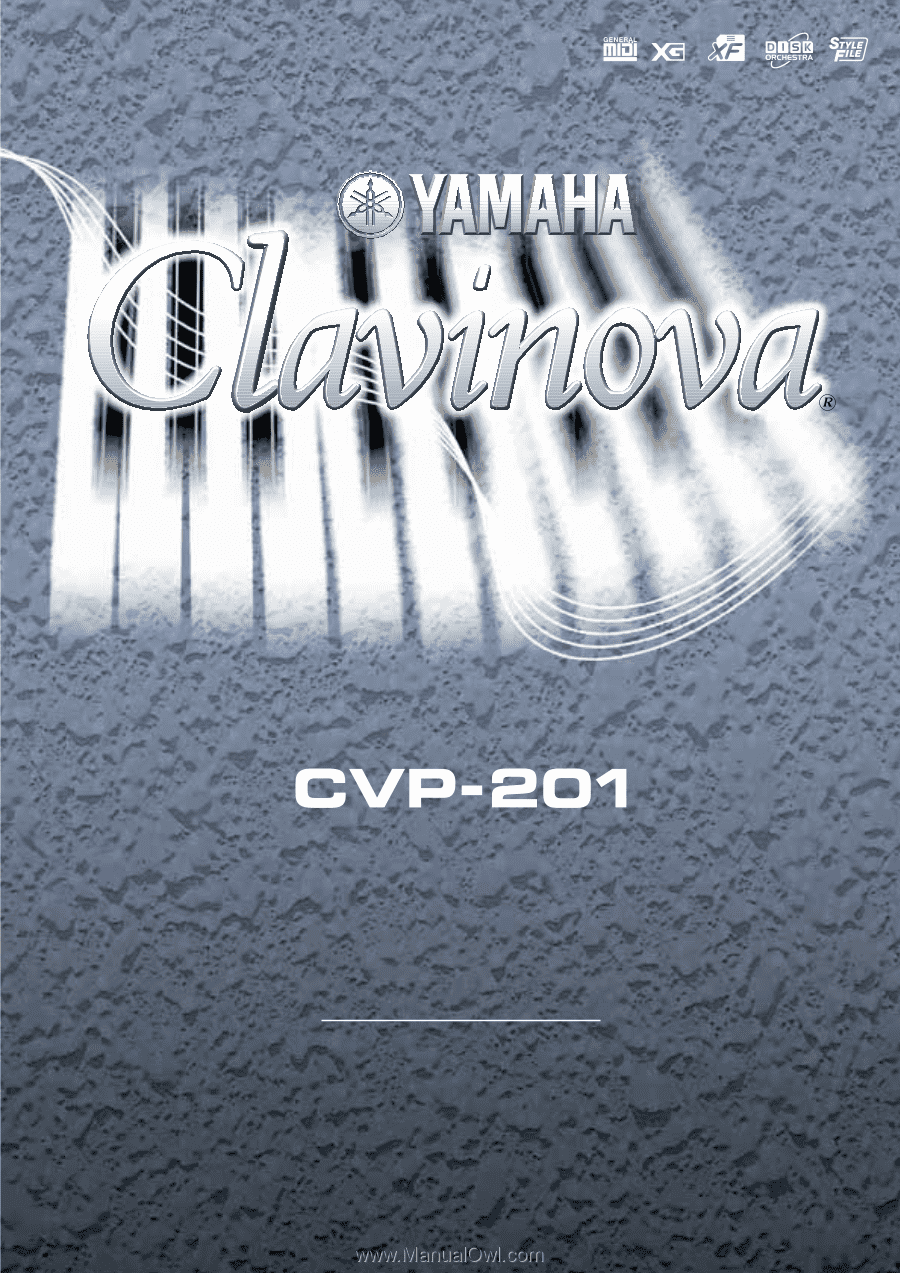
Yamaha CVP-201 Owner's Manual
Yamaha CVP-201 Manual
 |
View all Yamaha CVP-201 manuals
Add to My Manuals
Save this manual to your list of manuals |
Yamaha CVP-201 manual content summary:
- Yamaha CVP-201 | Owner's Manual - Page 1
Owner's Manual IMPORTANT Check Your Power Supply Make sure that your local AC mains voltage matches the voltage specified on the name plate on the bottom panel. In some areas a voltage selector may be provided on the bottom panel of the main keyboard unit near the power cord. Make sure that the - Yamaha CVP-201 | Owner's Manual - Page 2
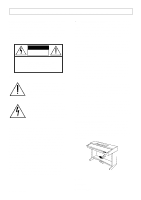
indicated in the safety instruction section. CAUTION RISK OF ELECTRIC SHOCK DO NOT OPEN CAUTION: TO REDUCE THE RISK OF ELECTRIC SHOCK. DO NOT REMOVE COVER (OR BACK). NO USER-SERVICEABLE PARTS INSIDE. REFER SERVICING TO QUALIFIED SERVICE PERSONNEL. See bottom of Keyboard enclosure for graphic symbol - Yamaha CVP-201 | Owner's Manual - Page 3
electric plug from the outlet, and have the instrument inspected by qualified Yamaha service Yamaha service personnel. • Do not place vinyl, plastic or rubber objects on the instrument, since this might discolor the panel or keyboard important data onto two floppy disks. Yamaha cannot be held - Yamaha CVP-201 | Owner's Manual - Page 4
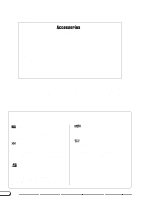
sample songs that you can play back on your Clavinova. q Floppy Disk Use this blank disk to record your performances. q Owner's Manual This manual contains complete instructions for operating your Clavinova. q Reference Booklet This manual contains lists of voices, styles, and parameters, etc., as - Yamaha CVP-201 | Owner's Manual - Page 5
written for any specific models). The document is available as a PDF file (in English) at the following Internet address: Clavinova Home Page: http://www.yamaha.co.jp/english/product/cl/ Yamaha Manual Library (Electronic Musical Instruments) http://www2.yamaha.co.jp/manual/english/ 3 CVP-201 5 - Yamaha CVP-201 | Owner's Manual - Page 6
This Manual 8 Handling the Floppy Disk Drive (FDD) and Floppy Disks 9 Setting Up the Clavinova 10 or Song Volume 23 Setting the Keyboard Volume 23 Adjusting Accompaniment or Song Yamaha Style File Format 86 Loading Styles from a Disk 86 Playing Loaded Style Files 88 6 CVP-201 4 - Yamaha CVP-201 | Owner's Manual - Page 7
Audio Connections 158 Headphones 158 Audio Input and Output 158 Data Connections 160 Connecting MIDI Equipment 160 Connecting to a Host Computer 160 APPENDICES Effect Type Lists 162 Messages 165 Troubleshooting 170 MIDI and Data Compatibility 172 Index 173 5 CVP-201 7 - Yamaha CVP-201 | Owner's Manual - Page 8
DEMO sliders, and connectors as they appear on your Clavinova. For example, the DEMO button is expressed HELP as [DEMO] in this manual. s Bold characters ...Bold type represents items shown should do n, then do p. Operation results n ➔ m ...indicates that doing n results in m. 8 CVP-201 6 - Yamaha CVP-201 | Owner's Manual - Page 9
tab to the "protect" position (tab open). Data backup For maximum data security Yamaha recommends that you keep two copies of important data on separate floppy disks. This gives you a backup if one disk is lost or damaged. To make a backup disk use the Disk Copy function on page 142. 7 CVP-201 9 - Yamaha CVP-201 | Owner's Manual - Page 10
Clavinova Music Stand s To raise the music stand Z Pull the stand up and toward yourself as far as it will go. X Flip down the two metal supports opening or closing the cover. 10 CVP-201 s To open the key cover electric shock, short circuit, fire or other serious damage to the instrument. 8 - Yamaha CVP-201 | Owner's Manual - Page 11
by - another MIDI instrument. There's even a TO HOST terminal that lets you connect the Clavinova directly to a personal computer. Be sure to turn the power off when connecting or disconnecting other equipment. See the instructions in Chapter 9 of this manual for details. 9 PHONES CVP-201 11 - Yamaha CVP-201 | Owner's Manual - Page 12
OUT R L /L+R JK L IN PEDAL MIDI OUT : THRU HOST SELECT PC-2 PC-1 MIDI Mac x TO HOST z 12 VOLUME MASTER 4 [HELP page 27 Accompaniment Style Section 5 STYLE buttons page 49 6 [DISK/CUSTOM page 73 7 [MUSIC DATABASE page 67 8 [HARMONY page 69 Auto FF page 103 12 CVP-201 10 - Yamaha CVP-201 | Owner's Manual - Page 13
TOUCH SETTING page 72 S [DISK IN USE] lamp page 9 D Floppy disk drive (3.5 page 9 F [POWER page 11 G Keyboard guide lamps page 109 Connectors H [PHONES page 158 J AUX IN [L/L+R], [R page 158 K AUX OUT [L/L+R], [R page 159 L [PEDAL page 34 in the Reference Booklet : MIDI [IN], [OUT], [THRU - Yamaha CVP-201 | Owner's Manual - Page 14
the voices, and 22 pieces showcasing the styles. Listen to them all and hear what the Clavinova can do. Z Call up the Demo Play mode Press [DEMO]. The lamps of the STYLE or [PLAY/ STOP]. • For a complete list of the Clavinova's demo songs, refer to page 7 of the Reference Booklet. 12 14 CVP-201 - Yamaha CVP-201 | Owner's Manual - Page 15
PIANO E. PIANO DISK HARMONY Guide function (page 105) while the Clavinova is playing 4. GUIDE Demo. You cannot change the voice selection while the demo is playing, however. Demo song data is not output through the [MIDI OUT] terminal; however, your keyboard performance data is output. CVP-201 - Yamaha CVP-201 | Owner's Manual - Page 16
you learn how to read the LCD display and use the related controls. Selecting a Function Many of the Clavinova's functions are displayed at the bottom of the LCD. The main display shown below contains two functions: KBD depending on the contents of the display. Press to select. 14 16 CVP-201 - Yamaha CVP-201 | Owner's Manual - Page 17
holding the corresponding LCD button. For now, since you'll want to hear your keyboard later on, press and hold the leftmost LCD button until the value for KBD Once you've got the keyboard volume back where it belongs, you can learn about a couple of other ways to change settings. CVP-201 17 15 - Yamaha CVP-201 | Owner's Manual - Page 18
problem with this method is that it can be hard to find the voice you're looking for - after all, the Clavinova PIANO] button now. Voice A voice is one of the sounds the Clavinova uses to make music. PIANO E. PIANO piano voices. s Using the LCD buttons Each piano different piano voices in - Yamaha CVP-201 | Owner's Manual - Page 19
Midi Grand), then turn the data dial clockwise or press the [+] button. This happens because the CVP-201 has more piano voices than it can fit in the display. When one of the Clavinova to tune the keyboard down as far as it will go. Basic settings • The functions of the Clavinova are set to certain - Yamaha CVP-201 | Owner's Manual - Page 20
[KEYBOARD 2] page has two functions in normal rectangles: KEY TOUCH and VOICE SETTING. Such functions cannot be selected; instead, pressing the corresponding LCD button changes the setting directly without selecting the function. The FIXED VELOCITY function is described on page 137. 20 CVP-201 - Yamaha CVP-201 | Owner's Manual - Page 21
for example, you can set the Clavinova's response to how hard you play , the highlighted setting switches between AUTO and MANUAL. Still, FIXED VELOCITY remains selected. For show the name of the last piano voice that you selected in the VOICE SELECT Piano display. You can usually use CVP-201 21 19 - Yamaha CVP-201 | Owner's Manual - Page 22
restore them at any time by pressing a couple of buttons. • You can instruct the Clavinova to remember certain settings when the power is off, and recall these settings when you turn the power back on. To do this, you need to change the settings of the Backup function (page 152). 20 22 CVP-201 - Yamaha CVP-201 | Owner's Manual - Page 23
DISK GUIDE CONTROL SOUND EASY PLAY NEXT NOTE REPEAT PIANO E. PIANO of the Clavinova. VOLUME MASTER keyboard performance. MIN MIN Setting the Keyboard Volume Select KBD VOL in the main display, then use the data dial or the [-] and [+] buttons to change the keyboard volume. 21 CVP-201 - Yamaha CVP-201 | Owner's Manual - Page 24
65) for details. q Song Mixer This MIXER display appears in the Song mode. See "Adjusting Indi- vidual Track Levels" (page 100) for details. 22 24 CVP-201 - Yamaha CVP-201 | Owner's Manual - Page 25
The Clavinova features REC PAUSE REW FF GUIDE CONTROL SOUND EASY PLAY NEXT NOTE REPEAT PIANO E. PIANO GUITAR VOICE SYNTHESIZER ORGAN Song mode (page 93). • The metronome cannot be used when playing disk software that was recorded in free-tempo (see page 96). Press the CVP-201 25 23 - Yamaha CVP-201 | Owner's Manual - Page 26
is not affected by the slider). If you use the slider, the playback volume for the Automatic Accompaniment (page 50) will also be affected. 26 CVP-201 24 - Yamaha CVP-201 | Owner's Manual - Page 27
explanations of the main functions of the Clavinova.You can select help topics from AUTO FILL MAIN B MAIN C MAIN D DISK HARMONY CUSTOM ENDING FADE IN/OUT METRONOME TEMPO PAUSE REW FF GUIDE CONTROL SOUND EASY PLAY NEXT NOTE REPEAT PIANO E. PIANO GUITAR VOICE CVP-201 27 25 - Yamaha CVP-201 | Owner's Manual - Page 28
Help mode To exit the Help mode and to go back to the main display at any time, simply press [HELP]. DEMO HELP 26 28 CVP-201 - Yamaha CVP-201 | Owner's Manual - Page 29
Voices Selecting Voices The Clavinova features a wealth of rich, authentic voices, including piano, strings and brass instruments. It also features a Keyboard Percussion function that lets you play the realistic drum and percussion sounds directly from the keyboard. VOLUME MASTER VOLUME ACMP - Yamaha CVP-201 | Owner's Manual - Page 30
by using the [MASTER VOLUME] slider. About Ensemble Voices The Clavinova's ensemble voices are rich, dual-like voices that you can play of ensemble voices. About XG Voices Yamaha's XG format is a major new enhancement to the GM (General MIDI) System Level 1 format. It provides 30 CVP-201 28 - Yamaha CVP-201 | Owner's Manual - Page 31
the KEYBOARD [RIGHT1] page and the [RIGHT2] (page 34) or [LEFT] (page 37) displays using the PAGE [] buttons. DIRECT ACCESS ➾ PIANO E. PIANO GUITAR VOICE SYNTHESIZER ORGAN STRINGS/ CHOIR DUAL REVERB BRASS SAX / FLUTE BASS PER- CUSSION ENSEMBLE XG SPLIT EFFECT 29 CVP-201 - Yamaha CVP-201 | Owner's Manual - Page 32
127 s Setting the Octave of the Main Voice The OCTAVE function in the KEYBOARD [RIGHT1] display lets you adjust the pitch of the main voice up or when a voice is selected by setting the VOICE SETTING function (page 137) to MANUAL. PAN • Settings: L - - R • Basic setting: (center) X CVP-201 30 - Yamaha CVP-201 | Owner's Manual - Page 33
The Dual mode of the Clavinova allows you to select and ACCOMPANIMENT AUTO FILL MAIN B MAIN C MAIN D DISK HARMONY CUSTOM ENDING FADE IN/OUT METRONOME TEMPO RESET REC PAUSE REW FF GUIDE CONTROL SOUND EASY PLAY NEXT NOTE REPEAT PIANO E. PIANO GUITAR VOICE SYNTHESIZER CVP-201 33 31 - Yamaha CVP-201 | Owner's Manual - Page 34
simultaneously to restore the basic setting. s Setting the Octave of the Second Voice The OCTAVE function in the KEYBOARD [RIGHT2] display lets you adjust the pitch of the second voice up or down by one or two selected by setting the VOICE SETTING function (page 137) to MANUAL. 34 CVP-201 32 - Yamaha CVP-201 | Owner's Manual - Page 35
basic setting. s Detuning the Second Voice The DETUNE function in the KEYBOARD [RIGHT2] display page lets you detune the pitch of the second the keyboard no longer plays in Dual mode. VOICE NTHEZER ORGAN STRINGS/ CHOIR DUAL REVERB PER- SSION ENSEMBLE XG SPLIT EFFECT CVP-201 35 33 - Yamaha CVP-201 | Owner's Manual - Page 36
Keyboard - Split Mode The Split mode of the Clavinova allows you to select and play two different voices with each hand. For example, you can play the bass with your left hand and the piano D DISK HARMONY keyboard guide lamp corresponding to the split point lights. PIANO E. PIANO CVP-201 34 - Yamaha CVP-201 | Owner's Manual - Page 37
[] buttons. s Setting the Volume of the Left Voice You can use the VOLUME function in the KEYBOARD [LEFT] page to change the volume of the left voice. Z Press the VOLUME button. ➔ The VOLUME function restore the basic setting. VOLUME • Range: 0 - 127 • Basic setting: 127 35 CVP-201 37 - Yamaha CVP-201 | Owner's Manual - Page 38
Setting the Stereo Position of the Left Voice The PAN function in the KEYBOARD [LEFT] display lets you adjust the stereo position of the left voice voice is selected by setting the VOICE SETTING function (page 137) to MANUAL. PAN • Settings: L - - R • Basic setting: (center) pedal. 36 38 CVP-201 - Yamaha CVP-201 | Owner's Manual - Page 39
Press the [-] and [+] buttons simultaneously to restore the basic setting. ➔ The keyboard guide lamp corresponding to the selected Split Point lights, and the key name is lamp turns off, and the keyboard no longer plays in Split mode. PER- SSION ENSEMBLE XG SPLIT EFFECT CVP-201 39 37 - Yamaha CVP-201 | Owner's Manual - Page 40
The Clavinova has three pedals. Damper Pedal (Right) The damper pedal performs the same function as the damper pedal on an actual acoustic piano, Sostenuto Pedal (Center) If you play a note or chord on the keyboard and press the sostenuto pedal while the note(s) are held, those notes CVP-201 - Yamaha CVP-201 | Owner's Manual - Page 41
a jazz club to a concert hall. The Clavinova lets you choose from a variety of reverb MAIN C MAIN D DISK HARMONY CUSTOM ENDING FADE IN GUIDE CONTROL SOUND EASY PLAY NEXT NOTE REPEAT PIANO E. PIANO the keyboard part(s), press the [REVERB] button. PIANO E. PIANO GUITAR VOICE CVP-201 41 39 - Yamaha CVP-201 | Owner's Manual - Page 42
. • The reverb type selection affects all voices played by the keyboard or Auto Accompaniment. Different settings cannot be made for each part. and [L/L+R] jacks. • It is also possible to apply reverb effects to the keyboard voices using the [EFFECT] button. See the Effect Type List on page 46 for - Yamaha CVP-201 | Owner's Manual - Page 43
set the reverb depth separately for the rhythm and accompaniment parts, as well as the parts you play from the keyboard. Z Select a part. Press the LCD button corresponding to RHYTHM to set the reverb depth for the drum part be applied to that part even if the other setting is 127. 41 CVP-201 43 - Yamaha CVP-201 | Owner's Manual - Page 44
Chorus The Clavinova's chorus effects let you modify the voices you play from the keyboard, adding warmth for an even richer sound. Flanger effects add pronounced modulation, for a spacy futuristic Chorus Type • Settings: See table on page 162. • Basic setting: Depends on style. 42 44 CVP-201 - Yamaha CVP-201 | Owner's Manual - Page 45
weaker, even though the same chorus type is selected. • It is also possible to apply chorus effects to the keyboard voices using the [EFFECT] button. See the Effect Type List on page 46 for details. You can also of 0 for any parts that you don't want affected by the chorus effect. 43 CVP-201 45 - Yamaha CVP-201 | Owner's Manual - Page 46
Clavinova FILL MAIN B MAIN C MAIN D DISK HARMONY CUSTOM ENDING FADE IN/OUT METRONOME REW FF GUIDE CONTROL SOUND EASY PLAY NEXT NOTE REPEAT PIANO E. PIANO GUITAR the effect to the keyboard parts, press the [EFFECT] button. PIANO E. PIANO GUITAR VOICE SYNTHESIZER ORGAN CVP-201 - Yamaha CVP-201 | Owner's Manual - Page 47
setting: Depends on voice. • The effect type selection affects all keyboard parts. Different settings cannot be made for each part. • When or three voices selected in Dual and/or Split mode, the Clavinova will automatically select the most appropriate effect type and set the effect CVP-201 47 45 - Yamaha CVP-201 | Owner's Manual - Page 48
depth separately for each part you play from the keyboard. Z Select a part. Press LEFT, RIGHT1, or RIGHT2 to set the effect depth for the corresponding keyboard part. ➔ The selected function is highlighted. X Set Range: 0 (no effect) - 127 (max.) • Basic setting: Depends on voice. 46 48 CVP-201 - Yamaha CVP-201 | Owner's Manual - Page 49
GUIDE CONTROL SOUND EASY PLAY NEXT NOTE REPEAT PIANO E. PIANO Reference Booklet. * The Clavinova's styles are divided Disks (page 86) or your original styles (page 73) . ➔ The corresponding STYLE SELECT display appears. • The last selected style in each group can be retained in memory CVP-201 49 - Yamaha CVP-201 | Owner's Manual - Page 50
adjust the playback volume, as described on page 23. C Return to the main display Press [EXIT] to return to the main display. EXIT 48 50 CVP-201 - Yamaha CVP-201 | Owner's Manual - Page 51
MAIN A COUNTRY BALLROOM TRAD/ WALZ DISK HARMONY AUTO ACCOMPANIMENT AUTO FILL MAIN B FF GUIDE CONTROL SOUND EASY PLAY NEXT NOTE REPEAT PIANO E. PIANO different style variation while the style is playing, the Clavinova will play an automatic fill-in pattern as it switches CVP-201 51 49 - Yamaha CVP-201 | Owner's Manual - Page 52
earlier than the last eighth note of the measure while the fill-in pattern is playing, the Clavinova will stop playing the fill-in pattern and continue with the main pattern. Starting the Accompaniment Style There measure number are shown at the left edge of the main display. 52 CVP-201 50 - Yamaha CVP-201 | Owner's Manual - Page 53
[BEAT] lamp flashes in time with the current tempo. X Start playing. When you are ready, play a note on the keyboard. The style starts playing when you play the first note. ➔ The [SYNCHRO] lamp turns off, the [START/STOP] lamp twice). In this case the tap "click" will not sound. 51 CVP-201 53 - Yamaha CVP-201 | Owner's Manual - Page 54
at left indicates that the Clavinova will play Intro C/D, followed by Main A. C Start the style. Use one of the three methods described on the preceding pages to start playing the style. To cancel the introduction before starting the style, press the [INTRO] button again. 52 54 CVP-201 - Yamaha CVP-201 | Owner's Manual - Page 55
MAIN B MAIN C MAIN D ENDING FADE IN/OUT ➔ The ENDING lamp lights, and the Clavinova stops style playback after playing an ending pattern. If you press the [ENDING] button on or after the second beat of a measure, the ending pattern will start at the top of the next measure. CVP-201 55 53 - Yamaha CVP-201 | Owner's Manual - Page 56
Playing the Accompaniment Styles The Clavinova will play one of three ending patterns, depending on the main pattern that is currently playing, as shown below. Ending can use the Fade Out function in combination with any pattern (including the Introduction and Ending functions). 54 56 CVP-201 - Yamaha CVP-201 | Owner's Manual - Page 57
as the bass root). Hence, you can select this mode to play "on bass" or "fraction" chords. (See page 61.) q Full Keyboard The Full Keyboard mode automatically produces appropriate auto- matic accompaniment for virtually anything you play, anywhere on the keyboard. (See page 61.) CVP-201 57 55 - Yamaha CVP-201 | Owner's Manual - Page 58
DATABASE SWING/ JAZZ LATIN COUNTRY BALLROOM TRAD/ WALZ DISK HARMONY CUSTOM X Set the tempo and accompaniment volume Start function (page 53). Also, a keyboard lamp shows the current split point. V playback of song data recorded on the CVP-109/107/105/ 700/103/201. • If you turn the Auto - Yamaha CVP-201 | Owner's Manual - Page 59
. • Basic setting: MULTI FINGER ➔ The selected accompaniment mode is highlighted. The method for indicating chords in each accompaniment mode are described in detail below. 57 CVP-201 59 - Yamaha CVP-201 | Owner's Manual - Page 60
black keys to the left of it (three keys at once). • The Clavinova displays the names of the chords you play at the left edge of the the Auto Accompaniment, play any chord in the left range of the keyboard (below and including the split point). Play the melody in the right chord. 58 60 CVP-201 - Yamaha CVP-201 | Owner's Manual - Page 61
mode. On-bass Chords C C on E C on G q Full Keyboard When the Full Keyboard mode is selected, the Clavinova will automati- cally create appropriate accompaniment while you play just about anything using both can use the Dual and Split modes together with the Auto Accompaniment. CVP-201 61 59 - Yamaha CVP-201 | Owner's Manual - Page 62
will automatically be reset to F#2. • The keyboard guide lamps do not indicate the split point when Chord Assistance is on, since they are used to indicate chord fingerings instead. ➔ The CHORD ASSIST display appears, and the accompaniment mode automatically changes to Fingered 1. 60 62 CVP-201 - Yamaha CVP-201 | Owner's Manual - Page 63
flatted fifth [7 (b5)] Minor major seventh [mM7] B Rotate the fingering as desired. Press INVERT to shift the fingering down the keyboard. Each time the INVERT button is pressed, the next viable fingering for the chord appears. The INVERT function displays the inversion number. CVP-201 63 61 - Yamaha CVP-201 | Owner's Manual - Page 64
recognized in Fingered 1 mode can be entered from the keyboard. • The Clavinova displays the name of the chord recognized from the keyboard at the left edge of the LCD display, under the mode (page 36) is on, the keyboard guide lamp corresponding to the selected split point lights. 64 CVP-201 62 - Yamaha CVP-201 | Owner's Manual - Page 65
Auto Accompaniment Adjusting Individual Part Levels The Clavinova has five accompaniment parts: Rhythm, Bass rhythmic chordal accompaniment for each style. You'll find guitar, piano, and other chordal instruments here. The Pad part plays long The selected function is highlighted. CVP-201 65 63 - Yamaha CVP-201 | Owner's Manual - Page 66
exit the function, press the [MIXER] button again, or press [EXIT]. FUNCTION MIXER EXIT ➔ The lamp turns off, and the main display appears. 64 66 CVP-201 - Yamaha CVP-201 | Owner's Manual - Page 67
JAZZ INTRO LATIN COUNTRY BALLROOM TRAD/ WALZ DISK HARMONY MAIN A AUTO ACCOMPANIMENT AUTO FILL FF GUIDE CONTROL SOUND EASY PLAY NEXT NOTE REPEAT PIANO E. PIANO GUITAR one of the 463 entries in the Music Database; the Clavinova does the rest! For a list of Music Database setup CVP-201 67 - Yamaha CVP-201 | Owner's Manual - Page 68
setup. The Harmony function will not be turned on if the Full Keyboard mode is selected, even if the selected Music Database setup includes the Registration function (page 89) to save the panel setup in the Clavinova's memory. V Return to the main display Press [EXIT] to exit the 68 CVP-201 66 - Yamaha CVP-201 | Owner's Manual - Page 69
of the keyboard, the harmony Clavinova will play harmony only while the left pedal is pressed. • If you use the left pedal to control the harmony, that pedal will have no effect when the Harmony function is off (i.e., when the [HARMONY] lamp is not lit). ➔ The HARMONY display appears. 67 CVP-201 - Yamaha CVP-201 | Owner's Manual - Page 70
by a "❍" in the Speed column of the table at left) have a speed setting that can be adjusted. See the next topic for details. 68 70 CVP-201 - Yamaha CVP-201 | Owner's Manual - Page 71
. To restore the VOLUME function to its basic setting for the currently selected main voice, press the VOLUME w and v buttons or the [-] and [+] buttons simultaneously. CVP-201 71 69 - Yamaha CVP-201 | Owner's Manual - Page 72
function will not be turned on if the Full Keyboard mode is selected, even if the selected One Touch Setting setup includes "Harmony On." The Clavinova's pre-programmed factory default panel settings can be stored in a registration memory to allow easy recall of the pre-programmed panel settings - Yamaha CVP-201 | Owner's Manual - Page 73
the Clavinova's memory at the same time, and any number can be saved to disk for DISK/CUSTOM STYLE menu to serve as the basis for your new custom style. ➔ The lamp lights, and the DISK/CUSTOM STYLE display appears. X Select the CUSTOM STYLE function Press the CUSTOM STYLE button. 71 CVP-201 - Yamaha CVP-201 | Owner's Manual - Page 74
of the CUSTOM STYLE display. The style that was selected in the DISK/CUSTOM STYLE display begins playing. C Select a source style Select a preset is highlighted, and each section is displayed in turn. The Clavinova plays the currently displayed section repeatedly. B Change the beat 74 CVP-201 - Yamaha CVP-201 | Owner's Manual - Page 75
the BEAT and/or MEAS. parameters have been set as required, press the PAGE [ - Yamaha CVP-201 | Owner's Manual - Page 76
the source style is a preset style or a style loaded from an optional Style File disk, parts other than R1 and R2 must be cleared before they can be recorded. • to record the part with. Select the voice as you would the main keyboard voice (see page 29). The preset voice for the part being recorded - Yamaha CVP-201 | Owner's Manual - Page 77
keyboard at guide can also be cleared in this way. Another useful recording aid is the SOLO LCD button: when this button is pressed and highlighted, only the selected part will sound. Press the SOLO button again to turn the solo function off and hear all parts in the selected section. 75 CVP-201 - Yamaha CVP-201 | Owner's Manual - Page 78
the PAGE buttons to select page 3 of the CUSTOM STYLE display, then press the STYLE NAME LCD button to display the NAME page. 76 78 CVP-201 - Yamaha CVP-201 | Owner's Manual - Page 79
memory number (1 through 4) where you want to store the custom style, then press OK to store or CANCEL to abort. If the selected memory number already contains a style, the style name will appear next to the memory number. The existing style will be overwritten when a new style is stored. CVP-201 - Yamaha CVP-201 | Owner's Manual - Page 80
Save Your Data! Custom style data is not retained in memory when the power is turned off, so be sure to RECALL SECTION LCD button in page 2 of the CUSTOM STYLE display. If the Clavinova cannot recall the preceding operation (i.e., after time signature has been changed), the change. 78 80 CVP-201 - Yamaha CVP-201 | Owner's Manual - Page 81
chorus type you want to apply to the current section and part. Chorus Type List • CHORUS 1 • CELESTE 1 • CHORUS 2 • CHORUS 3 • CELESTE 2 • CELESTE 3 • FLANGER 1 • FLANGER 2 • OFF 79 CVP-201 81 - Yamaha CVP-201 | Owner's Manual - Page 82
to four styles. After inserting a properly formatted disk (page 111) in the Clavinova's disk drive, use the MEMORY No. w and v buttons to select the custom style you want to save to disk, or select ALL to save a complete set the existing file, or CANCEL to abort the save operation. 80 82 CVP-201 - Yamaha CVP-201 | Owner's Manual - Page 83
Creating Your Own Styles Custom styles must be stored in the Clavinova's memory before they can be saved to a disk. If a custom style has not been stored and you attempt to save it to disk, the "Store in memory before saving to disk" message will be displayed. If this happens, press OK to return - Yamaha CVP-201 | Owner's Manual - Page 84
selected for playback by pressing the [DISK/CUSTOM] button, then using the STYLE Memory Full During Recording This message will be displayed if the memory Memory To Store This message will be displayed if there is not enough memory be displayed: The amount of memory being used by each style is - Yamaha CVP-201 | Owner's Manual - Page 85
MEMORY No. w and v buttons to select the style you want to delete, then press OK to delete the style, or CANCEL to cancel the operation. If the Clavinova the Clavinova will display a message like the one shown below: Select a memory Custom Style mode. Select a memory number and press OK to store - Yamaha CVP-201 | Owner's Manual - Page 86
to the use of CVP-201 style data by earlier-model Clavinovas.) Loading Styles from a Disk Z Insert a disk...Insert a disk containing style files into the disk drive. The [DISK IN USE] lamp will light briefly while the Clavinova reads and identifies the disk. When a Style File disk is inserted, the - Yamaha CVP-201 | Owner's Manual - Page 87
will be replaced by new data. • The amount of memory being used by each style is displayed next to the style name (in approximate kilobytes). You can refer to this amount to judge how much memory (out of the total 100 KB) will become available when a particular style is deleted. 85 CVP-201 87 - Yamaha CVP-201 | Owner's Manual - Page 88
same way as the preset styles (page 51). 8BEAT 16BEAT BALLAD ST YLE DANCE ROCK/ R&B PIANIST MUSIC DATABASE SWING/ JAZZ LATIN COUNTRY BALLROOM TRAD/ WALZ DISK HARMONY CUSTOM Loaded disk styles will be retained in memory only until the power is turned off. 86 88 CVP-201 - Yamaha CVP-201 | Owner's Manual - Page 89
Clavinova's memory. VOLUME MASTER VOLUME ACMP/SONG VOLUME MAX MAX MIN MIN DEMO HELP ACMP ON 8BEAT 16BEAT BALLAD ST YLE DANCE ROCK/ R&B PIANIST MUSIC DATABASE SWING/ JAZZ INTRO LATIN MAIN A COUNTRY BALLROOM TRAD/ WALZ AUTO ACCOMPANIMENT AUTO FILL MAIN B MAIN C MAIN D DISK - Yamaha CVP-201 | Owner's Manual - Page 90
in all registration memories when the Clavinova's power is first turned on. • By default, the registration settings are preserved even when the Clavinova's power is turned off (see page 152). You 5can also save individual registrations (or complete sets of 20 registrations) to floppy disk for future - Yamaha CVP-201 | Owner's Manual - Page 91
Registration function cannot be recalled in this case. The Clavinova's pre-programmed factory default panel settings can be stored in a registration memory to allow easy recall of the preprogrammed panel settings LCD button) is highlighted when a category to be frozen is selected. CVP-201 91 89 - Yamaha CVP-201 | Owner's Manual - Page 92
] display and return to the main display, press [EXIT]. FREEZE • Settings: ON (highlighted), OFF (unhighlighted) • Basic setting: OFF • Backup of last setting: ON 90 92 CVP-201 - Yamaha CVP-201 | Owner's Manual - Page 93
is normally not output via MIDI. However, you can set the Clavinova to output song data using the Song Transmission function in the FUNCTION [MIDI 4] display (page 150). • In addition to songs you've recorded yourself, the CVP-201 can play back commercially available disks of Yamaha DOC software, XG - Yamaha CVP-201 | Owner's Manual - Page 94
voice for the keyboard File icon q File Icons There are four icons (shown below) that indicate the type of the file. Icons File Type XG/SMF format file DOC/ESEQ format file Yamaha Disklavier PianoSoft or XG/ESEQ file Song data recorded with the CVP-201 • Refer to "MIDI and Data Compatibility - Yamaha CVP-201 | Owner's Manual - Page 95
names in the disk. The desired the disk, the keyboard can Keyboard Guide Lamp The keyboard guide lamps corresponding to the notes being played by the 1/RIGHT and 2/LEFT parts will light in real time. These guide lamps can be turned off in the SONG PLAY [GUIDE PLAY [GUIDE MODE] - Yamaha CVP-201 | Owner's Manual - Page 96
. Adjusting the Level Balance of Song Playback and the Keyboard Voices Use the [ACMP/SONG VOLUME] control (page 23) to adjust the volume. When playing back a song recorded on the CVP-109/107/105/700/103/201, the Auto Accompaniment can be turned on by pressing the [ACMP ON] button. 96 CVP-201 94 - Yamaha CVP-201 | Owner's Manual - Page 97
so you can practice them on the keyboard. • Parts can be switched on and RIGHT is canceled. In the case of Yamaha Disklavier PianoSoft files, DOC files and XG/ MIDI file song is selected (except songs recorded on the CVP-109/107/ 105/700/103/201, the CVP-98/96/600, and the CVP-94/92). 95 CVP-201 - Yamaha CVP-201 | Owner's Manual - Page 98
Basic setting: Depends on file type. 2/LEFT • Settings: 1 - 16, -- (off) • Basic setting: Depends on file type. The track assignments of DOC files and Yamaha Disklavier PianoSoft files are fixed, and therefore cannot be changed. Tracks can only be assigned when playback is stopped at the top of the - Yamaha CVP-201 | Owner's Manual - Page 99
VOLUME ACMP/SONG VOLUME MAX MAX If the Auto Accompaniment is turned on during playback of an original song that was recorded on the CVP-109/107/105/ 700/103/201, the [ACMP/SONG VOLUME] control will affect the level of the Auto Accompaniment rather than that of song playback. MIN MIN 97 - Yamaha CVP-201 | Owner's Manual - Page 100
Number (PRG#), Bank LSB (BKL), and Bank MSB (BKM) parameters, which are used to select voices via MIDI, are displayed when VOICE is selected. Depending on the file type, some parameters cannot be changed. For such parameters Select SOLO if you want to play only the selected track. 98 100 CVP-201 - Yamaha CVP-201 | Owner's Manual - Page 101
also affect the sound of your keyboard performance. • The voices of recorded on the CVP-109/ 107/105/700/103/201, the MIXER display will function as Auto Accompaniment Part Volume Control (page 65) instead of Song Track Volume Control. Repeat Functions The Clavinova - Yamaha CVP-201 | Owner's Manual - Page 102
Phrase Repeat ...When playing back Yamaha software that includes special phrase marks, • Parts can be turned on/off even during the performance. • The Guide function can also be used simultaneously with Phrase Repeat. • When Phrase Repeat is selected unless an A point is selected. 102 CVP-201 100 - Yamaha CVP-201 | Owner's Manual - Page 103
you to move the playback point of the song rapidly as long as the button is held. No sound is produced during [REW] operation. 101 CVP-201 103 - Yamaha CVP-201 | Owner's Manual - Page 104
: GM System Level 1, XG, DOC Refer to "MIDI and Data Compatibility" (page 172) for information on the voice allocation formats and sequence formats. The internal tone generator of the CVP-201 automatically resets for compatibility with either the Yamaha XG format (including GM System Level 1) or the - Yamaha CVP-201 | Owner's Manual - Page 105
" on page 108. If the guide lamps and piano roll are transposed up or down... The guide lamps and piano roll may be transposed up or down by one or two octaves for certain songs. The guide lamps and piano roll will not indicate notes exceeding the 88-key range of the keyboard. CVP-201 105 103 - Yamaha CVP-201 | Owner's Manual - Page 106
As soon as you play the phrase correctly, the Clavinova will automatically play the next phrase. Number of Repeats You can set the number of times the phrase will be repeated in the SONG PLAY [GUIDE MODE] display (display page 5). (See page 109.) The keyboard guide lamps can be turned on or off as - Yamaha CVP-201 | Owner's Manual - Page 107
one of the parts is turned off, the lamps indicate the notes to be played by the part that is turned off. • The guide part can be selected, the piano roll and guide lamps can be turned on and off, and the Guide function itself can be turned on or off during playback. 105 CVP-201 107 - Yamaha CVP-201 | Owner's Manual - Page 108
-hand playback. • Since the Guide phrases used in the Sound Repeat method are automatically determined by the Clavinova, they may not precisely match the active, even if the SPECIAL indication is shown. 108 CVP-201 GUIDE MODE • Settings: NORMAL, ENSEMBLE, (SPECIAL) • Basic setting: NORMAL or SPECIAL - Yamaha CVP-201 | Owner's Manual - Page 109
Lyric Display function has priority over the Piano Roll function. The Piano Roll will be displayed if you turn the Lyric Display function off as described above. s Keyboard Guide Lamp ON/OFF To turn off the keyboard guide lamps, press the LAMP button to set the function to OFF. 107 CVP-201 109 - Yamaha CVP-201 | Owner's Manual - Page 110
record songs on a new disk, the disk must be formatted for use by the Clavinova (see page 111). VOLUME GUIDE CONTROL SOUND EASY PLAY NEXT NOTE REPEAT PIANO E. PIANO the Floppy Disk Drive (FDD) and Floppy Disks" (page 9) for information on using floppy disks. • Songs recorded by the CVP-201 - Yamaha CVP-201 | Owner's Manual - Page 111
in the FUNCTION [DISK 5] display (page 146) to re-format floppy disks that have already been used for recording. Z Insert a disk...Gently insert the included blank disk for recording into the disk drive face-up and returns to the previous display when formatting is completed. 109 CVP-201 111 - Yamaha CVP-201 | Owner's Manual - Page 112
99, you will not be able to select the Song Record mode in step 3. The Clavinova can play back up to 99 songs on a single disk, but it can only record songs in song numbers up to 60. The selected number is song that contains data, the existing data will be replaced by the new data. 112 CVP-201 110 - Yamaha CVP-201 | Owner's Manual - Page 113
the Harmony Parts The Clavinova will record harmony notes disks should have about 690 KB (about 69,000 notes) and 1400 KB (about 140,000 notes), respectively. • When the ACMP&RHY part is set to REC, the metronome will sound to provide a timing guide before recording is started. CVP-201 - Yamaha CVP-201 | Owner's Manual - Page 114
part. • When the 2/LEFT part is being recorded, the Clavinova will not record the harmony notes for harmony types that are recorded to tracks 6 through 8 (see the sidebar on page 113), or the left range keyboard part. 114 CVP-201 The keyboard guide lamps do not light up during recording. 112 - Yamaha CVP-201 | Owner's Manual - Page 115
] button or the [FADE IN/OUT] button, the Clavinova will stop recording the keyboard as well. < Play back the recording Press the [ Clavinova may continue to write data to the disk for a short time after you stop recording. DO NOT eject the disk while the DISK IN USE lamp of the disk CVP-201 115 - Yamaha CVP-201 | Owner's Manual - Page 116
mode is turned on. The Clavinova will start recording when you begin to play on the keyboard. PLAY can only be guide. • If the Auto Accompaniment and/or Harmony are already on when the Track Recording page is selected, the corresponding tracks are automatically record-enabled. 114 116 CVP-201 - Yamaha CVP-201 | Owner's Manual - Page 117
features as required: voice, accompaniment style, tempo, reverb, etc. B Start recording Start playing the keyboard or press the [PLAY/STOP] button. To record the Auto Accompaniment parts, start the Auto Accompaniment included in style data, plus mixer levels set when recording) 115 CVP-201 117 - Yamaha CVP-201 | Owner's Manual - Page 118
stops. The [REC] lamp goes out when the data has been written to the disk, and the SONG PLAY display appears. If you press the [START/STOP] button [ENDING] button or the [FADE IN/OUT] button, the Clavinova will stop recording the keyboard as well. When recording is finished, the [ACMP/ SONG CVP-201 - Yamaha CVP-201 | Owner's Manual - Page 119
part, or a track (6, 7, or 8) that contains a harmony part (see sidebar on page 113), you will not be able to set the track to REC. 117 CVP-201 119 - Yamaha CVP-201 | Owner's Manual - Page 120
[PLAY/STOP] or [PAUSE] button to start playback. < Stop recording Press the [PLAY/STOP] button. ➔ Recording stops. When the data has been written to disk, the [REC] lamp goes out and the SONG PLAY display reappears. When the PEDAL mode is selected, recording can also be stopped by pressing the - Yamaha CVP-201 | Owner's Manual - Page 121
instrument for recording Just as you did in steps 1 through 3 of Quick Recording, insert a formatted disk, select a song number, then press the [REC] button to enter the Record mode. SONG CONTROL SONG function cannot be used when no disk has been inserted in the disk drive. 119 CVP-201 121 - Yamaha CVP-201 | Owner's Manual - Page 122
while the Chord Sequence function is active. However, you can select an accompaniment mode (other than Full Keyboard) in the ACCOMPANIMENT MODE display by pressing [DIRECT ACCESS] followed by the [ACMP ON] button. volume event is automatically entered at the beginning of a song.) 120 122 CVP-201 - Yamaha CVP-201 | Owner's Manual - Page 123
To enter a chord, either play the chord with appropriate fingering in the left range of the keyboard (lower than the split point), or highlight ROOT or TYPE in the LCD display and use that was recorded, the Clavinova will not record a chord change when the SET button is pressed. CVP-201 123 121 - Yamaha CVP-201 | Owner's Manual - Page 124
current cursor location, press the DELETE button. An "Are you sure?" message is displayed. Press YES to execute the operation, or NO to cancel. 124 CVP-201 122 - Yamaha CVP-201 | Owner's Manual - Page 125
to which a "rhythm on" event is entered. The rhythm on/off status is displayed in the box at the right side of the display. 123 CVP-201 125 - Yamaha CVP-201 | Owner's Manual - Page 126
are saved by the Setup Memory function, see the Parameter Chart on page 11 of the Reference Booklet. • The settings saved by the Setup Memory function will be deleted if you re-record the song data or use Initial Edit function (page 130) to edit the initial parameter settings. 126 CVP-201 124 - Yamaha CVP-201 | Owner's Manual - Page 127
or CANCEL to return to the RECORD EDIT display. ➔ The Clavinova displays the "Don't remove the disk!" message and bar graph as it saves the data to the disk, then displays a "Completed!" message before it returns to the file name. To cancel the operation, press the CANCEL button. CVP-201 127 125 - Yamaha CVP-201 | Owner's Manual - Page 128
cannot be used once you've selected another track or exited from this mode. • The Undo feature cannot be used for data recorded to internal memory (see page 133). 126 128 CVP-201 - Yamaha CVP-201 | Owner's Manual - Page 129
cannot be used once you've selected another track or exited from this mode. • The Undo feature cannot be used for data recorded to internal memory (see page 133). 127 CVP-201 129 - Yamaha CVP-201 | Owner's Manual - Page 130
size, or exited from this mode. • The Undo feature cannot be used for data recorded to internal memory (see page 133). Initial Edit (Changing the Initial Data) The Initial Edit function allows you to change Fixed") or change the voices for tracks other than tracks 1 and 2. 130 CVP-201 128 - Yamaha CVP-201 | Owner's Manual - Page 131
to select voices via MIDI, are displayed when VOICE keyboard sound. • The voices of the tracks to which Auto Accompaniment, rhythm and/or Harmony data have been recorded, can also be changed. • The data may not be played back accurately if you use the [REW] button while editing the data. CVP-201 - Yamaha CVP-201 | Owner's Manual - Page 132
Initial Edit mode. • The Undo feature cannot be used for data recorded to internal memory (see page 133). B Exit the Initial Edit function To do this, press the you do this after making any edits that you have not yet written to disk, a "Write edited data?" message will be displayed. Press YES to - Yamaha CVP-201 | Owner's Manual - Page 133
Clavinova has about 26 KB of internal memory that you can use to record a limited amount of song data - approximately 2,500 notes, if no other data is recorded - without using a floppy disk. About the CVP MEMORY Song If you enter the Song Record mode without inserting a disk, the words CVP MEMORY - Yamaha CVP-201 | Owner's Manual - Page 134
MIDI settings, or give you greater, more convenient control over disk-related operations. These sophisticated functions let you customize the Clavinova GUIDE CONTROL SOUND EASY PLAY NEXT NOTE REPEAT PIANO E. PIANO are available: Group KEYBOARD PEDAL DISK MIDI BACKUP UTILITY Display 1 CVP-201 - Yamaha CVP-201 | Owner's Manual - Page 135
operation. Refer to Chapter 2 "Basic Operation" for instructions regarding the selection and use of the various types of functions. V Press the [FUNCTION] button when finished. ➔ The [FUNCTION] lamp goes out. You can also exit the Function mode by pressing the [EXIT] button. 133 CVP-201 135 - Yamaha CVP-201 | Owner's Manual - Page 136
the panel affects the keyboard sound. • The values set here affect playback data transmitted via MIDI. • When a keyboard (e.g., C5 through C7 for a value of +24) may not sound as expected. The same is true of notes at the lower end of the keyboard when a low Transpose value is set. 134 136 CVP-201 - Yamaha CVP-201 | Owner's Manual - Page 137
voices played by the Clavinova's keyboard. Select from four Key Touch settings to tailor the keyboard response to the selected voice applied to a key is frequently referred to in this manual as velocity. This is because the Clavinova determines the amount of force that was applied to a CVP-201 137 - Yamaha CVP-201 | Owner's Manual - Page 138
left pedal during style playback causes the Clavinova to play a special "break fill-in is changed. This function does not work when FULL KEYBOARD is selected as the accompaniment mode (page 61). memory is not recalled. GLIDE RANGE • Settings: 1 - 12 (semitones) • Basic setting: 1 138 CVP-201 136 - Yamaha CVP-201 | Owner's Manual - Page 139
set of twenty. When saving registration data, the REGIST setting specifies which memory location(s) will be saved to disk. When loading data, the REGIST setting specifies how the registration data will or rename any registration file on the disk, regardless of the REGIST setting. CVP-201 139 137 - Yamaha CVP-201 | Owner's Manual - Page 140
on the operation you've selected. Refer to the corresponding instructions for each operation below. s LOAD ...When you select LOAD execute the Load operation. Be sure to save all important data to disk (see below) before using the Load operation. First, select the desired input. 140 CVP-201 138 - Yamaha CVP-201 | Owner's Manual - Page 141
Disk name entry operation and return to the FUNCTION [DISK 1] display, press the CANCEL button. When If you enter a name that already exists on the disk, a "Same name! Overwrite?" message will appear. If you enter a name that already exists on the disk, a "Same name! Overwrite?" message will appear. - Yamaha CVP-201 | Owner's Manual - Page 142
1 to 99. • You will not be able to select DISK1 - 1 as the copy function if the disk you inserted is write protected (page 9). • If the Clavinova's memory contains song data recorded without a disk (page 133), CVP - DISK will automatically be selected as the copy function. If you want to keep the - Yamaha CVP-201 | Owner's Manual - Page 143
be copied using these functions. Data files (other than those made with the CVP-109/107/105/700/103/201) that have been copied once cannot be copied a second time to another disk. Also, additional data can be recorded only to the right-hand/left-hand parts of the copied DOC files. 141 CVP-201 143 - Yamaha CVP-201 | Owner's Manual - Page 144
disk drive. X Select the song to be deleted. Use the SONG w and v buttons, the data dial, or the [-] and [+] buttons to select the song to be deleted. The song data in the Clavinova's memory can be also deleted with this operation. To do this, select CVP MEMORY instead of a song number (CVP MEMORY - Yamaha CVP-201 | Owner's Manual - Page 145
in the Clavinova's memory, use the Song Copy function (page 142) to copy the song to a 2DD disk before you attempt to convert it. Data Format Compatibility CVP-series Clavinovas other than the models listed in the table at left can play back song data recorded on the CVP-201 without conversion - Yamaha CVP-201 | Owner's Manual - Page 146
sure?" message is displayed. Press YES to execute the format, or NO to cancel. A bar graph indicates the progress of the formatting process. Once the disk has been formatted, the Clavinova can use it to store songs and other data. 144 146 CVP-201 - Yamaha CVP-201 | Owner's Manual - Page 147
you want to play an external MIDI tone generator from the Clavinova's keyboard without sounding the internal voices. To turn the local control on or off, press the LOCAL button. The data dial and [-] and [+] buttons cannot be used. LOCAL • Settings: ON, OFF • Basic setting: ON CVP-201 147 145 - Yamaha CVP-201 | Owner's Manual - Page 148
MIDI data. q Program Change Messages Normally the Clavinova will respond to MIDI program change numbers received from an external keyboard or another MIDI device. For example, the Clavinova can change voices in response to MIDI and received even when PROGRAM is set to OFF. 146 148 CVP-201 - Yamaha CVP-201 | Owner's Manual - Page 149
instrument connected to the Clavinova's MIDI [THRU] terminal.) By default, the Clavinova will receive messages on all 16 channels. Use the following procedure to enable or disable the reception of a channel: RECEIVE FILTER • Settings: ON, OFF (x 16) • Basic setting: ON (x 16) CVP-201 149 147 - Yamaha CVP-201 | Owner's Manual - Page 150
without a surrounding box. FUNCTION [MIDI 4] Display - page 12 s MIDI Transpose ...The MIDI Transpose function determines whether the Transpose setting in the FUNCTION [KEYBOARD 1] display (page 136) will affect the MIDI data received by the Clavinova. The Clavinova will normally transpose the - Yamaha CVP-201 | Owner's Manual - Page 151
Transmission When the SONG function is set to ON, the Clavinova will transmit song data via the MIDI [OUT] terminal. Select this setting when you want an external the main voice. MIDI data received by the remote keyboard function cannot be output via the MIDI [OUT] terminal. 149 CVP-201 151 - Yamaha CVP-201 | Owner's Manual - Page 152
if the Clavinova is not turned on during this time. All parameters will be reset to their default values if the power remains off for longer than about a week. To ensure that your backed-up settings are maintained, turn the power on for a few minutes at least once a week. 152 CVP-201 150 - Yamaha CVP-201 | Owner's Manual - Page 153
of the Clavinova can be recalled. Group VOICE SETTING REVERB/EFFECT TUNE PEDAL ACMP SETTING SONG SETTING REGISTRATION MIDI SETTING ALL by turning the power on while holding down the rightmost key on the keyboard (C7). When this is done, the "Back up data erased and . 151 CVP-201 153 - Yamaha CVP-201 | Owner's Manual - Page 154
they are no longer needed. Z Insert a disk in the disk drive. Make sure that a properly formatted disk has been inserted in the disk drive before executing a file operation. If you want to load, delete, or rename a tuning file, the inserted disk should contain the file in question. 154 CVP-201 152 - Yamaha CVP-201 | Owner's Manual - Page 155
the music of the corresponding eras. The Clavinova contains the following seven temperaments: The Scale Tuning function does not affect the pitch of song data played back by the Clavinova. • EQUAL • PURE(MAJOR) • PURE(MINOR) • MEANTONE • PYTHAGOREAN • WERCKMEISTER • KIRNBERGER 153 CVP-201 155 - Yamaha CVP-201 | Owner's Manual - Page 156
The setting made for one key is automatically assigned to the same key in all other octaves. Z Select USER with the leftmost LCD button. ➔ The following display appears: X Press the key to be tuned. 0 (all keys) V Repeat steps 2 and 3 until all the required keys have been tuned. 156 CVP-201 154 - Yamaha CVP-201 | Owner's Manual - Page 157
disk as a user scale file. User scale files can be loaded whenever necessary, or deleted when they are no longer needed. Z Insert a disk in the disk drive. Make sure that a properly formatted disk has been inserted in the disk page 140. See page 140. See page 141. See page 141. 155 CVP-201 157 - Yamaha CVP-201 | Owner's Manual - Page 158
to do so can result in damage to speakers and other problems. Headphones PHONES To use headphones, connect them to one of the [PHONES] jacks (standard 1/ 4" phone jacks) located below the left end of the keyboard. The Clavinova's built-in speaker system is automatically shut off when a pair of - Yamaha CVP-201 | Owner's Manual - Page 159
controls on the connected equipment to adjust the overall volume of the sound from the Clavinova. Use the AUX OUT [L/L+R] jack for monophonic output. For stereo output, connect the AUX OUT [L/L+R] jack to the left channel input, and the AUX OUT [R] jack to the right channel input. 157 CVP-201 159 - Yamaha CVP-201 | Owner's Manual - Page 160
is available as a PDF file (in English) at the following Internet address: Clavinova Home Page: http://www.yamaha.co.jp/english/product/cl/ Yamaha Manual Library (Electronic Musical Instruments) http://www2.yamaha.co.jp/manual/english/ Connecting MIDI Equipment Use MIDI cables to connect the - Yamaha CVP-201 | Owner's Manual - Page 161
MIDI driver) To transfer data via the computer's serial port and the Clavinova's TO HOST jack, you need to install a specified MIDI driver (Yamaha CBX driver for Windows). You can download this driver from the following XG Library on the Yamaha Web site: http://www.yamaha-xg.com CVP-201 161 - Yamaha CVP-201 | Owner's Manual - Page 162
Lists The tables in this appendix contain descriptions of the various reverb, chorus, and effect types that are available for use on the CVP-201. Reverb Type List Type HALL1 HALL2 HALL3 HALL4 ROOM1 ROOM2 ROOM3 ROOM4 STAGE1 STAGE2 PLATE1 PLATE2 Description Concert hall reverb effects Small room - Yamaha CVP-201 | Owner's Manual - Page 163
modulation effects Tremolo effect that is suitable for guitar sounds Effects that cyclically move the sound from right to left and front to back 161 CVP-201 163 - Yamaha CVP-201 | Owner's Manual - Page 164
L and R delays with independent feedback for L and R Two delays (L and R) with crossed feedback Effects that add distortion with an edge to the sound; useful for electric guitar sounds, etc. Disco-oriented equalizer effect Equalizer effect that simulates sound heard over the phone 162 164 CVP-201 - Yamaha CVP-201 | Owner's Manual - Page 165
data. ➾ Select a song that contains data, or insert a disk with song data into the floppy disk drive. This message appears when you attempt to load, rename, or , the disk itself has internal write protection, making it impossible to perform recording or file operations on the disk. CVP-201 165 163 - Yamaha CVP-201 | Owner's Manual - Page 166
or editing on the CVP-109/107/105/ 700/103/201. Press NO if you don't want to convert the data. It may not be possible to record to tracks other than tracks 1 and 2 of songs converted in this manner. q General (Memory-related) This message appears when the Clavinova's memory has become full while - Yamaha CVP-201 | Owner's Manual - Page 167
, such as playback of disk software, that will cause the Clavinova to delete data recorded to the internal memory. ➾ Press YES to delete the data recorded to the internal memory, then perform the desired return to the preceding display, and select a different style for deletion. CVP-201 167 165 - Yamaha CVP-201 | Owner's Manual - Page 168
the Disk Copy function (page 143) to copy data from one disk to another. ➾ Press OK to cancel the copy operation, then execute the Disk Copy function again from the beginning. When exchanging disks during the copy operation, be careful not to confuse the source and destination disks. 168 CVP-201 - Yamaha CVP-201 | Owner's Manual - Page 169
the destination when copying a song within a disk. (See sidebar, page 143.) ➾ or the MIDI driver or MIDI application is not active. ➾ Turn off both the Clavinova and the Clavinova is turned on after data has been lost. It also appears when you recall all factory data (page 153.) 167 CVP-201 169 - Yamaha CVP-201 | Owner's Manual - Page 170
Troubleshooting Problem Cause Solution The Clavinova does not turn on. The Clavinova has not been plugged in properly. Securely insert the female plug into the socket on the Clavinova, and the male plug into a proper AC outlet. A click or pop is heard when the power is turned on or off. - Yamaha CVP-201 | Owner's Manual - Page 171
Troubleshooting Problem (See page 59.) The maximum of 60 songs cannot be recorded. The memory capacity is full because the playing time of one or more songs is were used. Delete unnecessary songs (page 144) or record to a new disk. Some tracks do not play back when playing back data. Playback of - Yamaha CVP-201 | Owner's Manual - Page 172
is XG-compatible. DOC This voice allocation format is compatible with many of Yamaha's MIDI devices, including the Clavinova series instruments. This is also a common format used with various Yamaha software. • The CVP-201 is compatible with DOC. Even if the devices and data used satisfy all - Yamaha CVP-201 | Owner's Manual - Page 173
, MIDI Filter 148-150 fingering (chords 60-61, 62-64 Fixed Velocity 137 floppy disks 9 formatting, Disk 111, 146 free tempo 96 Function 134-135 function, resetting 19-20 functions in normal rectangles 20-21 functions in rounded rectangles 16 G Glide Range 138 Guide 15, 105-109 guide - Yamaha CVP-201 | Owner's Manual - Page 174
Transpose 136, 150 troubleshooting 170-171 Tune 136, 156 U user scale 156-157 V velocity 137 Voice Setting 137 voices, selecting 29-30, 76, 99 volume 23-24 volume, metromome 26 volume, part 65-66, 81-82 volume, song 99 volume, track 100-101 volume, voices 32, 34, 37 172 174 CVP-201 - Yamaha CVP-201 | Owner's Manual - Page 175
the instructions found in the users manual, and "ON", please try to eliminate the problem by using one of the following measures: contact Yamaha Corporation of America, Electronic Service Division products distributed by Yamaha-Kemble Music (U.K.) Ltd. CAUTION: TO PREVENT ELECTRIC SHOCK, MATCH WIDE - Yamaha CVP-201 | Owner's Manual - Page 176
in the owners manual, on the name plate, or specifically recommended by Yamaha. 5. probability of lightening and/or electrical storm activity. 11. Care service this product beyond that de- scribed in the user-maintenance instructions. All other servicing should be referred to qualified service - Yamaha CVP-201 | Owner's Manual - Page 177
Yamaha KINGDOM Yamaha-Kemble Keyboard Division Viale Italia 88, 20020 Lainate (Milano), Italy Tel: 02-935-771 SPAIN/PORTUGAL Yamaha-Hazen Electronica Musical, S.A. Ctra. de la Coruna km. 17, 200, 28230 Las Rozas (Madrid) Spain Tel: 91-201 filial av Yamaha Scandinavia AB Grini Yamaha Yamaha OCEAN Yamaha - Yamaha CVP-201 | Owner's Manual - Page 178
Clavinova Web site (English only) http://www.yamaha.co.jp/english/product/cl/ Yamaha Manual Library (English versions only) http://www2.yamaha.co.jp/manual/english/ M.D.G., Pro Audio & Digital Musical Instrument Division, Yamaha Corporation © 2001 Yamaha Corporation V780550 1??PO???.?-01A0 Printed
-
 1
1 -
 2
2 -
 3
3 -
 4
4 -
 5
5 -
 6
6 -
 7
7 -
8
-
9
-
10
-
11
-
12
-
13
-
14
-
15
-
16
-
17
-
18
-
19
-
20
-
21
-
22
-
23
-
24
-
25
-
26
-
27
-
28
-
29
-
30
-
31
-
32
-
33
-
34
-
35
-
36
-
37
-
38
-
39
-
40
-
41
-
42
-
43
-
44
-
45
-
46
-
47
-
48
-
49
-
50
-
51
-
52
-
53
-
54
-
55
-
56
-
57
-
58
-
59
-
60
-
61
-
62
-
63
-
64
-
65
-
66
-
67
-
68
-
69
-
70
-
71
-
72
-
73
-
74
-
75
-
76
-
77
-
78
-
79
-
80
-
81
-
82
-
83
-
84
-
85
-
86
-
87
-
88
-
89
-
90
-
91
-
92
-
93
-
94
-
95
-
96
-
97
-
98
-
99
-
100
-
101
-
102
-
103
-
104
-
105
-
106
-
107
-
108
-
109
-
110
-
111
-
112
-
113
-
114
-
115
-
116
-
117
-
118
-
119
-
120
-
121
-
122
-
123
-
124
-
125
-
126
-
127
-
128
-
129
-
130
-
131
-
132
-
133
-
134
-
135
-
136
-
137
-
138
-
139
-
140
-
141
-
142
-
143
-
144
-
145
-
146
-
147
-
148
-
149
-
150
-
151
-
152
-
153
-
154
-
155
-
156
-
157
-
158
-
159
-
160
-
161
-
162
-
163
-
164
-
165
-
166
-
167
-
168
-
169
-
170
-
171
-
172
-
173
-
174
-
175
-
176
-
177
-
178
 |
 |
Owner’s Manual
IMPORTANT
Check Your Power Supply
Make sure that your local AC mains voltage matches
the voltage specified on the name plate on the bottom
panel. In some areas a voltage selector may be
provided on the bottom panel of the main keyboard
unit near the power cord. Make sure that the voltage
selector is set for the voltage in your area. The voltage
selector is set at 240V when the unit is initially shipped.
To change the setting use a “minus” screwdriver to
rotate the selector dial so that the correct voltage
appears next to the pointer on the panel.