Yamaha CVP-201 Owner's Manual - Page 122
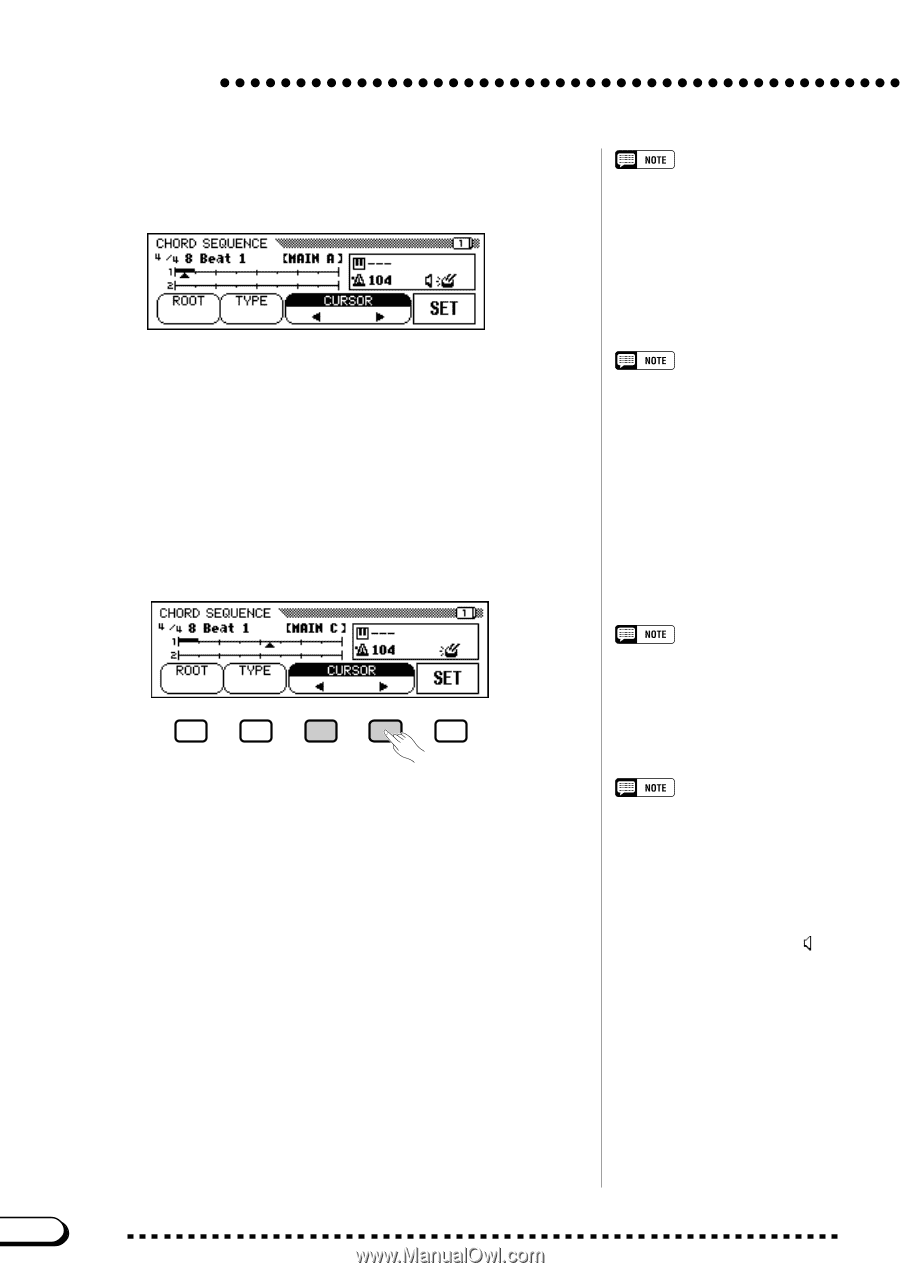
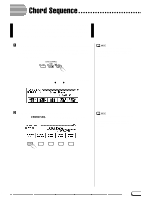
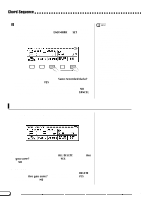
Move the cursor to the entry point., point at which you want to enter a chord or style change
 |
View all Yamaha CVP-201 manuals
Add to My Manuals
Save this manual to your list of manuals |
Page 122 highlights
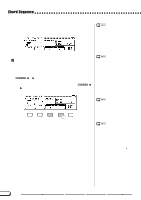
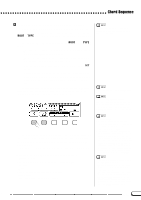
Chord Sequence ➔ The CHORD SEQUENCE display appears, the Auto Accompaniment is turned on, and the Fingered 1 accompaniment mode is selected. Changing the Auto Accompaniment Mode Auto Accompaniment cannot be turned off while the Chord Sequence function is active. However, you can select an accompaniment mode (other than Full Keyboard) in the ACCOMPANIMENT MODE display by pressing [DIRECT ACCESS] followed by the [ACMP ON] button. The split point can also be changed in this display. C Move the cursor to the entry point The display shows measures as a horizontal line with 8th-note divisions. To move the triangular cursor along the measure indication to the point at which you want to enter a chord or style change, press one of the CURSOR < or > buttons to highlight the function, then use the data dial or [-] and [+] buttons. You can also move the triangular cursor by pressing the CURSOR < and > buttons. • The Chord Sequence data will automatically replace any previous data in the Auto Accompaniment and rhythm tracks that was recorded in the Quick Record or Track Record modes. • Up to 999 measures can be recorded using the Chord Sequence function. • The chord input resolution will be automatically selected according to the current style. For styles with 2/4, 3/4, 4/4, and 5/4 time signatures, one chord can be entered on every 8th note or 8th-note triplet. For other time signatures, one chord can be entered for each measure. Entering Accompaniment Style and Section Changes One style change or section change (page 123) can be made at the beginning of each measure (The Intro pattern can only be entered at the beginning of a song.). However, Auto Fill data can be entered anywhere you desire. Adjusting the Volume of Auto Accompaniment You can also enter volume changes for the Auto Accompaniment. Used judiciously, these can help you create professional-sounding dynamic changes in the Auto Accompaniment of your song. To do this, first enter the Auto Accompaniment part volume data from the MIXER display; the volume event symbol ( ) will appear in the box at the right side of the display. To actually record the volume data at the current position, press the SET button in the CHORD SEQUENCE display. (An initial volume event is automatically entered at the beginning of a song.) 120 122 CVP-201
-
 1
1 -
2
-
3
-
4
-
5
-
6
-
7
-
8
-
9
-
10
-
11
-
12
-
13
-
14
-
15
-
16
-
17
-
18
-
19
-
20
-
21
-
22
-
23
-
24
-
25
-
26
-
27
-
28
-
29
-
30
-
31
-
32
-
33
-
34
-
35
-
36
-
37
-
38
-
39
-
40
-
41
-
42
-
43
-
44
-
45
-
46
-
47
-
48
-
49
-
50
-
51
-
52
-
53
-
54
-
55
-
56
-
57
-
58
-
59
-
60
-
61
-
62
-
63
-
64
-
65
-
66
-
67
-
68
-
69
-
70
-
71
-
72
-
73
-
74
-
75
-
76
-
77
-
78
-
79
-
80
-
81
-
82
-
83
-
84
-
85
-
86
-
87
-
88
-
89
-
90
-
91
-
92
-
93
-
94
-
95
-
96
-
97
-
98
-
99
-
100
-
101
-
102
-
103
-
104
-
105
-
106
-
107
-
108
-
109
-
110
-
111
-
112
-
113
-
114
-
115
-
116
-
 117
117 -
 118
118 -
 119
119 -
 120
120 -
 121
121 -
 122
122 -
 123
123 -
 124
124 -
 125
125 -
 126
126 -
 127
127 -
128
-
129
-
130
-
131
-
132
-
133
-
134
-
135
-
136
-
137
-
138
-
139
-
140
-
141
-
142
-
143
-
144
-
145
-
146
-
147
-
148
-
149
-
150
-
151
-
152
-
153
-
154
-
155
-
156
-
157
-
158
-
159
-
160
-
161
-
162
-
163
-
164
-
165
-
166
-
167
-
168
-
169
-
170
-
171
-
172
-
173
-
174
-
175
-
176
-
177
-
178
 |
 |