Yamaha CVP-201 Owner's Manual - Page 90
Recalling the Registered Panel Settings, Using Registrations
 |
View all Yamaha CVP-201 manuals
Add to My Manuals
Save this manual to your list of manuals |
Page 90 highlights
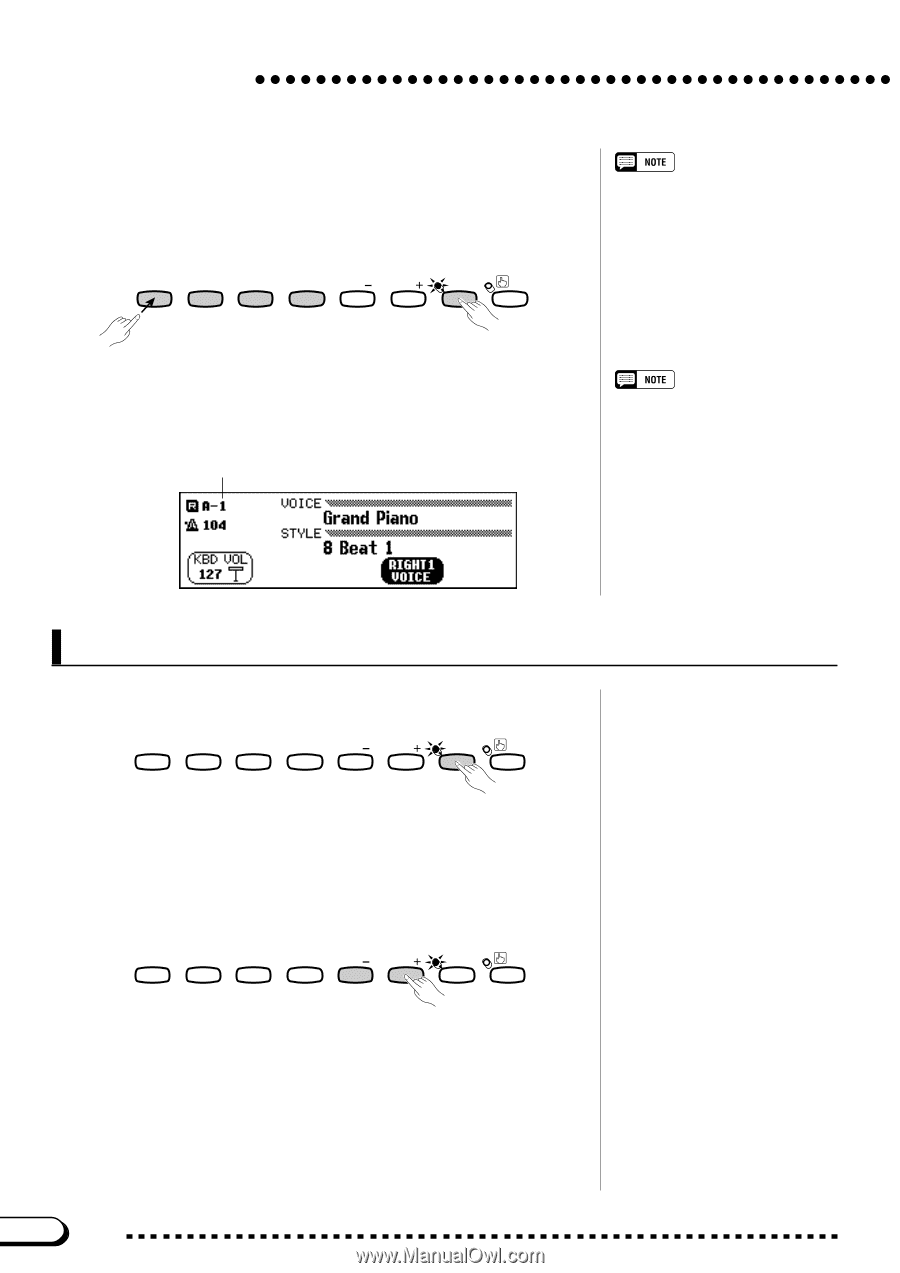
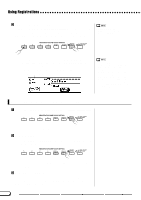
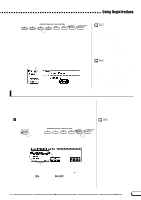
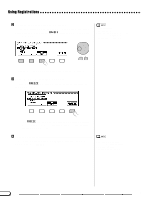
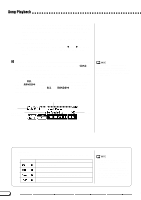
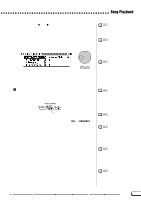
Using Registrations C Register the panel setup While holding down the [REGISTRATION] button, press one of the buttons labeled [1] through [4] under REGISTRATION/ONE TOUCH SETTING corresponding to the registration memory where you want to save the setup. REGISTRATION/ONE TOUCH SETTING REGIST- ONE TOUCH 1 2 3 4 BANK BANK RATION SETTING Registration Memory • Range: 1 - 4 (each bank) • Basic setting: None ➔ The number of the selected registration memory appears next to the bank name in the upper left corner of the main display. The panel settings that were previously stored in the selected registration are cleared and replaced by the new settings. Registration number • Pre-programmed settings are initially stored in all registration memories when the Clavinova's power is first turned on. • By default, the registration settings are preserved even when the Clavinova's power is turned off (see page 152). You 5can also save individual registrations (or complete sets of 20 registrations) to floppy disk for future recall (see page 139). Recalling the Registered Panel Settings Z Press the [REGISTRATION] button REGISTRATION/ONE TOUCH SETTING REGIST- ONE TOUCH 1 2 3 4 BANK BANK RATION SETTING ➔ The [REGISTRATION] lamp lights. X Select a bank...Use the [BANK +] and [BANK -] buttons to select the bank that contains the desired registration. REGISTRATION/ONE TOUCH SETTING REGIST- ONE TOUCH 1 2 3 4 BANK BANK RATION SETTING ➔ The selected bank is displayed in the upper left corner of the main display. C Select a registration. Press one of the buttons labeled [1] through [4] under REGISTRATION/ONE TOUCH SETTING corresponding to the registration memory you want to recall. 90 CVP-201 88
-
 1
1 -
2
-
3
-
4
-
5
-
6
-
7
-
8
-
9
-
10
-
11
-
12
-
13
-
14
-
15
-
16
-
17
-
18
-
19
-
20
-
21
-
22
-
23
-
24
-
25
-
26
-
27
-
28
-
29
-
30
-
31
-
32
-
33
-
34
-
35
-
36
-
37
-
38
-
39
-
40
-
41
-
42
-
43
-
44
-
45
-
46
-
47
-
48
-
49
-
50
-
51
-
52
-
53
-
54
-
55
-
56
-
57
-
58
-
59
-
60
-
61
-
62
-
63
-
64
-
65
-
66
-
67
-
68
-
69
-
70
-
71
-
72
-
73
-
74
-
75
-
76
-
77
-
78
-
79
-
80
-
81
-
82
-
83
-
84
-
 85
85 -
 86
86 -
 87
87 -
 88
88 -
 89
89 -
 90
90 -
 91
91 -
 92
92 -
 93
93 -
 94
94 -
 95
95 -
96
-
97
-
98
-
99
-
100
-
101
-
102
-
103
-
104
-
105
-
106
-
107
-
108
-
109
-
110
-
111
-
112
-
113
-
114
-
115
-
116
-
117
-
118
-
119
-
120
-
121
-
122
-
123
-
124
-
125
-
126
-
127
-
128
-
129
-
130
-
131
-
132
-
133
-
134
-
135
-
136
-
137
-
138
-
139
-
140
-
141
-
142
-
143
-
144
-
145
-
146
-
147
-
148
-
149
-
150
-
151
-
152
-
153
-
154
-
155
-
156
-
157
-
158
-
159
-
160
-
161
-
162
-
163
-
164
-
165
-
166
-
167
-
168
-
169
-
170
-
171
-
172
-
173
-
174
-
175
-
176
-
177
-
178
 |
 |