Yamaha CVP-201 Owner's Manual - Page 98
Assignment of Tracks to 1/RIGHT and 2/LEFT, and Voice Assignment, Assigning Tracks
 |
View all Yamaha CVP-201 manuals
Add to My Manuals
Save this manual to your list of manuals |
Page 98 highlights
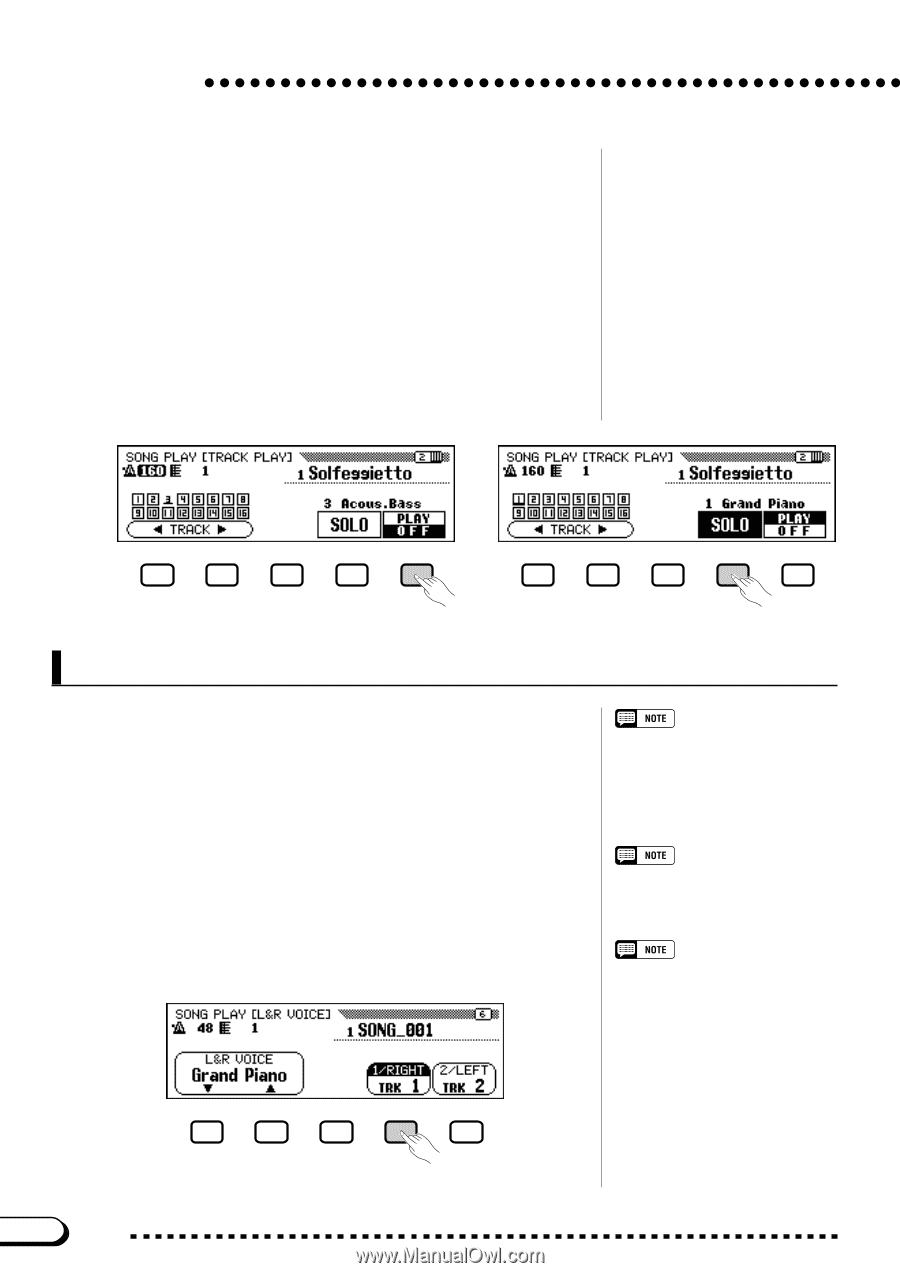
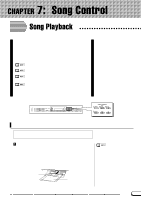
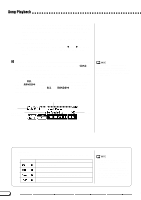
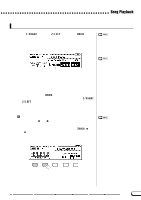
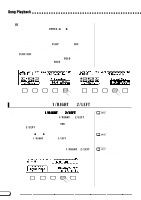
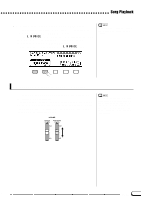
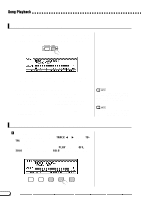
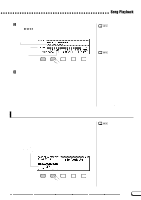
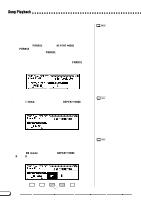
Song Playback X Select the desired track for playback (PLAY/OFF, SOLO). Select the track by using the TRACK < and > buttons, the data dial, or the [-] and [+] buttons. ➔ The selected track is indicated by an underline mark. Turn playback on or off for the selected track by pressing the rightmost LCD button to select PLAY (playback) or OFF. When a track is muted, the box surrounding the track number disappears. The voice used by the currently selected track is shown above PLAY/OFF. Select a track, then press and highlight the SOLO LCD button to hear only the selected track. Press the SOLO LCD button again to cancel the Solo function. Assignment of Tracks to 1/RIGHT and 2/LEFT, and Voice Assignment s Assigning Tracks to 1/RIGHT and 2/LEFT Specific tracks can be assigned to the 1/RIGHT and 2/LEFT functions in the SONG PLAY [MAIN] display, allowing you to selectively turn playback of assigned tracks on or off. TRK - - (OFF) can be assigned to 2/LEFT. The same track cannot be assigned to both parts. Select the SONG PLAY [L&R VOICE] display (display page 6) by using the PAGE [] buttons. ➾ Press the 1/RIGHT button or the 2/LEFT button to highlight the corresponding function in the display, then use the data dial or [-] and [+] buttons to assign the desired track. You can also select the track by pressing the 1/RIGHT or 2/LEFT button. 1/RIGHT • Settings: 1 - 16 • Basic setting: Depends on file type. 2/LEFT • Settings: 1 - 16, -- (off) • Basic setting: Depends on file type. The track assignments of DOC files and Yamaha Disklavier PianoSoft files are fixed, and therefore cannot be changed. Tracks can only be assigned when playback is stopped at the top of the song. 96 98 CVP-201
-
 1
1 -
2
-
3
-
4
-
5
-
6
-
7
-
8
-
9
-
10
-
11
-
12
-
13
-
14
-
15
-
16
-
17
-
18
-
19
-
20
-
21
-
22
-
23
-
24
-
25
-
26
-
27
-
28
-
29
-
30
-
31
-
32
-
33
-
34
-
35
-
36
-
37
-
38
-
39
-
40
-
41
-
42
-
43
-
44
-
45
-
46
-
47
-
48
-
49
-
50
-
51
-
52
-
53
-
54
-
55
-
56
-
57
-
58
-
59
-
60
-
61
-
62
-
63
-
64
-
65
-
66
-
67
-
68
-
69
-
70
-
71
-
72
-
73
-
74
-
75
-
76
-
77
-
78
-
79
-
80
-
81
-
82
-
83
-
84
-
85
-
86
-
87
-
88
-
89
-
90
-
91
-
92
-
 93
93 -
 94
94 -
 95
95 -
 96
96 -
 97
97 -
 98
98 -
 99
99 -
 100
100 -
 101
101 -
 102
102 -
 103
103 -
104
-
105
-
106
-
107
-
108
-
109
-
110
-
111
-
112
-
113
-
114
-
115
-
116
-
117
-
118
-
119
-
120
-
121
-
122
-
123
-
124
-
125
-
126
-
127
-
128
-
129
-
130
-
131
-
132
-
133
-
134
-
135
-
136
-
137
-
138
-
139
-
140
-
141
-
142
-
143
-
144
-
145
-
146
-
147
-
148
-
149
-
150
-
151
-
152
-
153
-
154
-
155
-
156
-
157
-
158
-
159
-
160
-
161
-
162
-
163
-
164
-
165
-
166
-
167
-
168
-
169
-
170
-
171
-
172
-
173
-
174
-
175
-
176
-
177
-
178
 |
 |