Yamaha CVP-201 Owner's Manual - Page 118
Adding New Tracks, Punch-in/out Recording, Stop recording., Play back the song.
 |
View all Yamaha CVP-201 manuals
Add to My Manuals
Save this manual to your list of manuals |
Page 118 highlights
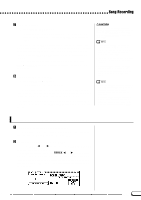
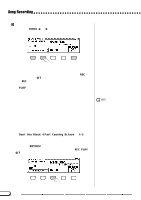
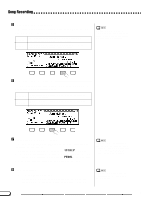
Song Recording N Stop recording Press the [PLAY/STOP] button. ➔ Recording stops. The [REC] lamp goes out when the data has been written to the disk, and the SONG PLAY display appears. If you press the [START/STOP] button, only the recording of the Auto Accompaniment or rhythm will stop. You can continue recording your keyboard performance without the Auto Accompaniment or rhythm. Press the [PLAY/STOP] button in order to actually stop recording. If you stop the style by pressing the [ENDING] button or the [FADE IN/OUT] button, the Clavinova will stop recording the keyboard as well. When recording is finished, the [ACMP/ SONG VOLUME] level is automatically set to the maximum value, regardless of the current slider position. Adding New Tracks You can add a new track to your song by selecting a new record track(s) and voice(s) for recording as described above. You can also play back and monitor the previously recorded tracks while you record. By repeating this process, you can assemble a complete song. If you record on a track that has already been recorded, the previous material will be erased and the new material will be recorded in its place. Punch-in/out Recording With the Punch-in/out Recording function, you can selectively rerecord specified sections of the song. Punch-in/out recording allows you to start recording from any "punch-in" point within a previously recorded track and stop recording at any "punch-out" point, leaving intact all recorded material up to the punch-in point and following the punchout point. Punch-in/out recording cannot be performed on tracks which have been used to record the Auto Accompaniment or rhythm parts, or on tracks 6 through 8 when these tracks have been used to record harmony parts (see sidebar on page 113). Z Play back the song Play back the song in order to locate the point where you want to punch in (i.e., start re-recording). SONG CONTROL SONG PLAY/ STOP REC 116 118 CVP-201
-
 1
1 -
2
-
3
-
4
-
5
-
6
-
7
-
8
-
9
-
10
-
11
-
12
-
13
-
14
-
15
-
16
-
17
-
18
-
19
-
20
-
21
-
22
-
23
-
24
-
25
-
26
-
27
-
28
-
29
-
30
-
31
-
32
-
33
-
34
-
35
-
36
-
37
-
38
-
39
-
40
-
41
-
42
-
43
-
44
-
45
-
46
-
47
-
48
-
49
-
50
-
51
-
52
-
53
-
54
-
55
-
56
-
57
-
58
-
59
-
60
-
61
-
62
-
63
-
64
-
65
-
66
-
67
-
68
-
69
-
70
-
71
-
72
-
73
-
74
-
75
-
76
-
77
-
78
-
79
-
80
-
81
-
82
-
83
-
84
-
85
-
86
-
87
-
88
-
89
-
90
-
91
-
92
-
93
-
94
-
95
-
96
-
97
-
98
-
99
-
100
-
101
-
102
-
103
-
104
-
105
-
106
-
107
-
108
-
109
-
110
-
111
-
112
-
 113
113 -
 114
114 -
 115
115 -
 116
116 -
 117
117 -
 118
118 -
 119
119 -
 120
120 -
 121
121 -
 122
122 -
 123
123 -
124
-
125
-
126
-
127
-
128
-
129
-
130
-
131
-
132
-
133
-
134
-
135
-
136
-
137
-
138
-
139
-
140
-
141
-
142
-
143
-
144
-
145
-
146
-
147
-
148
-
149
-
150
-
151
-
152
-
153
-
154
-
155
-
156
-
157
-
158
-
159
-
160
-
161
-
162
-
163
-
164
-
165
-
166
-
167
-
168
-
169
-
170
-
171
-
172
-
173
-
174
-
175
-
176
-
177
-
178
 |
 |