Yamaha CVP-201 Owner's Manual - Page 124
Other Chord Sequence Functions, Stop recording., ALL DELETE, DELETE
 |
View all Yamaha CVP-201 manuals
Add to My Manuals
Save this manual to your list of manuals |
Page 124 highlights
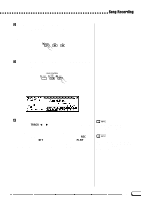
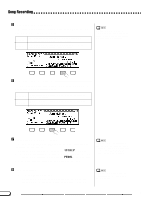
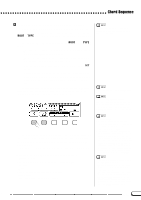
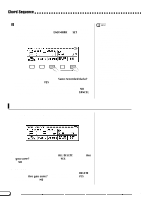
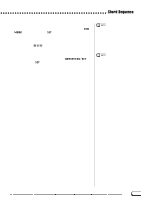
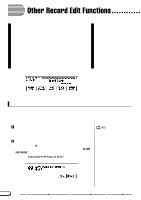
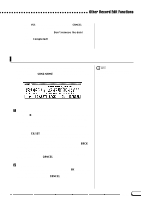
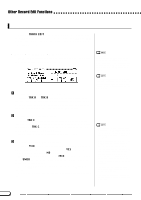
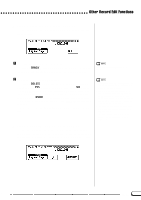
Chord Sequence B Stop recording...When all recording has been finished, select page 2 of the CHORD SEQUENCE display, then press the END MARK and SET buttons and input an "end mark" which determines the location of the ending. The end mark will be displayed in the box at the right side of the display. Finally, press the [REC] button; the "Save recorded data?" message will appear. Press YES to store the recorded data and automatically leave the Chord Sequence function; the display returns to the SONG PLAY display. To leave without saving the data, press NO. To continue editing the sequence without saving the data, press CANCEL. • The chord sequence data now resides in tracks 9 through 16, and can be played back in the normal way. Add other tracks as desired by using the standard track selection and recording procedure. You can also record over the Auto Accompaniment parts and replace them with original material if you like by using the standard track selection and record procedure. • The song recorded via the Chord Sequence function can be modified later by re-entering the Chord Sequence mode and making the desired changes. However, keep in mind that any data recorded over the Auto Accompaniment parts (with normal track recording) will be replaced by the preset accompaniment style data. (For example, even if you've recorded your own bass part, it will be erased and replaced by the original bass pattern if you correct the data in the Chord Sequence display.) Other Chord Sequence Functions Page 2 of the CHORD SEQUENCE display contains a number of versatile functions that help you enter chord sequence data more efficiently. s ALL DELETE To delete all sequence data, press the ALL DELETE button. An "Are you sure?" message is displayed. Press YES to execute the operation, or NO to cancel. s DELETE To delete the data at the current cursor location, press the DELETE button. An "Are you sure?" message is displayed. Press YES to execute the operation, or NO to cancel. 124 CVP-201 122
-
 1
1 -
2
-
3
-
4
-
5
-
6
-
7
-
8
-
9
-
10
-
11
-
12
-
13
-
14
-
15
-
16
-
17
-
18
-
19
-
20
-
21
-
22
-
23
-
24
-
25
-
26
-
27
-
28
-
29
-
30
-
31
-
32
-
33
-
34
-
35
-
36
-
37
-
38
-
39
-
40
-
41
-
42
-
43
-
44
-
45
-
46
-
47
-
48
-
49
-
50
-
51
-
52
-
53
-
54
-
55
-
56
-
57
-
58
-
59
-
60
-
61
-
62
-
63
-
64
-
65
-
66
-
67
-
68
-
69
-
70
-
71
-
72
-
73
-
74
-
75
-
76
-
77
-
78
-
79
-
80
-
81
-
82
-
83
-
84
-
85
-
86
-
87
-
88
-
89
-
90
-
91
-
92
-
93
-
94
-
95
-
96
-
97
-
98
-
99
-
100
-
101
-
102
-
103
-
104
-
105
-
106
-
107
-
108
-
109
-
110
-
111
-
112
-
113
-
114
-
115
-
116
-
117
-
118
-
 119
119 -
 120
120 -
 121
121 -
 122
122 -
 123
123 -
 124
124 -
 125
125 -
 126
126 -
 127
127 -
 128
128 -
 129
129 -
130
-
131
-
132
-
133
-
134
-
135
-
136
-
137
-
138
-
139
-
140
-
141
-
142
-
143
-
144
-
145
-
146
-
147
-
148
-
149
-
150
-
151
-
152
-
153
-
154
-
155
-
156
-
157
-
158
-
159
-
160
-
161
-
162
-
163
-
164
-
165
-
166
-
167
-
168
-
169
-
170
-
171
-
172
-
173
-
174
-
175
-
176
-
177
-
178
 |
 |
