Yamaha CVP-201 Owner's Manual - Page 115
Track Recording (Multi-track Recording), Stop recording., Play back the recording.
 |
View all Yamaha CVP-201 manuals
Add to My Manuals
Save this manual to your list of manuals |
Page 115 highlights
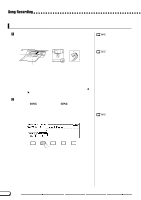
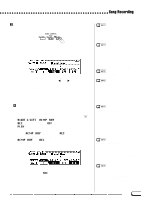
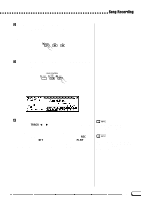
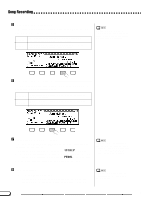
Song Recording M Stop recording Press the [PLAY/STOP] button. ➔ Recording stops. When the recorded data has been written to disk, the [REC] lamp goes out and the SONG PLAY display appears. If you press the [START/STOP] button, only the recording of the Auto Accompaniment or rhythm will stop. You can continue recording your keyboard performance, without the Auto Accompaniment and rhythm. Press the [PLAY/STOP] button in order to actually stop recording. If you stop the style by pressing the [ENDING] button or the [FADE IN/OUT] button, the Clavinova will stop recording the keyboard as well. < Play back the recording Press the [PLAY/STOP] button. ➔ The recorded data will be played back. During playback you can use the [REW], [FF] and [PAUSE] buttons to control the playback, and use the TEMPO [-] and [+] buttons to change the tempo. You can also play along on the keyboard. Playback will stop automatically when the end of the recording is reached, or you can press the [PLAY/STOP] button again to stop it at any time. CAUTION The Clavinova may continue to write data to the disk for a short time after you stop recording. DO NOT eject the disk while the DISK IN USE lamp of the disk drive is lit. • When a song has been recorded, the temporary name SONG *** (*** is the number) will automatically be given to the song. You can change the name as desired. (See page 127.) • The [ACMP ON] lamp automatically goes out when recording of these parts has finished. • When recording is finished, the song volume is automatically reset to the maximum setting, regardless of the current [ACMP/SONG VOLUME] slider position. • When style changes have been recorded in a song, playback may become slightly sluggish at points where the style changes, depending on the styles that were used. • Playback of songs recorded using both the Dual mode (page 33) and the Full Keyboard accompaniment mode (page 57) may also sound somewhat sluggish. Track Recording (Multi-track Recording) Z Set up the instrument for recording The first three steps in the Track Recording process are exactly the same as those for Quick Recording. (See page 112.) X Select the TRACK RECORD page Use the PAGE [] buttons to select the TRACK RECORD page (Record mode display page 2). The 16 tracks appear above the TRACK < and > buttons. Tracks which are enabled for playback are indicated by a box surrounding the track number, and tracks which are record-enabled are indicated by a highlighted number. The numbers of tracks that do not contain data are not displayed. 113 CVP-201 115
-
 1
1 -
2
-
3
-
4
-
5
-
6
-
7
-
8
-
9
-
10
-
11
-
12
-
13
-
14
-
15
-
16
-
17
-
18
-
19
-
20
-
21
-
22
-
23
-
24
-
25
-
26
-
27
-
28
-
29
-
30
-
31
-
32
-
33
-
34
-
35
-
36
-
37
-
38
-
39
-
40
-
41
-
42
-
43
-
44
-
45
-
46
-
47
-
48
-
49
-
50
-
51
-
52
-
53
-
54
-
55
-
56
-
57
-
58
-
59
-
60
-
61
-
62
-
63
-
64
-
65
-
66
-
67
-
68
-
69
-
70
-
71
-
72
-
73
-
74
-
75
-
76
-
77
-
78
-
79
-
80
-
81
-
82
-
83
-
84
-
85
-
86
-
87
-
88
-
89
-
90
-
91
-
92
-
93
-
94
-
95
-
96
-
97
-
98
-
99
-
100
-
101
-
102
-
103
-
104
-
105
-
106
-
107
-
108
-
109
-
 110
110 -
 111
111 -
 112
112 -
 113
113 -
 114
114 -
 115
115 -
 116
116 -
 117
117 -
 118
118 -
 119
119 -
 120
120 -
121
-
122
-
123
-
124
-
125
-
126
-
127
-
128
-
129
-
130
-
131
-
132
-
133
-
134
-
135
-
136
-
137
-
138
-
139
-
140
-
141
-
142
-
143
-
144
-
145
-
146
-
147
-
148
-
149
-
150
-
151
-
152
-
153
-
154
-
155
-
156
-
157
-
158
-
159
-
160
-
161
-
162
-
163
-
164
-
165
-
166
-
167
-
168
-
169
-
170
-
171
-
172
-
173
-
174
-
175
-
176
-
177
-
178
 |
 |