Yamaha CVP-201 Owner's Manual - Page 116
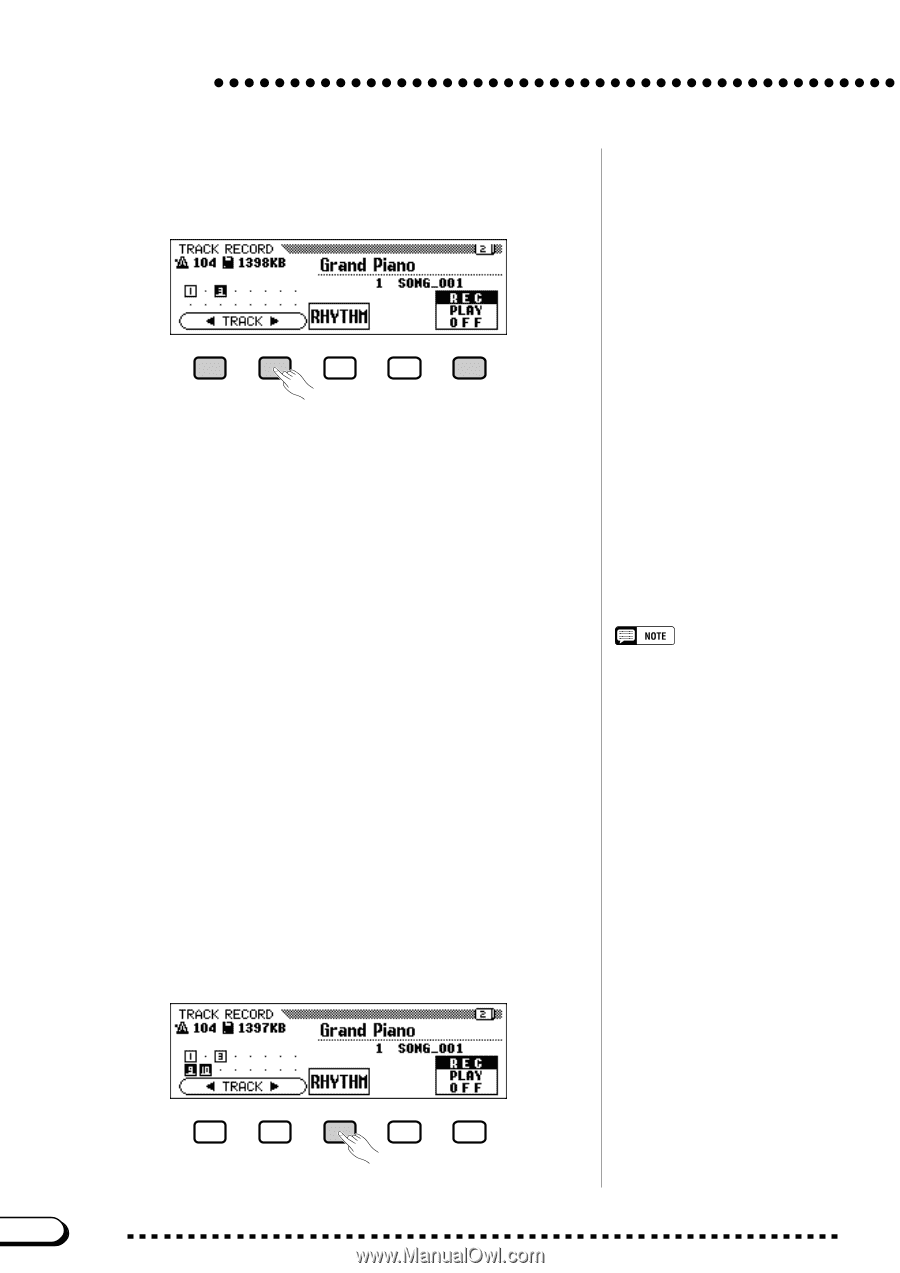
Select the desired track for recording., TRACK, Block, Country, Octave, RHYTHM
 |
View all Yamaha CVP-201 manuals
Add to My Manuals
Save this manual to your list of manuals |
Page 116 highlights
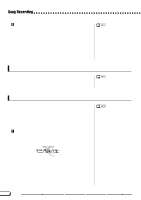
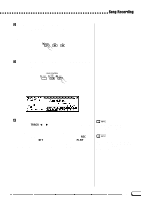
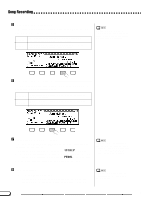
Song Recording C Select the desired track for recording Press the TRACK < and > buttons or use the data dial or [-] and [+] buttons to select the track. ➔ The selected track is indicated by an underline mark. Use the rightmost LCD button to set the selected tracks to REC (recording enabled) or OFF (recording/playback disabled). When a track is set to REC, the Synchronized Start mode is turned on. The Clavinova will start recording when you begin to play on the keyboard. PLAY can only be selected for tracks which contain data.When a track is muted, the track number is displayed without a surrounding box. Three separate tracks can be set to record simultaneously when recording keyboard parts. If you intend to record using the Dual or Split functions, two tracks must be record-enabled. If you intend to use both the Dual and Split functions simultaneously, three tracks must be selected. If the Auto Accompaniment and/or Harmony are turned on, the recording track numbers are automatically fixed, as described below. * If the Auto Accompaniment is turned on, tracks 9 through 16 are automatically set to record the Auto Accompaniment data. If the Harmony function is turned on and a harmony type (page 70) other than Duet, Trio, Block, 4 Part, Country, Octave, or 1+5 is selected, tracks 6 through 8 are automatically set to record the Harmony data. When the RHYTHM button is pressed, tracks 9 and 10 are automatically selected for the rhythm data. Set tracks 9 and 10 to REC, PLAY, or OFF using the rightmost LCD button. • Track 10 (and 9, in some cases) can only be used to record the rhythm sound of the accompaniment style and cannot be used to record keyboard part. Also, the keyboard part should be recorded on a track other than those used for Harmony or Auto Accompaniment. • When the RHYTHM tracks (9 and 10) or the Auto Accompaniment tracks (9 through 16) are set to REC, the metronome will sound to provide a timing guide. • If the Auto Accompaniment and/or Harmony are already on when the Track Recording page is selected, the corresponding tracks are automatically record-enabled. 114 116 CVP-201
-
 1
1 -
2
-
3
-
4
-
5
-
6
-
7
-
8
-
9
-
10
-
11
-
12
-
13
-
14
-
15
-
16
-
17
-
18
-
19
-
20
-
21
-
22
-
23
-
24
-
25
-
26
-
27
-
28
-
29
-
30
-
31
-
32
-
33
-
34
-
35
-
36
-
37
-
38
-
39
-
40
-
41
-
42
-
43
-
44
-
45
-
46
-
47
-
48
-
49
-
50
-
51
-
52
-
53
-
54
-
55
-
56
-
57
-
58
-
59
-
60
-
61
-
62
-
63
-
64
-
65
-
66
-
67
-
68
-
69
-
70
-
71
-
72
-
73
-
74
-
75
-
76
-
77
-
78
-
79
-
80
-
81
-
82
-
83
-
84
-
85
-
86
-
87
-
88
-
89
-
90
-
91
-
92
-
93
-
94
-
95
-
96
-
97
-
98
-
99
-
100
-
101
-
102
-
103
-
104
-
105
-
106
-
107
-
108
-
109
-
110
-
 111
111 -
 112
112 -
 113
113 -
 114
114 -
 115
115 -
 116
116 -
 117
117 -
 118
118 -
 119
119 -
 120
120 -
 121
121 -
122
-
123
-
124
-
125
-
126
-
127
-
128
-
129
-
130
-
131
-
132
-
133
-
134
-
135
-
136
-
137
-
138
-
139
-
140
-
141
-
142
-
143
-
144
-
145
-
146
-
147
-
148
-
149
-
150
-
151
-
152
-
153
-
154
-
155
-
156
-
157
-
158
-
159
-
160
-
161
-
162
-
163
-
164
-
165
-
166
-
167
-
168
-
169
-
170
-
171
-
172
-
173
-
174
-
175
-
176
-
177
-
178
 |
 |